43
© Copyright 2008 Panoramic Corporation
10. Install new rubber gaskets included with the
screw motor.
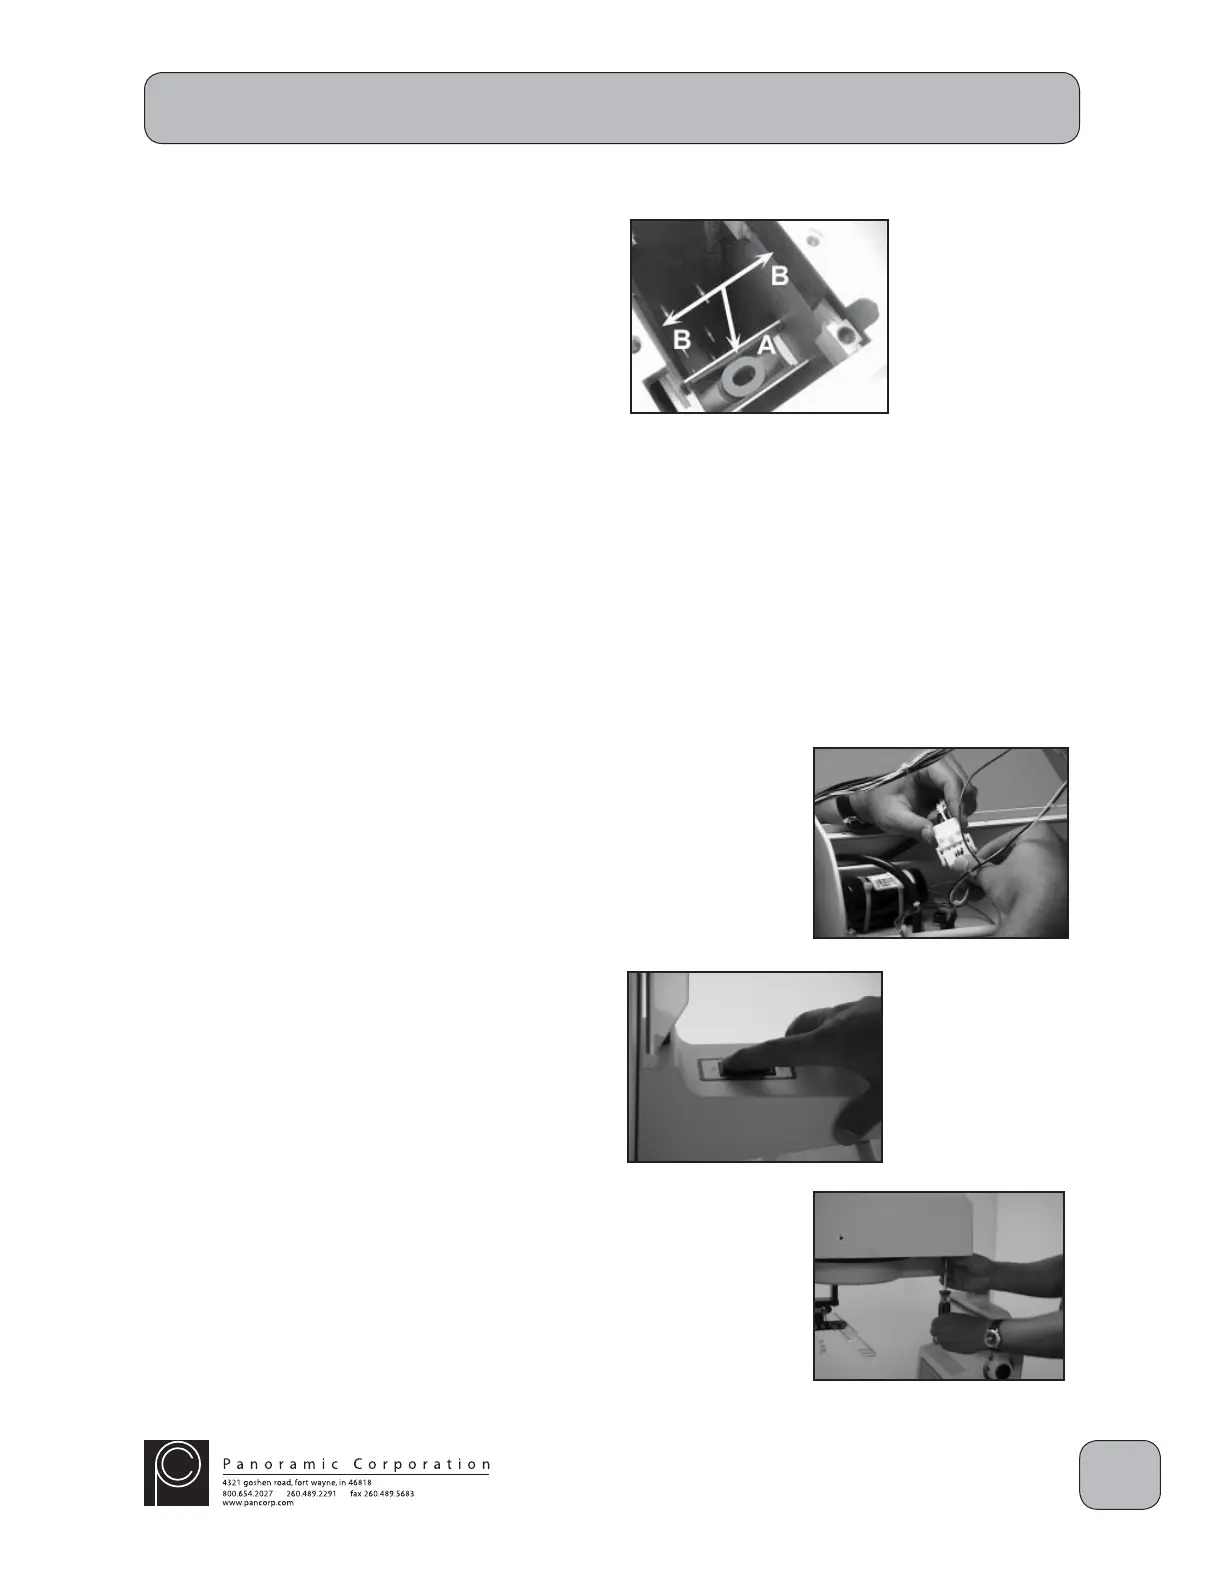
A. The bracket mounted in the column will
receive two gaskets: fi rst insert the black
gasket with the hole. Center the hole with
the hole on the bracket. Run a fi nger along
the bottom side of the bracket making sure
the gasket is centered. Next insert the
orange "donut" on top of the black gasket
again; make sure all holes are lined up.
B. Remove the protective backing from the
self-adhesive gasket. The two rubber pads
will be installed in the inner column on the
mounting block for the screw motor plate.
11. Lower the replacement screw motor assembly
into the column, ensuring that the threaded
screw shaft is inserted through the bracket on
the inner column.
12. Now install the 2 5/16" allen head bolts that
are shipped with the replacement screw
motor and install them in opposite corners of
the mounting plate. Tighten these two bolts
down, drawing the mounting plate closer to the
overhead of the machine. Now you can install
two of the original 5/16" bolts in the remaining
open mounting holes and tighten them
completely. Last, remove the 2 5/16" allen
head bolts that came with the replacement
motor and reinstall the last two original bolts.
13. Reconnect the molex connector J11/P11.
14. Hinge the aluminum chassis back down into
position, but do not reinstall the mounting
screws, yet.
15. Power the PC-1000 on and verify that the new
screw motor assembly is working properly.
16. Reinstall the 4 screws on the aluminum
chassis in the overhead.
17. Slide the top cover on the machine from the
front and reinstall the 6 screws. Ensure that
the wiring on the control panel side is properly
routed.
Screw Motor Assembly Exchange
S0105
S0107
 Loading...