1.
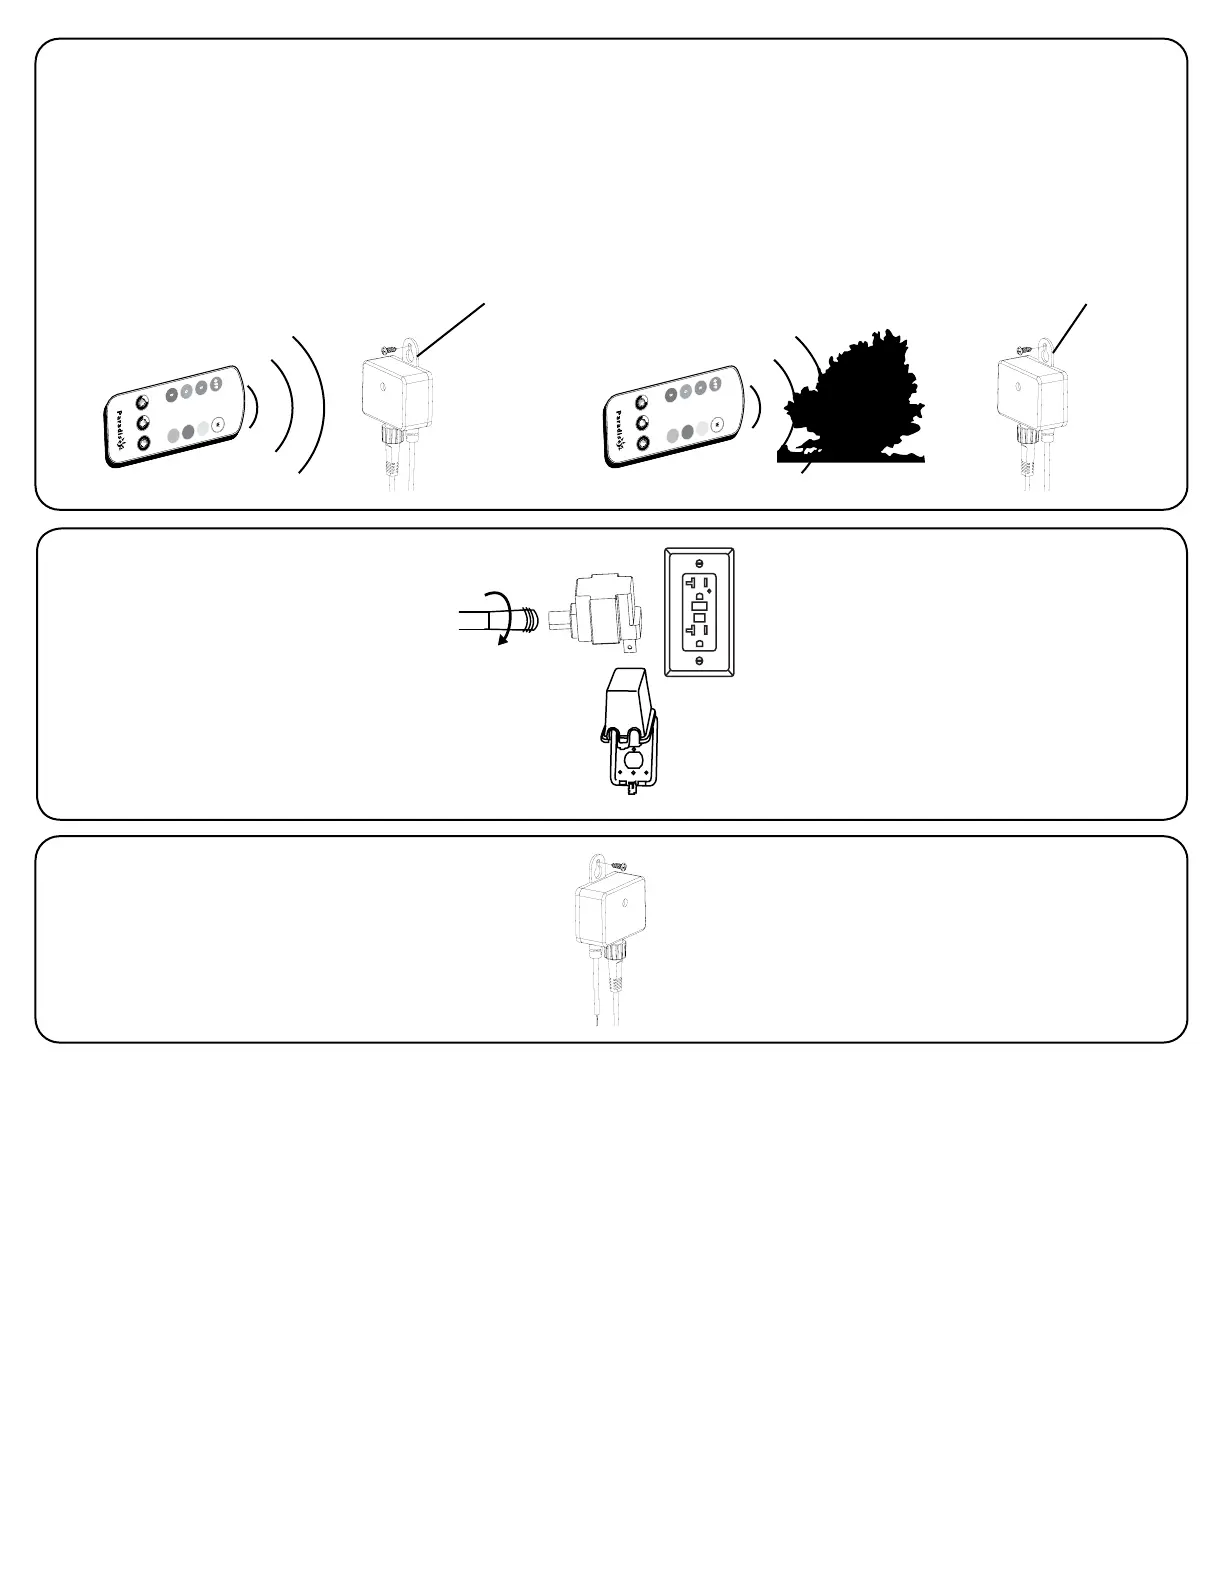
Find a location for the transformer and controller
3.
Mount the controller
1.
Trouver un emplacement adéquat pour le bloc
d’alimentation et le boîtier de contrôle.
3
.
I
nstallation du contrôleur
1.1 Both the transformer and controller are designed for outdoor
use and are weather resistant.
1.2 Make sure that the controller can be installed in a location that
will allow a direct line of sight with the remote to operate properly.
1.3 Any objects between the front of the control box and the remote
control will reduce the range.
Mount the controller with the included screw on a wall within
1foot (30.5cm) of the electrical outlet where the transformer will
be connected.
1.1 Le bloc dalimentation et le boîtier de contrôle sont conçus pour
l’utilisation extérieure et sont à l’épreuve de l’eau.
1.2
Assurez-vous que le boîtier de contrôle peut être installé dans un
endroit qui permettra une ligne directe avec la télécommande afin de
fonctionner correctement.
1.3 Tout objet entre le devant du boîtier de contrôle et la télécommande
réduira la portée.
Fixer le contrôleur au mur à l’aide de la vis incluse à une distance
maximale de 30.5cm (1 pied) d’où seront installés le bloc
d’alimentation et la prise de courant.
Bushes
Buissons
a
r
Controller box
Boîtier de contrôle
Controller box
Boîtier de contrôle
Front
Devant
Front
Devant
2.
Connect the Transformer and the Wire
2.
Branchez le bloc d’alimentation et le câble
Note: Prior to installing and powering the transformer,
a safety approved GFCI receptacle (fig. 1) and GFCI
watertight protective cover (fig. 2)– (not supplied)
must be installed by a qualified electrician. GFCI
receptacle and cover must be mounted a minimum of
12 inches (0.3 m) above ground level.
Transformer must be mounted
at least 1 foot (0.3m) above ground level.
2.1 Connect the wire to the power pack.
2.2 Screw the watertight connector by turning clockwise.
2.3 Plug the power pack into the GFCI receptacle.
Remarque: Avant d’installer et d’alimenter le bloc
d’alimentation, un réceptacle approuvé GFCI (fig. 1) et un
couvercle de protection étanche GFCI (fig. 2) - (non fourni)
doivent être installés par un électricien qualifié. Le réceptacle
et le couvercle GFCI doivent être installés à un minimum
de 12 pouces (0,3 m) au-dessus du niveau du sol. Le bloc
d’alimentation doit être installé à 12 pouces (0,3 m) au-
dessus du niveau du sol.
2.1 Reliez le fil au bloc d’alimentation.
2.2 Vissez le connecteur étanche en tournant dans
le sens horaire.
2.3 Branchez le bloc d’alimentation dans la prise GFCI.
fig. 1
fig. 2
 Loading...