Do you have a question about the Parallax 27800 and is the answer not in the manual?
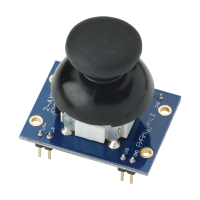
Describes the miniature two-axis analog joystick with spring-loaded movement and its suitability for breadboards and custom circuits.
Lists all necessary components for connecting the joystick, including microcontrollers, wire, resistors, and capacitors.
Illustrates connection diagrams for the 2-Axis Joystick with BASIC Stamp, Propeller, and Arduino microcontrollers.
Details how to display joystick values and provides approximate output ranges for BASIC Stamp, Propeller, and Arduino.
Provides a specific wiring diagram and sample BASIC Stamp program for reading joystick axis values.
Offers a wiring setup and Propeller code example for capturing and displaying joystick axis data.
Details the Arduino Uno wiring and provides a sketch to read analog values from the joystick's X-Y axes.
Directs users to product documentation and related navigational control components for further details.
The Parallax 2-Axis Joystick (#27800) is a compact, two-axis analog joystick designed to provide X-Y control for various electronic projects. It features spring-loaded movement, ensuring the joystick always returns to a centered position when released. This makes it suitable for applications requiring precise and intuitive directional input.
The 2-Axis Joystick operates by utilizing two 10 kΩ potentiometers, one for each axis (X for Left/Right and Y for Up/Down). As the joystick is moved, the resistance of these potentiometers changes proportionally to the joystick's position. This change in resistance provides an analog feedback signal that can be read by a microcontroller. The spring-loaded mechanism ensures that when the joystick is not actively being manipulated, it automatically centers itself, providing a neutral input. This plug-in module is designed for easy integration into breadboards and custom circuits, making it a versatile component for hobbyists and engineers.
The 2-Axis Joystick is designed for straightforward integration and use. Depending on the chosen microcontroller, a small assortment of external components (resistors and capacitors) may be required for proper connection. The manual provides detailed wiring diagrams for BASIC Stamp & Propeller, and Arduino platforms, illustrating how to connect the joystick to the microcontroller's I/O pins and power supply.
The manual includes "KickStart" program examples for BASIC Stamp, Propeller, and Arduino. These examples demonstrate how to read the instantaneous X and Y values from the joystick and display them in a debug window or serial monitor.
RCTIME to measure the time it takes for a capacitor to charge through the potentiometer, providing a proportional value for each axis. The DEBUG command is used to display these values in the BASIC Stamp Debug Terminal. The approximate range of values for BASIC Stamp is 1-60, with a center position of 30.FullDuplexSerial and RCTime objects to read the joystick values and send them to the Parallax Serial Terminal. The waitcnt function introduces a delay between readings. The approximate range of values for Propeller is 0-6000, with a center position of 3000.analogRead() to directly read the analog voltage from the joystick's potentiometers. The Serial.print() and Serial.println() functions are used to display the values in the Arduino IDE's Serial Monitor. The approximate range of values for Arduino is 0-1023, with a center position of 512.The manual does not explicitly detail maintenance features for the 2-Axis Joystick, suggesting it is a low-maintenance component. Given its design as a sealed module, typical maintenance would likely involve ensuring proper connections and handling to prevent physical damage. If issues arise, troubleshooting would generally focus on verifying wiring, power supply, and microcontroller code.
Parallax provides additional resources for the 2-Axis Joystick, including product documentation. They also offer the Parallax 5-Position Switch (#27801) as an alternative for navigational control, with its own KickStart guide.
| Brand | Parallax |
|---|---|
| Model | 27800 |
| Category | Video Game Controller |
| Language | English |