44
www.paramondo.de
Anschluss und Inbetriebnahme • Connecon and start-up • Aansluing en inbedrijfstelling • Conexión y puesta en servicio • Connexion et
mise en service • Collegamento e messa in funzione • Podłączenie i uruchomienie • Elektrik bağlansının yapılması ve işleme alınması
1. Seng of the end points in opening direcon:
1.1 Open the awning ca. three-quarter and following rotate ca. 20
mes the adjusng screw for the correspondent end point in the
minus direcon.
1.2 Open the awning slightly further and stop it with your transmier,
if the motor has not stopped shortly before reaching the end point.
1.3 Should the awning already stop before reaching the desired end
point, press the buon for the opening direcon and rotate the cor-
respondent adjusng screw slightly further in the plus direcon unl
the motor has reached the desired end point.
Connuaon if the motor has not yet stopped:
1.4 Retract the awning slightly again, so that the awning is opened ca.
three-quarter. Rotate the adjusng screw 20 mes more in the minus
direcon and check if the motor has stopped shortly before reaching
the desired end point.
1.5 If the end point has not yet been reached, repeat this step unl
the motor autonomously stops and go on with the point 1.3.
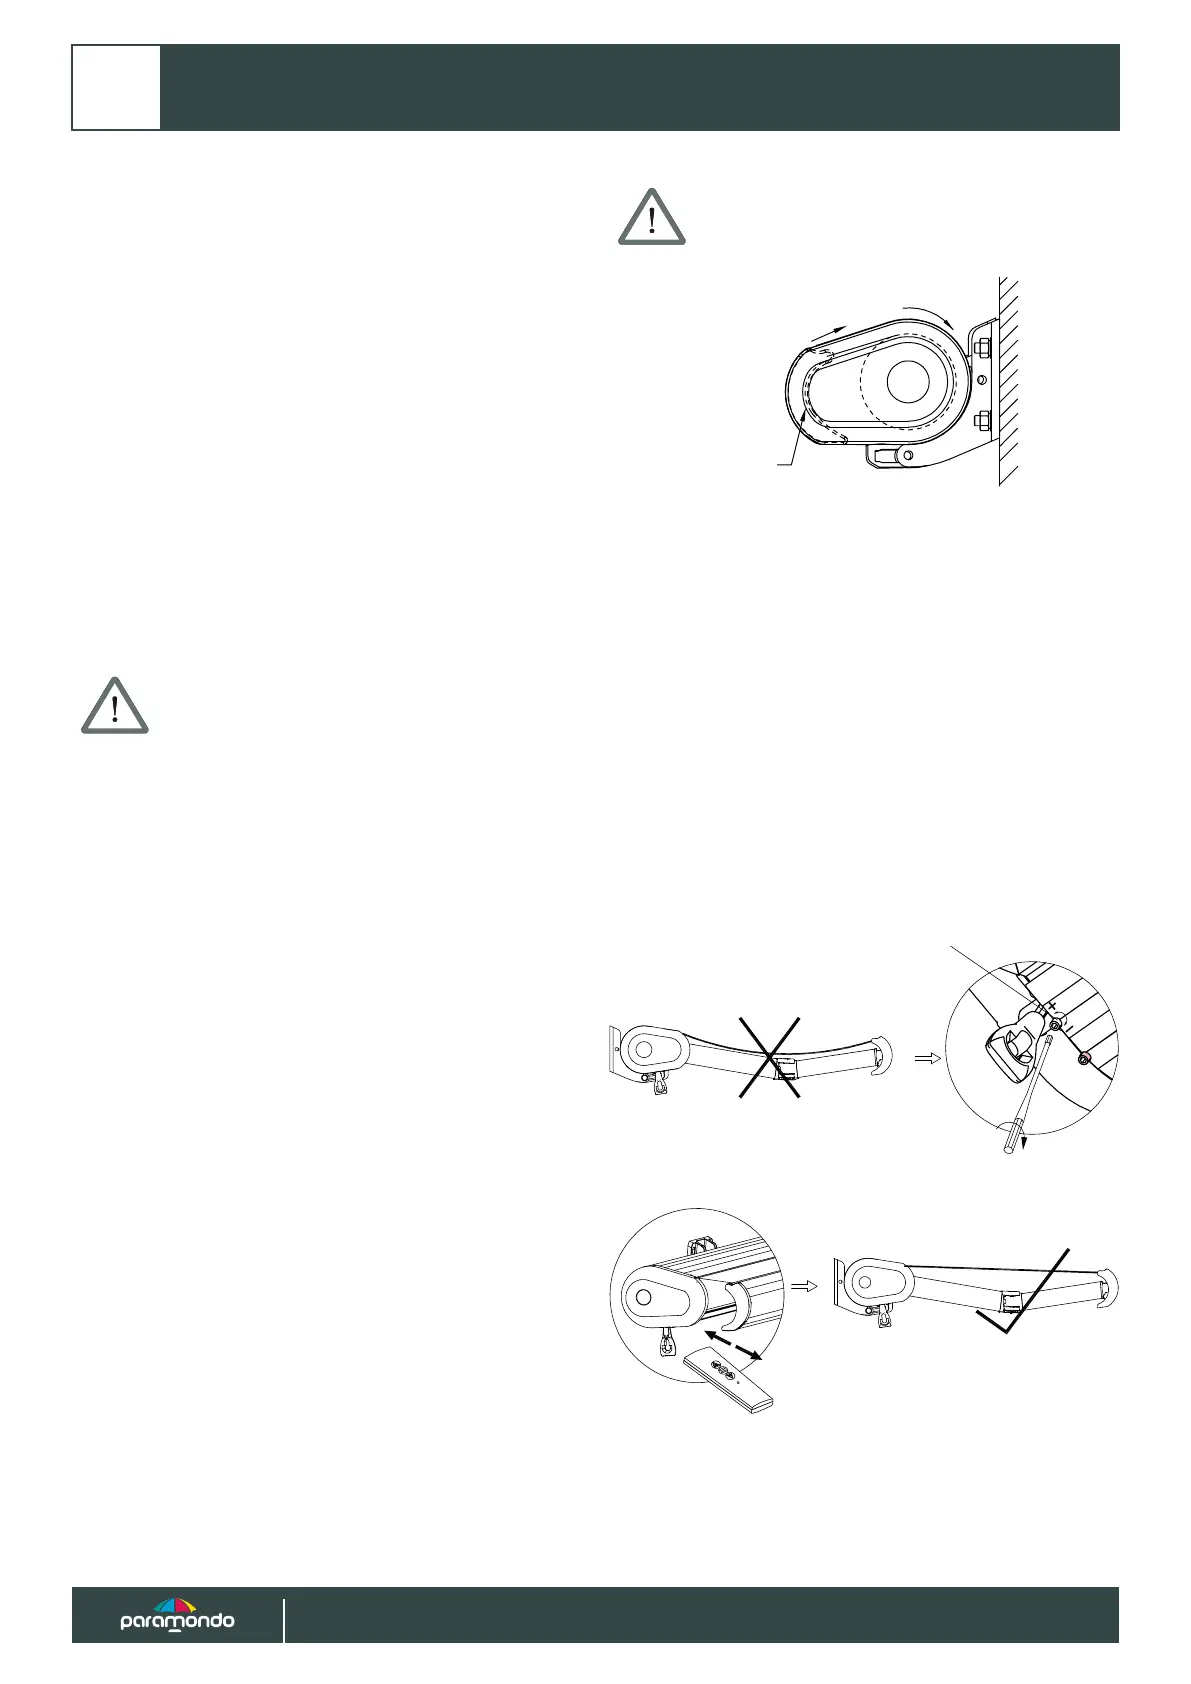
Aenon: the end point in opening direcon must be
set so that the arms are sll bent and stay under enough
tension.
2. Seng of the end points in retracng direcon:
2.1 Retract the awning and stop it ca. 50 cm before reaching the desi-
red end point with the transmier and following rotate the adjusng
screw for the correspondent end point ca. 20 mes in the minus
direcon.
2.2 Retract the awning slightly further and stop it with your transmit-
ter, if the motor has not yet stopped autonomously shortly before
reaching the desired end point.
2.3 Should the awning already stop before reaching the desired end
point, press the buon for the retracng direcon and rotate the
correspondent adjusng screw in the plus direcon unl the motor
has reached the desired end point.
Connuaon if the motor has not yet stopped:
2.4 Open the awning slightly, so that the awning is ca. 50 cm opened.
Rotate the adjusng screw 20 mes more in the minus direcon and
check if the motor has stopped autonomously shortly before reaching
the desired end point.
2.5 If the end point has not yet been reached, repeat this step unl
the motor stops and go on with the point 2.3.
Aenon: make sure that the end point in retracng
direcon is set so that the awnings are not pulled too
strongly to the suspension tube. This aims to prevent
damage to the awning system.
3. Run the awning to check both the end points. If the awning stops at
the set end points, the limit switch seng is completed.
4. Please note that the motor is provided with a thermal protecon
switch and that it may be that the motor stops, because aer a few
movements it has reached a high temperature. Aer ca. 15-20 minu-
tes cooling me the motor is ready for operaon again.
5. Changing the end points:
Retract the awning in the middle posion and start from the begin-
ning again.
6. Adjust the awning cloth tension:
When extending your awning, note that the awning cloth is ght. You
can change the tension of the awning as shown in the gure below.
Then retract and extend the awning completely once more and check
the tension of the awning cloth again.
Front prole
Adjusng screw
for the awning
cloth tension
 Loading...