EasyManua.ls Logo

Park Tool PRS-2.3 Series User Manual

Park Tool PRS-2.3 Series
4 pages
To Next Page IconTo Next Page
Page #1 background imageLoading...
Page #1 background image
5115 Hadley Ave. N., St. Paul, MN 55128 (USA) parktool.com/PRS-2.3
PARK TOOL CO.
13
14
15
16
17
PRS-2.3-1 / PRS-2.3-2
Deluxe Double Arm Repair Stand
Assembly
1. Rotate base support upright (#13) until the holes marked with 2 align
correctly with the holes in the steel base (#16). Attach base support upright
to steel base using four button head cap screws (#17), 3/16” washers (#15)
and ¼-20 hex nuts (#14).
2. Place lock block assembly without spring (#3, #5 - #9) into square tube on
base support upright (#13).
3. Slide work tray (#12) onto T support (#11). Install locking pin (#10) in one of
ve positioning holes on T-support and slide into base support upright (#13).
Tighten handle of lock block assembly (#8) to secure T support.
4. Place lock block assembly with spring (#3 - #9) into square tube on each end
of T support. Position work tray at desired height and tighten set screw
to secure.
5. Place clamp (#1 or #2) into each end of T support (#11) and tighten handle of
lock block assembly (#8) to secure clamp.
PRS-2.3-1 / PRS-2.3-2 Pied de Réparation
Professionnel Double Deluxe
Montage
1. Pivoter le montant bas (#13) jusquà ce que les trous marqués 2 s’alignent
correctement avec les trous de la base en fonte (#16). Fixer le montant bas
à la base en utilisant boulons à tête plate (#17), les rondelles 3/16” (#15) et
les écrous 1/4-20 (#14).
2. Placer le bloc d’assemblage sans ressort (#3, #5 - #9) dans le tube carré sur le
montant bas (#13).
3. Coulisser le plateau alu (#12) sur le montant en T (#11). Insérer la goupille (#10)
dans l’un des cinq trous du montant en T et glisser celui-ci dans le montant
bas (#13). Resserrer la poignée du bloc dassemblage (#8) afin de sécuriser
le montant en T.
4. Placer les blocs d’assemblage avec ressort (#3 - #9) dans les tubes cars du
montant en T. Positionner le plateau alu à la hauteur souhaie et serrer la
vis de blocage.
5. Placer les pinces (#1 ou #2) dans les deux extrémités du montant en T (#11)
et serrer les poignées des blocs d’assemblage (#8) afin de sécuriser les
pinces.
D
,
No Spring
OR
OR
3
3
1
1
2
2
5 9
9
12
11
10
1 2 3 4 5
PRS-2.3 Instructions / Instructions / Anleitung / Instrucciones
Question and Answer IconNeed help?

Do you have a question about the Park Tool PRS-2.3 Series and is the answer not in the manual?

Park Tool PRS-2.3 Series Specifications

General IconGeneral
TypeRepair Stand
ModelPRS-2.3 Series
MaterialSteel
FoldableYes
Height Range39 to 57 inches

Summary

Assembly

Attach Base Support Upright

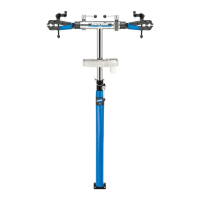
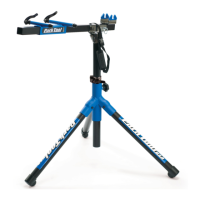
Securing the base support upright to the steel base using screws and nuts.

Install Lock Block Assembly (No Spring)

Placing the lock block assembly without spring into the square tube.

Mount T Support and Work Tray

Sliding the work tray onto the T support and securing with a locking pin.

Position Work Tray and Secure with Spring Lock Block

Placing lock block assembly with spring and positioning the work tray.

Install and Secure Clamps

Placing clamps into the T support ends and securing them with the lock block.

Adjusting Height

Release Height Adjustment Lock

Loosening the handle and pulling the locking pin to allow height adjustment.

Adjust T Support Height

Raising or lowering the T support and re-installing the locking pin.

Secure Adjusted Height

Re-tightening the handle of the lock block assembly.

Rotating Clamps Vertically

Loosen Clamp Lock Block

Loosening the handle of the lock block assembly in the T support.

Adjust Clamp Angle

Rotating the clamp to the desired position.

Secure Clamp Rotation

Re-tightening the handle to secure the clamp's position.

Rotating Clamps Horizontally

Loosen Base Lock Block

Loosening the handle of the lock block assembly in the base support upright.

Rotate T Support

Rotating the T support 180 degrees for easier bike access.

Secure T Support Rotation

Re-tightening the handle to secure the T support's position.
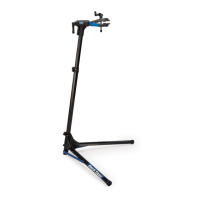
Related product manuals