5115 Hadley Ave. N., St. Paul, MN 55128 (USA) www.parktool.com
PARK TOOL CO.
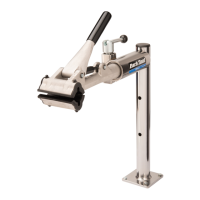
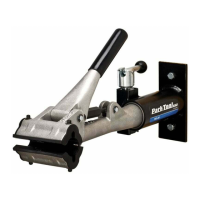
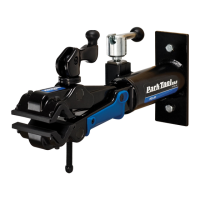
PRS-4.2-1 / PRS-4.2-2
Deluxe Bench Mount Repair Stand
Assembly
A. Secure bench support weldment (#14) to bench using appropriate through bolts or lag bolts (not included).
B. Select desired mounting hole on bench support weldment and attach horizontal tube (#3) using hex head bolt (#12) and washer (#13).
C. Place lock block assembly (#15) into square tube on horizontal tube. Press end cap (#11) into top of bench support weldment.
D. Place clamp (#1 or #2) into horizontal tube and tighten handle of lock block assembly to secure.
Clamp Rotational Adjustment
The clamp on the PRS-4.2-1 and PRS-4.2-2 can be rotated 360 degrees, allowing easy access to any component of the bike. To adjust the angle
of the clamp:
E. Loosen handle on lock block assembly (#9).
F. Rotate clamp (#1 or #2) to desired position.
G. Retighten handle of lock block assembly to secure clamp.
Notes
• Some bike manufacturers recommend not clamping thin-walled or carbon fiber frames. Consult the manufacturer for suggested clamping locations.
• To avoid damage to the finish, clean the bike tube and jaw covers before clamping.
• The two clamping jaws each have a recess to provide clearance for cables. Make sure any brake or shift cables are in one of the recesses before
clamping.
• Keeping the front of the bike slightly lower than the back will help prevent the front wheel and handlebars from flopping and hitting the frame’s top tube. A
Park Tool HBH-2 Handlebar Holder can be used to prevent handlebar flopping if the bike is being rotated in the repair stand.
PRS-4.2-1 / PRS-4.2-2
Pied de Réparation Deluxe pour Etabli
Montage
A. Fixer fermement le montant du pied (#14) à l’établi en utilisant les écrous ou vis appropriés (non fournis).
B. Sélectionner le trou dans le montant correspondant à la hauteur souhaitée et attacher le tube horizontal (#3) à l’aide de la vis hexagonale (#12) et de la
rondelle (#13).
C. Placer le bloque d’assemblage (#15) dans le tube carré sur le tube horizontal. Enfoncer le capuchon (#11) à l’extrémité du montant.
D. Placer la pince (#1 ou #2) dans le tube horizontal et resserrer le bloc d’assemblage de façon à verrouiller la pince.
Ajustements Rotatifs de la Pince
La pince sur les PRS-4.2-1 et PRS-4.2-2 peut pivoter à 360 degrés, permettant un accès facile à n’importe quel composant du vélo.
Pour ajuster l’angle de la pince :
E. Desserrer légèrement le bloc d’assemblage (#9).
F. Pivoter la pince (#1 ou #2) dans la position souhaitée.
G. Resserrer le bloc d’assemblage afin de verrouiller la pince.
Notes
• Certains fabricants de vélos conseillent de ne pas serrer les tubes à parois fines ou cadres en fibres de carbone. Consulter le fabricant pour des
emplacements de serrage recommandés.
• Afin d’éviter tout dommage à la finition du cadre, bien nettoyer le tube du cadre et la mâchoire de la pince avant tout serrage.
• Les deux mâchoires de la pince sont pourvues de renfoncements permettant le passage des câbles. Bien vérifier que tous les câbles ou gaines s’y
trouvent avant de serrer la pince.
• En conservant la roue avant légèrement plus basse que l’arrière, vous évitez que le cintre et la roue avant ne battent de gauche à droite de façon
intempestive en abiment le tube supérieur du cadre. Un HBH-2 Park Tool peut être utilisé afin d’éviter ce battement lorsque le vélo est pivoté sur le pied.
PRS-4.2 Instructions / Instructions / Anleitung / Instrucciones