Bulletin 2751-001-M1/USA
Service Manual
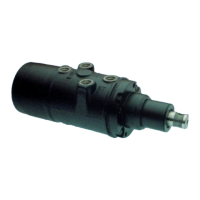
HGA Hydraguide™
Hydraulics
Parker Hannifin Corporation
Hydraulic Pump/Motor Division
Greeneville, Tennessee
16
Disassembly Procedure
10. Reverse the HGA unit in the vise to place the input
shaft (16) in a vertical position. Using a center
punch, mark the upper cover flange (7) in relation
to a similar mark placed on the port face of the
housing (25) to facilitate reassembly. (See figure
HGA-11).
11. Remove the four special cap screws (6) by using a
5/16-12 point socket.
12. Grasp the input shaft (16) and with a smooth
upward motion, remove the input shaft (16), upper
cover (7) and spool (22) assembly from the
housing (25). Note: Avoid applying side forces
to the spool which would cause binding of the
closely fitted assembly. Never use excessive
force to remove the spool from the housing.
13. Remove and discard seal (8).
14. Remove the upper cover (7) with shaft seal pack-
age (Items 2 thru 5) intact. Remove spacer item
(15).
15. Remove shims (9) from either upper cover (7)
cavity or from face of thrust washer (11). Count
and record the number of shims to aid in reassem-
bly of unit.
Figure HGA-10
16.Remove seal (2), retaining ring (3), using proper
snap ring pliers. Discard seal (2). Remove and
discard backup washer (4). Remove and discard
seal (5).
17.Remove the retaining ring (10), thrust washer (11),
thrust bearing (12), thrust washer (13) and spring
washer (14) from input shaft (16). Note: Retaining
ring is twisted design. Do not straighten ring.
18. Remove the needle roller (17) by using a pin
punch of .125-inch max. diameter for a minimum of
.625 length. The input shaft (16) should be placed
on a block of wood (to avoid shaft damage) and
the needle roller (21) removed by impact, using
light hammer blows. (See Figure HGA-12).
19.Remove the torsion bar (20) and spacer (19) by
inverting the spool assembly and allowing the
parts to fall free. Do not remove needle roller (21)
from torsion bar. (See Figure HGA-13).
Figure HGA-12
Figure HGA-13
Figure HGA-11
MARKS
 Loading...