18 19
EN
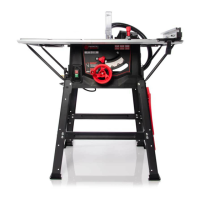
TOP BLADE GUARD
The top blade guard (H) (Fig. 18) (sometimes referred to as
knife. The ‘split’ line along the top of the guard indicates the
centre line of the saw blade below. Graphics on the guard
further reinforce the cutting line of the saw blade.
WARNING: The top blade guard
to the
machines riving knife.
WARNING: The machine must be disconnected from the
mains supply when installing the blade guard.
t3BJTFUIFCMBEF to its full height to fully reveal the riving
knife. (Fig. 19)
t5IFHVBSETMPDBUJOH pin should be positioned through the
hole machined in the top edge of the riving knife (Fig. 20).
guard.
Note: To adjust to the thickness of the material being cut, the
blade guard must pivot up and down easily and smoothly, so
do not over-tighten this wing nut.
t$IFDLUIFPQFSBUJPO of the blade guard. Ensure that it is
as the crown.
t-PXFSUIFCMBEF a little and recheck that the blade guard
operation.
t8IFOTBUJTmFE that the blade guard works throughout
the blades height adjustment range, check that the guard
works equally well with the blade set to a bevel angle.
t$IFDLUIBUXIFO the blade is fully lowered, the blade guard
is in contact with the table top.
Note: The top blade guard is equipped with a dust extraction
port (Fig.21).
t$POOFDUUIFTVQQMJFE dust extraction hose to the top blade
t$POOFDUUIFPUIFS end of the hose to the 2 way connector
found to the rear of the machines main body. (Fig. 22)
Note: The ‘free’ port of the 2 way connector can be used to
attach a workshop dust extraction machine to this Evolution
machine. If such a machine is connected to this Table Saw
follow the Instructions provided by the supplier/manufacturer
of the dust extraction equipment.
Use of such equipment will ensure that the workplace is kept
clean and tidy, and that dust is kept to a minimum.
OPERATION
ON/OFF SAFETY SWITCH
WARNING: Before operating the switch make sure that the
blade guard is correctly installed and operating properly.
Fig. 23)
t1VTIUIFA0/ button to start the machine.
t1VTIUIFA0'' button to stop the machine.
WARNING: /ever start the machine until all safety checks and
procedures have been carried out.
RAISING/LOWERING THE BLADE
WARNING: 0nly make adjustments to the machine when the
machine is switched 0''and the blade is stationary.
Note: This machine is equipped with a dual function
hand- wheel (Fig. 24) in its ‘normal’ (outer) position this
hand-wheel is used to raise or lower the blade.
Fig. 21
Fig. 22
Fig. 23
Fig. 24
Fig. 18
Fig. 19
Fig. 20
t5IFNBDIJOFIBWFPWFSMPBEQSPUFDUJPOGVDUJPOXIFOMPBEFYDFFE
the rated load too much, the machine will turn off automatically ,
1SFTTUIFCPUUPOPGPWFSMPBEQSPUFDUPSUIFOQVTIUIFA0/CVUUJPO
to restart the machine
 Loading...