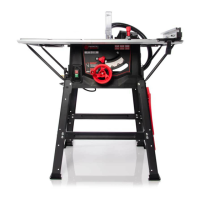
24 25
To set the rip fence for repetitive cross-cutting:
t Set the rip fence at the required distance from the saw blade.
t Adjust and align the back of the rip fence faceplate with the
front of the saw blade. (Fig. 39)
for the material as it passes through the saw blade. It will allow
the cut material to move sideways away from the saw blade,
with little risk of any binding or kickback occurring.
Index and hold the material to be cut against the mitre gauge
faceplate and the also index the material gently against the
rip fence. Hold the material and mitre gauge securely with
your left hand. Gently push the workpiece through the saw.
Use a push stick, if necessary, in your right hand to guide the
workpiece on the
RH side of the blade.
RIP CUTTING
Rip cutting is the process of cutting along the length of a piece
of material rather than across it.
Rip cutting should be done with the rip fence set at the desired
width from the saw blade and normally on the RH side of the
machines table. (Fig 40)
The mitre gauge is not required for this operation, and should
WARNING: Check that the rip fence is locked in position and is
parallel to the saw blade.
Check that the riving knife is properly aligned with the saw blade.
When ripping small section material a push stick should be
300mm of the material past the
blade. A push stick should always be used when making cuts
of less than 300mm. (Fig 41)
Note: When ripping long boards or large panels we
recommend the use of remote work-piece support(s)
to aid material handling.
Feed the work-piece through the saw keeping it indexed
against the rip fence. Use smooth, steady pressure and employ
a push stick when necessary.
When the ripping width is greater than 300mm, and with care,
both hands can be used to guide/feed the material through
th
e saw. The operators left hand will be to the LH side of the
saw blade. The operators right hand will be close to the rip
fence on the RH side of the sawblade.
WARNING: The operators hands should never be in line with
the blade.
BEVEL RIPPING
Bevel ripping is cutting along the length of a work-piece with
the saw blade tilted at an angle.
When bevel ripping material 150mm or narrower use the
rip fence on the RH side of the blade only. (Fig 42)
MAINTENANCE
WARNING: Ensure that the machine is disconnected from the
m
ains supply before any maintenance tasks or adjustments
are attempted.
CHANGING THE BLADE
Note: We recommend that the operator considers wearing
protective gloves when handling or changing the machines blade.
t Disconnect the machine from the power supply
t Remove the top blade guard. (refer to TOP BLADE GUARD
on page 18)
t Remove the table access plate by removing the countersunk
head screw from the front edge of the access plate. (Fig. 43)
t Lift the plate aw
ay and carefully store it and its
screw
for future use.
t Raise the blade to its highest position.
t Use two the blade changing spanners provided. One spanner
and thus prevent the arbor from rotating. The other
(Fig 44)
t Remove the arbor nut, the outer blade
and the blade.
t Thoroughly clean any debris from these parts and also from
the exposed motor arbor and inner blade
The inner
blade
can be left in situ.
t Fit the new blade. Ensure that the teeth are facing to the
front of the saw (Fig. 45), and that the rotation arrow on
the blade is in conformism with the rotation arrow on the
motor housing.
t Replace the outer
and nut and tighten securely with
Fig. 42
Fig. 43
Fig. 44
Fig. 45
Fig. 39
Fig. 40
Fig. 41
 Loading...