10 GB
Operation
Note: Please use suitable accessories available
from your speciality retailer to cut wall tiles and /
or edit sheets of metal / light metal.
Installing sanding belts
Install the sanding belts
16
as shown in Figure C.
Setting the working depth
(see Fig. E)
Loosen the wing bolt
5
.
Slide the base plate
7
to the desired working
depth (to cut through completely set approx.
3.2 mm deeper than the material thickness).
The recommended maximum cutting depth for
wood is 13 mm *(only applies to multipurpose
cutter (HSS)
18
).
Retighten the wing bolt
5
.
Milling direction for edges
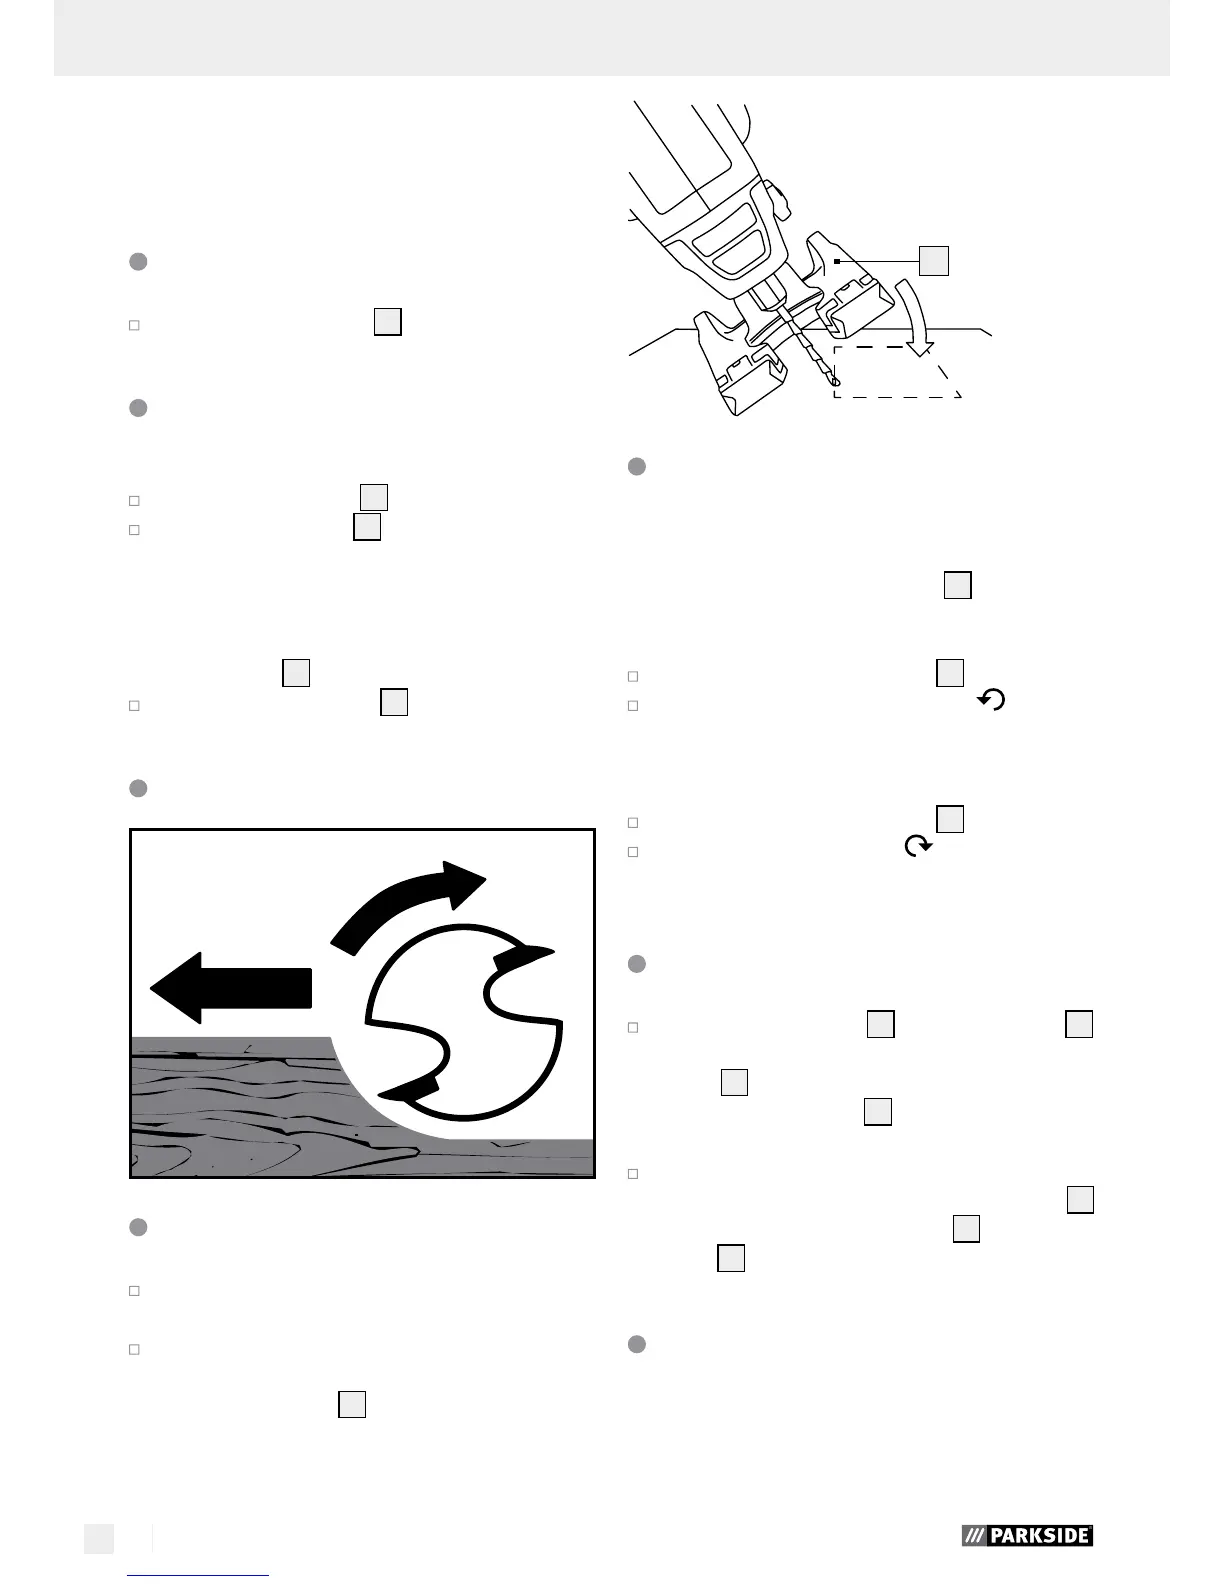
Plunge cutting
Insert the bit into the work piece at an angle
of 45°.
Slowly straighten the bit to an angle of 90° to
begin the cut.
Note: The base plate
7
must be flush with the
material surface.
7
Pivot handle (see Fig. F)
Note: Turning the grip during the start up opera-
tions is forbidden. Remove the plug from the socket
and make sure that the swivel lock
13
is engaged.
Pivot to horizontal
Press and hold the bevel stop
13
.
Turn the handle counter-clockwise from ver-
tical to horizontal until the bevel stop locks in.
Pivot to vertical
Press and hold the bevel stop
13
.
Turn the handle clockwise from horizontal
to vertical until the bevel stop locks in.
Using the rip fence (see Fig. G)
Loosen the wing bolts
9
on the base plate
7
and slide the guide bar for the circle- / rip
fence
15
through the two openings in the bot-
tom of the base plate
7
, with the rip fence
facing down.
Position the tool the desired distance from the
edge of the work piece. Tighten the wing bolts
9
to secure the circle- / ripe fence
15
to the foot
plate
7
.
Cutting circles (see Fig. H)
Note: The position of the guide hole depends on the
desired result, either inside or outside of the edge
of the circle: inside for holes, outside for discs. The
radius can be set from ca. 5 to 16 cm.