Before first use / Preparing the tool for use
battery pack
6
forward out of the charging
station.
7. Push the battery pack
6
from the front into the
device to insert the battery pack
6
into the
device.
Q
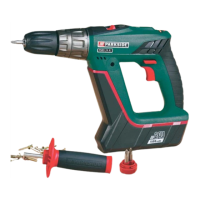
Changing tools
Your cordless electric drill / screwdriver has a fully
automatic spindle lock
and is fitted with an
enclosed keyless chuck incorporating the latest
technology from
”Made in Germany”.
Once the motor has come to a halt, the drive shaft
is automatically locked, so that the chuck
9
can
be opened simply by turning it
.
After you have inserted the required bit and fixed it
in place by turning the chuck
, you can immedi-
ately continue working. The spindle lock releases
itself automatically when the motor is started (by
operation of the ON / OFF switch
4
).
Q
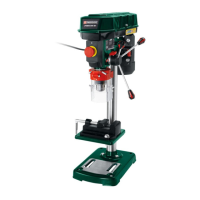
2 Gear Drive
Note: Move the gear selector switch
1
only
after the device has come to a standstill.
Failure to observe this advice may result in damage
to the device.
In the first gear (Gear selector switch
1
in Position: 1)
A speed of up to approx. 400 rpm can be
achieved
and a high torque. This setting is intended
for use with all screwing tasks and for accessories.
In the second gear (Gear selector switch
1
in Position: 2)
It achieves a speed of up to approx. 1200 rpm, for
the carrying out of drilling tasks.
Q
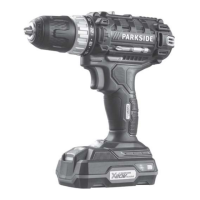
Torque pre-selection
You can adjust the torque by using
8
torque pre-
selection.
When the value of the torque setting is reached, the
clutch disengages the drive connection to the chuck.
By doing this, screws can be driven to a predeter-
mined depth, which is ideal for repetitive work.
j Select a low setting for small screws, soft work
material.
j Select a high setting for large screws, hard
work materials and for the extraction of screws.
j For drilling, push the selector to the setting for
drilling, in that you adjust the torque pre-selector
to the position
.
j For drilling tasks, also push the gear selector
switch
1
to the front (Position: 2).
Q
Preparing the tool for use
Q
Switching ON /OFF
m CAUTION! Make sure the device not operat-
ing when it contacts the screw. A rotating inserted
tool may slip. This could result in personal injury or
damage to the workpiece.
Switching on:
j To start the appliance squeeze on the ON /
OFF switch
4
and then keep it pressed down.
Switching off:
j To stop the appliance, release the ON / OFF
switch
4
.
Q
Adjusting the speed
The ON / OFF switch
4
has a variable speed
regulator.
j By increasing the pressure on the ON / OFF
switch
4
you can increase the R.P.M.