EasyManua.ls Logo

Parkside PKO 270 A1 - User Manual

Parkside PKO 270 A1
22 pages
Print Icon
To Next Page IconTo Next Page
Loading...
PKO 270 A1 (LB6)
Air Compressor
Artikel-Nr.: 4010365
Ident-Nr.: 11010

Other manuals for Parkside PKO 270 A1

Questions and Answers

  • S
    Shannon MitchellJul 27, 2025
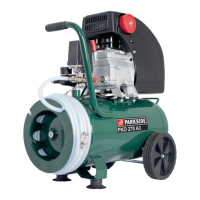
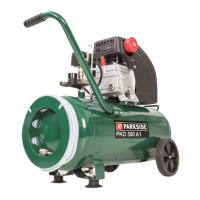
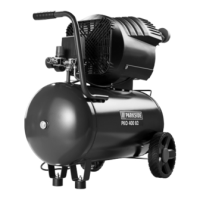
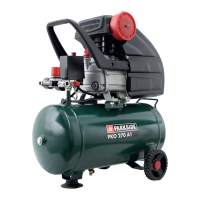
    What to do if my Parkside PKO 270 A1 Air Compressor does not start?
    • H
      howardmitchellJul 28, 2025
      If your Parkside Air Compressor fails to start, several factors could be at play. First, ensure there is supply voltage by checking the power plug and the socket-outlet. Also, insufficient supply voltage can be a problem, so ensure that the extension cable is not too long and has large enough wires. Another reason could be a low outside temperature; avoid operating the compressor below +5° C. Finally, the motor might be overheated; allow it to cool down and address the cause of overheating.
  • M
    marthaclaytonAug 6, 2025
    What to do if my Parkside PKO 270 A1 Air Compressor starts, pressure is shown on the pressure gauge, but the tools do not start?
    • K
      Karen MasonAug 6, 2025
      If your Parkside Air Compressor shows pressure but your tools aren't starting, there are a few things to check. Start by inspecting the compressed air hose and tools for leaks, replacing them if necessary. Also, examine the quick-lock coupling for leaks and replace if needed. Finally, ensure that the pressure regulator is set to a sufficient pressure; increase it if necessary.
  • J
    Julie MurphyAug 16, 2025
    Why does my Parkside PKO 270 A1 Air Compressor start but there is no pressure?
    • N
      nfloydAug 16, 2025
      If your Parkside Air Compressor starts but doesn't build pressure, it could be due to several reasons. A leaking non-return valve could be the culprit, in which case you should have a service center replace it. Damaged seals could also cause this issue; a service center should replace any damaged seals. Lastly, check the drain plug for condensation; tighten the screw by hand and replace the seal if necessary.

Summary

1. Introduction

2. Safety Information

2.1 General Safety Precautions

Basic safety actions to protect the user from electric shocks and injury.

2.2 Safety Instructions for Compressed Air and Blow-out Pistols

Specific safety guidelines for using compressed air and blow-out pistols.

2.3 Safety Information for Paint Spraying

Safety instructions pertaining to paint spraying operations.

2.4 Operating Pressure Vessels

Guidelines for the safe operation and maintenance of pressure vessels.

3. Product Layout

4. Intended Use

5. Technical Data

7. Assembly and Starting

7.1 Fitting the Wheels

Instructions for attaching the wheels to the compressor unit.

7.2 Fitting the Supporting Foot

Instructions for attaching the supporting foot to the compressor unit.

7.3 Fitting the Air Filter

Procedure for installing the air filter onto the compressor.

7.4 Changing the Transportation Cover

Steps to replace the transportation cover with the oil sealing plug.

7.5 Mains Connection

Guidelines for connecting the compressor to the electrical power supply.

7.6 ON;OFF Switch Operation

How to operate the compressor's ON/OFF switch.

7.7 Adjusting the Pressure

Method for adjusting the output pressure using the pressure regulator.

7.8 Adjusting the Pressure Switch

Information on the factory-set pressure switch settings.

7.9 Fitting the Compressed Air Hose

Instructions for connecting the compressed air hose for extended reach.

8. Replacing the Power Cable

9. Cleaning, Maintenance, and Storage

9.1 Cleaning the Compressor

Procedures for cleaning the compressor and its components.

9.2 Pressure Vessel Maintenance

Essential maintenance tasks for the pressure vessel.

9.3 Safety Valve Operation

How to test the functionality of the safety valve.

9.4 Checking the Oil Level

Method for checking and maintaining the compressor's oil level.

9.5 Changing the Oil

Step-by-step guide for changing the compressor oil.

9.6 Cleaning the Intake Filter

Instructions for cleaning the air intake filter.

9.7 Storage Guidelines

Proper procedures for storing the compressor when not in use.

9.8 Ordering Replacement Parts

Information required to order spare parts for the equipment.

10. Disposal and Recycling

11. Possible Causes of Failure

12. Declaration of Conformity

13. Guarantee Certificate

Parkside PKO 270 A1 Specifications

General IconGeneral
Tank Capacity24 l
Suction Capacity270 l/min
Sound Power Level LWA97 dB
Power1.8 kW
Air Displacement270 l/min
Noise Level97 dB
Voltage230 V
Frequency50 Hz
Max Pressure8 bar
Motor Rating1.8 kW

Related product manuals