Digital Thermometer
www.parrinst.com
5
Operation
Plug the probe into the receptacle.
Turn the power switch on.
The thermometer will automatically perform an ini-
tial internal electronic calibration immediately after
power is applied.
Immerse the stainless steel portion of the probe into
the liquid to be measured. In most instances, the
depth of probe immersion needs to be approximate-
ly 10 cm in order to minimize errors related to stem
conduction.
Turn the ON/OFF switch to the off position when the
thermometer is not in use to prolong the battery life.
If the 1341 Plain Jacket Calorimeter originally used
a glass thermometer then the A366C Thermistor
Conversion kit will need to be installed. Contact
Parr Instrument Company or your local distributor
for details.
Installing the A366C to Use the 6775 in
Place of a Glass Thermometer in a 1341
1. Remove the 467W black plastic bushing from the
top cover of the 1341.
2. Remove the 3 screws holding the 40C thermom-
eter support plate to the top cover of the 1341.
3. Position the 347C so that the middle hole is lined
up with the thermometer hole in the cover and
the two small holes line up with the two screw
holes.
4. Re-install the 3 screws. The third screw is op-
tional as it no longer secures anything.
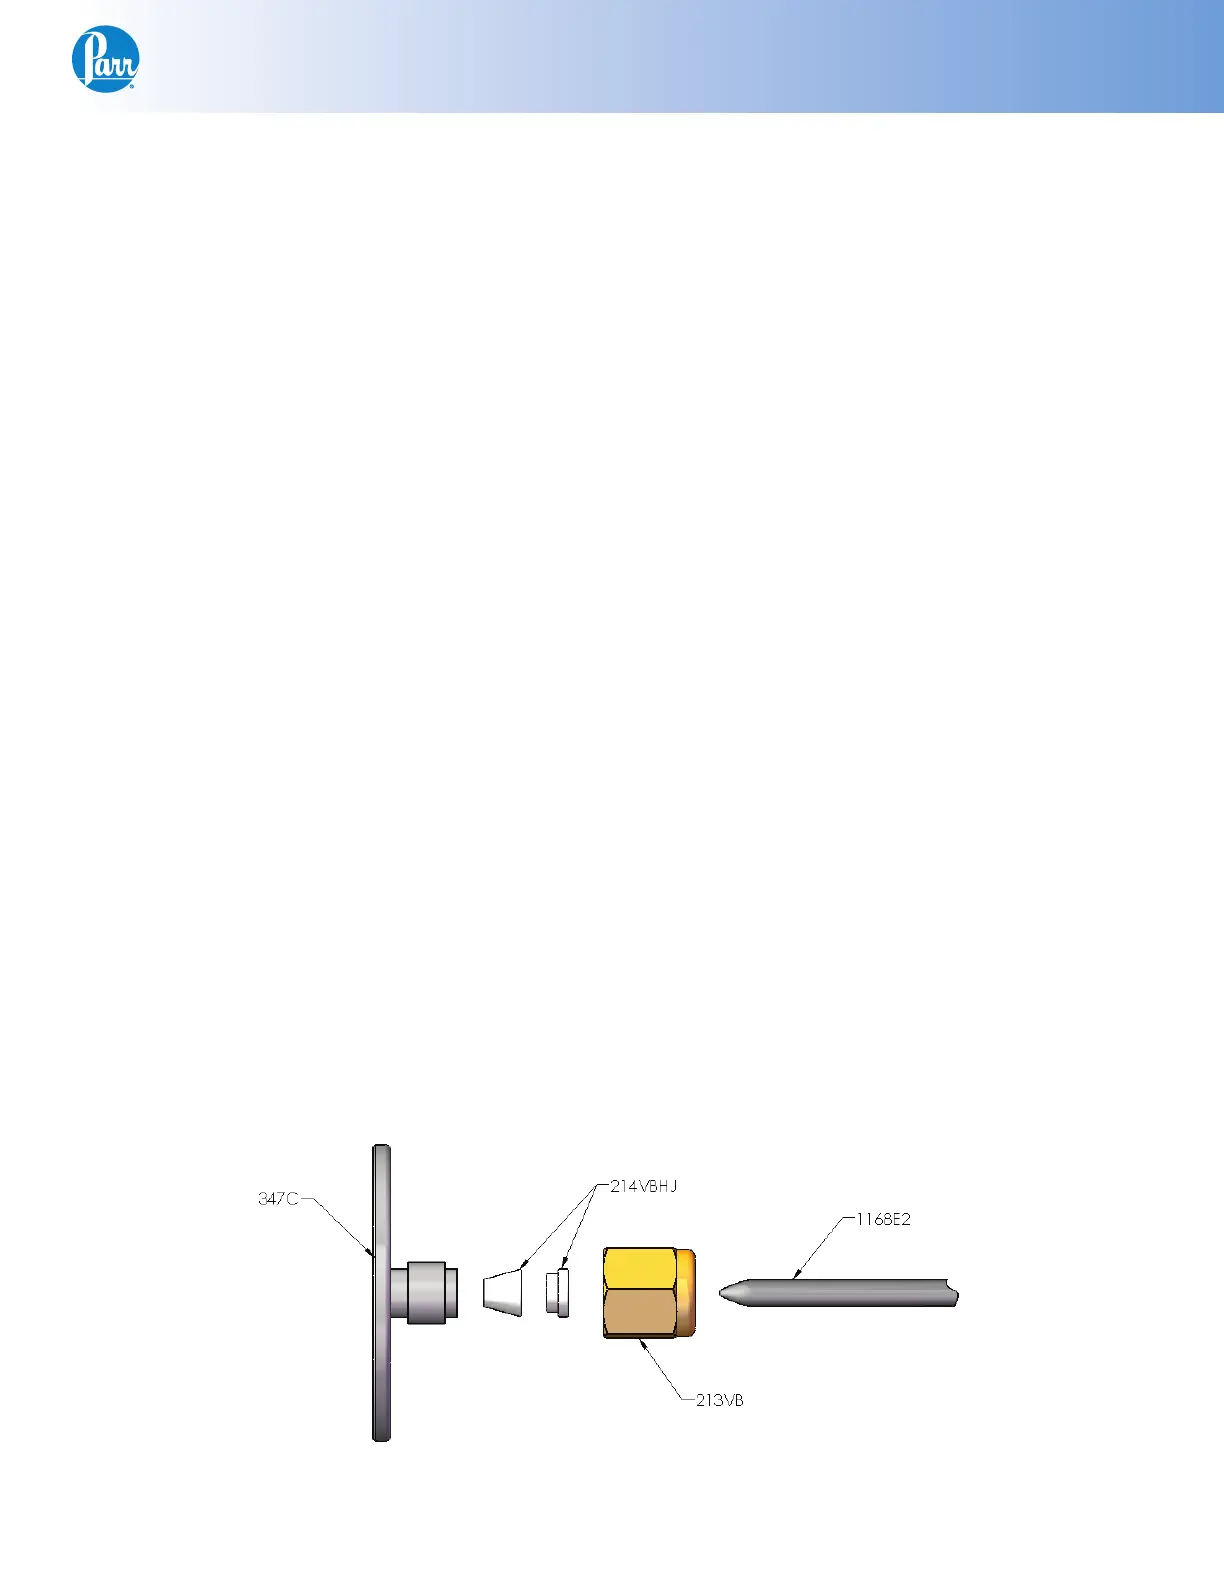
5. Install the 213VBAD nut and the 214VBHJ ferrule
set on the 347C. See Figure 2.
6. Slide the 1168E2 thermistor into the 213VBAD
and 214VBHJ then through the 347C.
7. Adjust the length of the thermistor extending be-
low the cover to approximately the same length
as the stirrer shaft.
8. Hand-tighten the 213VBAD nut to secure the
1168E2 thermistor.
Note: Do not over tighten the nut.
Serial Interface (6775A)
The 6775A is equipped with a serial RS-232C inter-
face. The user interacts with the thermometer using
a terminal emulation program installed on a host
PC. Parr recommends a program known as PuTTY
for this purpose. The program is freely available at
the following URL address.
http://www.putty.org
Realizing that most contemporary PCs no longer
have RS-232C serial ports, Parr includes a 2286E
USB to serial adapter and 2261E USB extension
cable to provide connectivity between the thermom-
eter and a PC. The adapter attaches directly to the
9 pin DS connector on the rear of the thermometer.
Otherwise, a so-called straight through style three
wire serial cable is used to connect the thermometer
to a legacy PC serial port.
Figure 2