www.parweld.com
8
0.040” (1.0mm) 15-30 20-60
1/16” (1.6mm) 60-120 75-150
3/32” (2.4mm) 100-180 150-250
Tungsten electrode types
Type Application Colour
Thoriated 2% DC welding of mild
steel,
Stainless steel and
Copper
Red
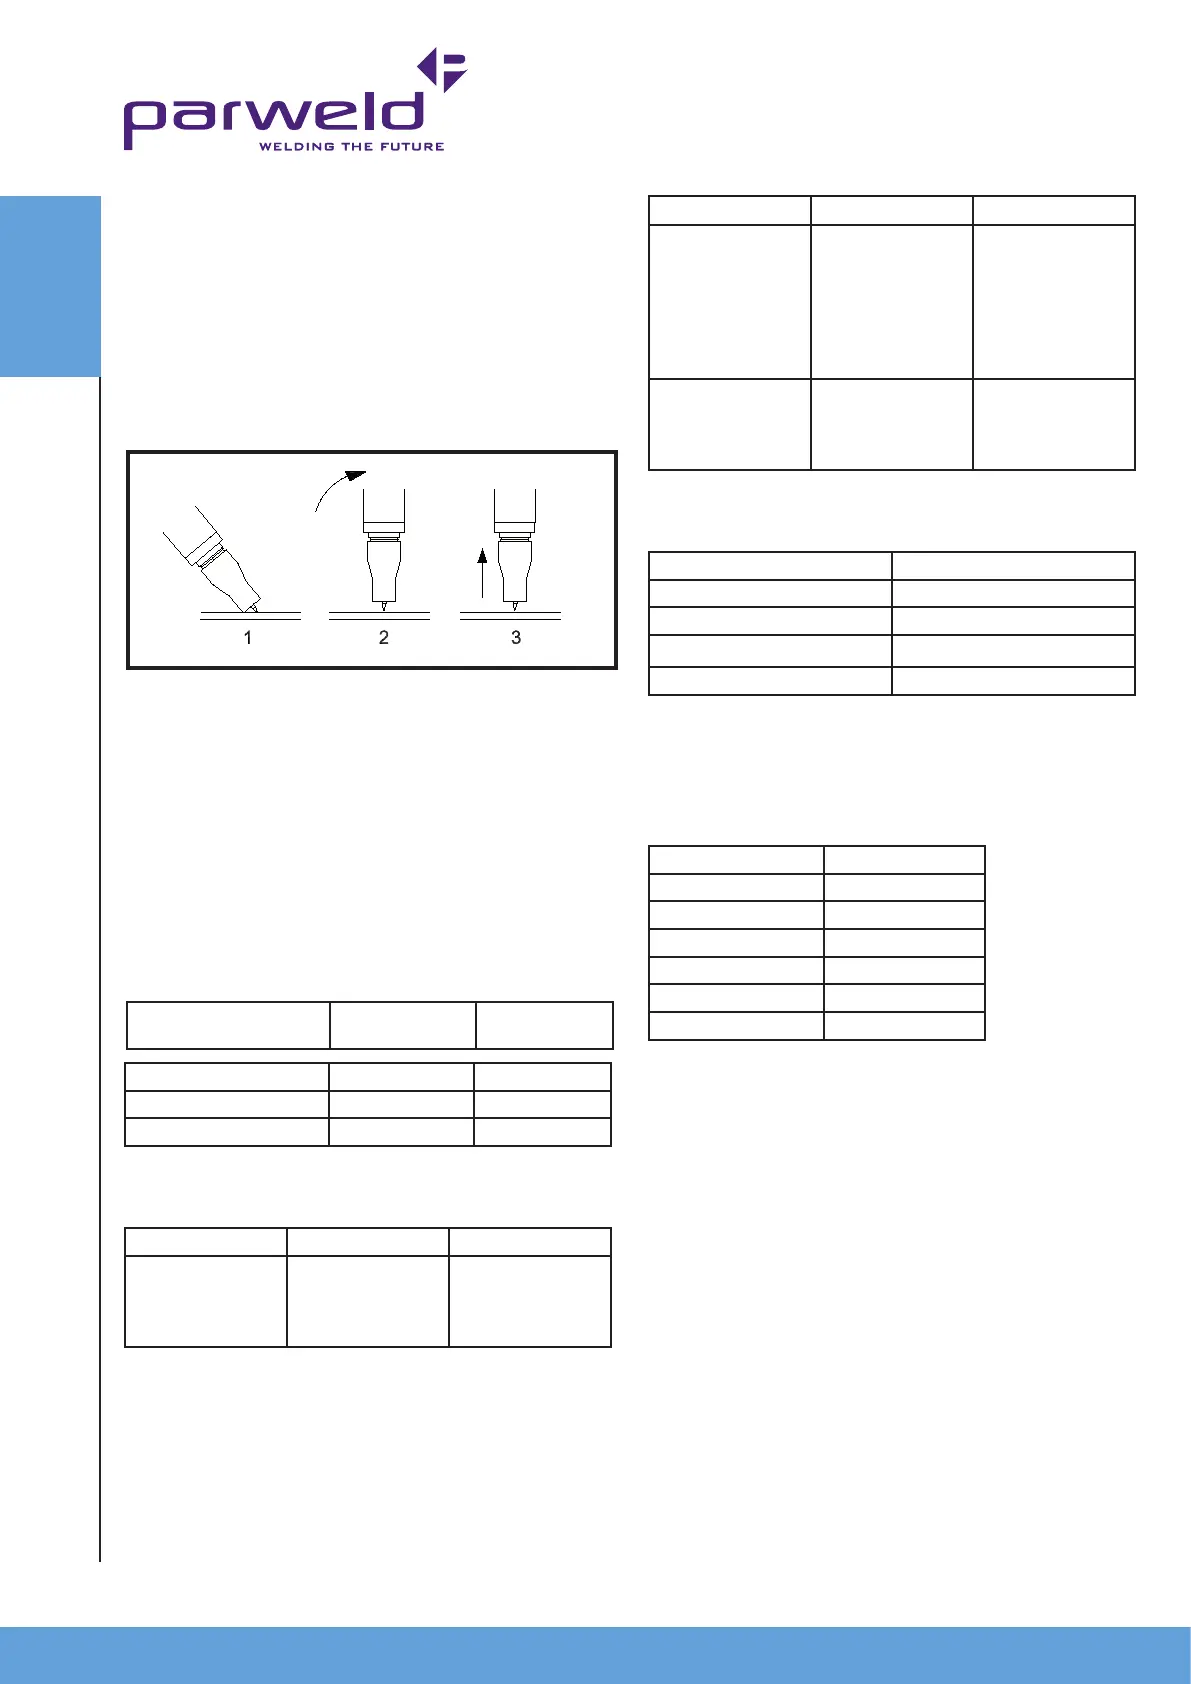
Torch starting in Lift TIG mode
Ensure the gas supply is switched on to the machine. Briey contact
the tip of the tungsten electrode down onto the work piece with the
torch at around 70
0
from vertical. Depress the trigger to start the gas
ow and switch on the power, lift the torch up from the work piece
to draw out an arc. To prevent melting of the end of the tungsten the
machine will increase the output current when it detects the rise in
arc voltage as the tungsten is lifted from the work piece. At the end
of the weld release the torch trigger and the power will slope down
and switch off.
Type Application Colour
Ceriated 2% DC welding of mild
steel, Stainless
steel, Copper
AC welding
of aluminium,
magnesium and
their alloys
Grey
Zirconiated AC welding
of aluminium,
magnesium and
their alloys
White
Guide for selecting ller wire diameter
Filler wire diameter Current range
1/16” (1.6 mm) 20 - 90
3/32” (2.4 mm) 65 - 115
1/8” (3.2 mm) 100 - 165
3/16” (4.8 mm) 200-350
The ller wire diameter specied is a guide only, other diameter
wires may be used according to the welding application.
Shielding gas selection
Alloy Shielding gas
Aluminium & alloys Pure Argon
Carbon steel Pure Argon
Stainless steel Pure Argon
Nickel alloy Pure Argon
Copper Pure Argon
Titanium Pure Argon
Machine setup for TIG welding
DC TIG welding
1)Connect the torch to the - connection and the gas hose to the gas
outlet.
2) Connect the trigger control plug on the torch to the trigger socket.
3) Connect the Earth lead to the + connection.
4) Set the process mode to 2T or 4T if you prefer a latching trigger
action. (Note in 4T position you must press and release to start the
process and press and release again to stop the process. When
stopping in 4T mode holding down the trigger button will activate the
slope down, releasing the button will switch off the arc)
5) Select HF start (bottom position)
6) Dial up the welding amperage required
OPERATION
Torch starting in HF mode
Ensure the gas supply is switched on to the machine. Hold the torch
with the tip of the tungsten approx 2-3 mm from the job. Depress the
trigger to start the gas ow and switch on the power. At the end of
the weld release the torch trigger and the power will slope down and
switch off. (Note in 4T position you must press and release to start
the process and press and release again to stop the process. When
stopping in 4T mode holding down the trigger button will activate
the slope down, releasing the button will switch off the arc) when
starting the arc the HF will only re for a few seconds so if the arc is
not started withing this tine the starting process should be repeated
by releasing the trigger and depressing again.
TIG welding guide ranges
Electrode diameter AC current
(amps)
DC current
(amps)