EasyManua.ls Logo

Patpet p-collar 640 User Manual

Patpet p-collar 640
22 pages
To Next Page IconTo Next Page
Page #1 background imageLoading...
Page #1 background image
These steps will help keep your pet safe and comfortable. Millions of pets are
comfortable while they wear stainless steel contacts. Some pets are sensitive
to contact pressure. You may nd after some time that your pet is very tolerant
of the collar. If so, you may relax some of these precautions.
Risk of skin damage.
Please read and follow the instructions in this manual. Proper t of the collar
is important. A collar worn for too long or made too tight on the pets neck may
cause skin damage ranging from redness to pressure ulcers.
Important Safety Information
Components
Scissors
16 Adjustable Progressive Intensity Levels for Shock
White Backlit LCD Indicating Intensity Level and Battery
Selecting Channels
Quick selection for the certain
dog we want to train.
Adjustable Shock
Touch Distinguishing Edge
Effectively preventing unexpected
operation and avoiding unintended
training.
Easily distinguish and send the correct
training command without eyes on by
touching and feeling on buttons with
different pattems.
Main Features
1000 Yards Remote Range
Overview
Indicating intensity level under any
circumstances of visibility.
100% Waterproof Receiver
Remote
T
V
S
3
Overview
Charging Jack
(with cover)
Contact Points
On/Off
Button
Collar
Receiver
Avoid leaving the collar on the dog for more than 12 hours per day.
When possible reposition the collar on the pets neck every 1 to 2 hours.
Check the t to prevent excessive pressure; follow the instructions in this
manual.
Never connect a lead to the electronic collar; it will cause excessive pressure
on the contacts.
When using a separate collar for a lead, dont put pressure on the electronic
collar.
Wash the dogs neck area and the contacts of the collar weekly with a damp
cloth.
If a rash or sore is found, discontinue use of the collar until the skin has healed.
If the condition persists beyond 48 hours, see your veterinarian.
Safety during on-leash training.
It is vitally important that you and your dog remain safe while learning during
on-leash training. Your dog should be on a strong leash, long enough for him
to attempt to chase an object, but short enough for him not to reach a road or
other unsafe area. You must also be physically strong enough to restrain your
dog when he tries to chase.
Do not use this Product if your dog is aggressive, or if your dog is prone to
aggressive behavior. Aggressive dogs can cause severe injury and even
death to their owner and others. If you are unsure whether this product is
appropriate for your dog, please consult your veterinarian or certied trainer.
Not for use with aggressive dogs.
Contact Points
0.3.0.02.640010-28-30
Remote Training Collar
operating and training guide
1 Dog Model Number
p-collar 640
p-collar 640B
PLEASE READ THIS ENTIRE GUIDE BEFORE OPERATING
2 Dogs Model Number
Test Lamp
Receiver
Remote
Power Adapter
Neck Strap
For Remote
For Receiver
USB Port
Con duct ive Sil icon e
Conductive Silicone
Charging the battery
The unit need to be charged under any of the below situations:
1. The indicator light on the collar is emitting a red color and ashes
rapidly.
Setting Up the Product
1. Prepare the Remote: install the antenna and turn the Remote on.
2. Charge the Remote and the Receiver.
3. Prepare the Receiver: install contact points, conductive silicone,
and turn the Receiver on.
4. Function test: Test function of buttons before putting it on the dog.
5. Use the Test Lamp to test shock function or use as a screw driver.
6. Pair the Remote and the Receiver, pair them when the product loses
its code or pair a second collar.
Before you can use the Dog Training Collar, you must set up the product
following the steps below:
The unit uses Lithium-Polymer batteries.
1. Charge the unit before using the unit for the rst time.
2. Do not charge the batteries near any ammable substances.
3. Fully charge the batteries if the unit is to be stored without use
for a period of 3 months or more.
Intensity Level
Innovative Blind Operation with Touch Distinguishing Mode Buttons
2-hour Rapid Charging Lithium Polymer Battery
Tone, Vibration, and Shock Commands
User Expandable to a Two-dog System
Charging Jack(with cover)
Belt Clip
Antenna
Neck Strap Pin
Blind Operation Buttons
2. The 3 bar indicator on the Remote LCD shows just 1 bar.
3. The indicator light on the Remote or Receiver will not come on.
4. The indicator light on the Remote or Receiver comes on
momentarily when any of the Mode Buttons are pressed.
Battery Charging Procedure.
1. Lift the rubber covers protecting the Remote and Receiver Charging
Jack.
2. Connect the charger connectors to the Remote and Receiver
Charging Jack, as shown below.
3. Plug the charger into a standard wall outlet.
NOTE: The unit has a partial charge when it leaves our facility, upon
receipt of the collar, be sure to give it a 4-hour initial charge before
the rst use.
Question and Answer IconNeed help?

Do you have a question about the Patpet p-collar 640 and is the answer not in the manual?

Patpet p-collar 640 Specifications

General IconGeneral
WaterproofYes
Battery TypeRechargeable Lithium-ion
TypeTraining Collar
ModesStatic Shock, Vibration, Beep
Shock Levels16
Vibration Levels8
Receiver Weight1.76 oz
Stimulation Levels16
Stimulation TypeStatic Shock, Vibration, Beep

Summary

Important Safety Information

Aggressive Dog Warning

Warning against use with aggressive dogs due to potential severe injury or death.

On-Leash Training Safety

Emphasizes safety during on-leash training, leash length, and user strength.

Skin Damage Precautions

Details risks of improper collar fit, tightness, or prolonged wear causing skin damage.

Components

Main Features

Overview

Remote Interface and Controls

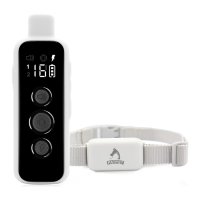
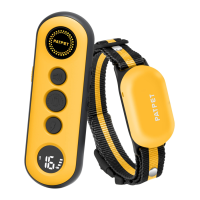
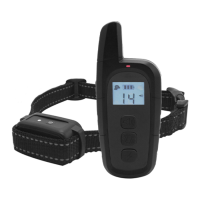
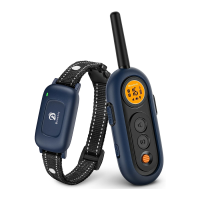
Describes channel selection, intensity adjustment, and touch-sensitive buttons.

Remote Display and Indicators

Explains the LCD display and LED indicator for operational feedback.

Receiver Overview

Receiver Components and Connections

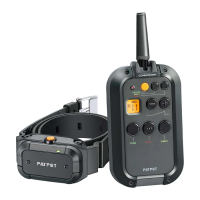
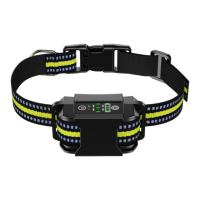
Details the antenna, clip, charging jack, and contact points.

Receiver Power and Indicator

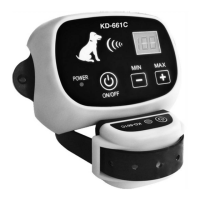
Covers the on/off button and its indicator light.

Setting Up the Product

Battery Charging Procedure

Guides on charging the unit, initial charge, and charging indicators.

Device Preparation

Instructions for setting up the Remote and Receiver, including antenna and contact points.

Testing and Pairing

Covers function testing, using the test lamp, and pairing the remote and receiver.

Fit the Training Collar

Collar Placement and Contact

Instructions on how to properly fit the collar on the dog's neck for effective contact.

Collar Wear Precautions

Advisories on duration of wear and avoiding skin irritation.

Optimizing Shock Level

Determining Pet's Threshold

Guidance on finding the appropriate shock level based on the dog's reaction.

Situational Adjustments

Notes on adjusting shock levels based on distractions and training situations.

General Tips

Age and Association

Recommendations on pet age, associating collar with positive experiences, and positive reinforcement.

Training Approach

Advice on single command training, handling fearful reactions, and training environment.

Aggressive Behavior Warning

Warning against using the collar for aggressive behavior, recommending professional consultation.

Device Information

Product Specifications

Details battery type, life, waterproof ratings, operating temperature, power, and range.

Indicator Lights and Displays

LCD and LED Indicators

Explains the meaning of shock levels, active dog, and battery indicators on the LCD.

Remote Indicator Light Functions

Details the function and response of the remote's LED indicator for different buttons.

Receiver Indicator Light Functions

Describes the green and red LED responses for receiver functions and states.

Maximizing Range

Distance Factors

Explains how factors like holding the remote and charging affect the effective range.

Antenna Interaction

Note to avoid touching the antenna to prevent range reduction.

Frequently Asked Questions

Safety and Suitability

Addresses pet safety with vibration/shock and minimum age requirements.

Training Reinforcement

Discusses whether reinforcement is needed after a pet is trained.

Receiver Waterproofing

Confirms the waterproof status of the receiver unit.

Range and Usage Limits

Explains factors affecting range and limits on continuous stimulation.

Troubleshooting

No Response to Button Press

Addresses issues where the pet or receiver does not respond to remote commands.

Receiver Not Turning On

Provides solutions for the receiver failing to power on.

Receiver Not Responding to Remote

Offers steps to resolve issues when the receiver is not communicating with the remote.

Warranty and Repair Information

1-Year Warranty Details

Outlines the terms, coverage, and duration of the product's warranty.

Warranty Qualification and Exclusions

Specifies conditions that qualify for warranty and situations that void it.

Procedure for Repair Work

Details the process for sending the unit for service and required information.

Compliance

FCC-USA Regulations

States compliance with FCC rules for radio frequency interference.

Related product manuals