pattersonfan.com
800.768.3985
12
STEP 5 - INSTALL GUY WIRES
Note: For maximum stability, the angle formed between the guy wire and the ceiling should be less
than 45 degrees.
Note: This step is required. Failure to install the guy wires properly may void
the manufacturer’s warranty AND become a safety hazard.
The following steps should be performed with the aid
of a scissor lift.
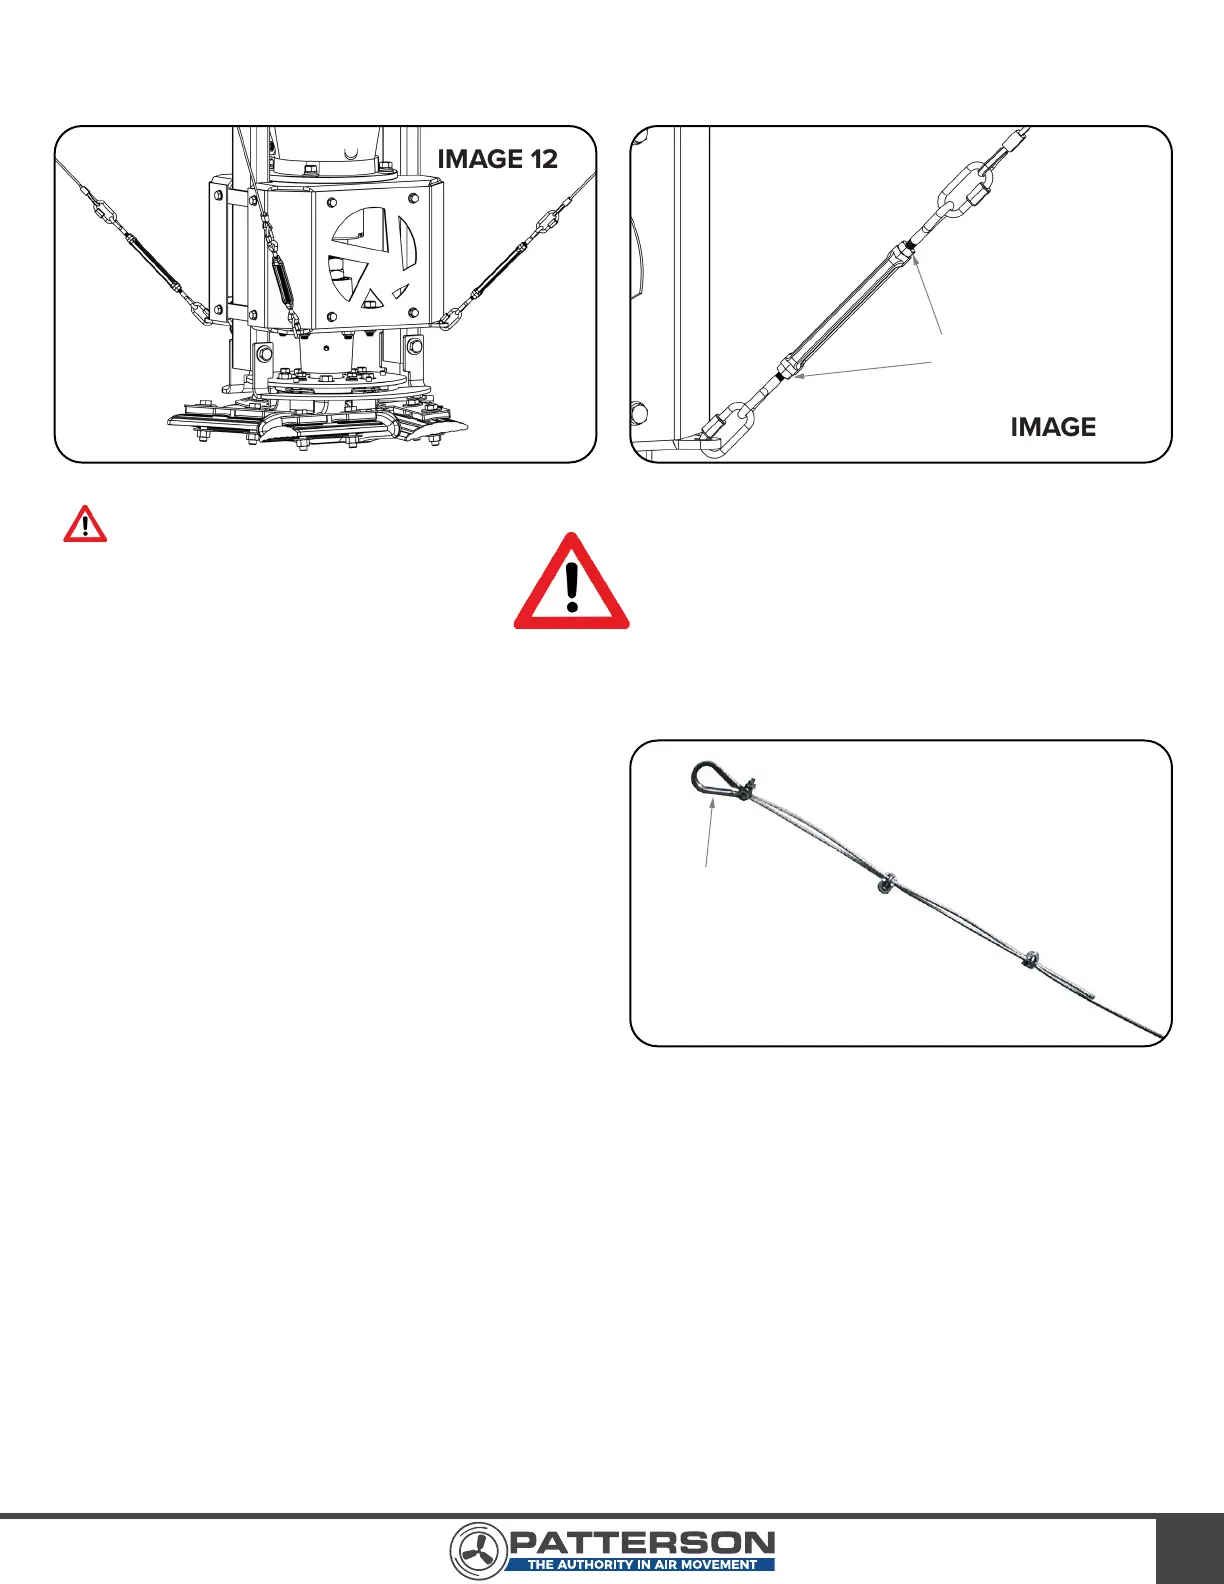
1) Attach the looped end of the guy wire to the
turnbuckle located on the fan assembly. It
should appear like the Image 13.
2) Pass the opposite end of the guy wire through
the eye bolt of a beam clamp (not supplied).
Thimbles must be used to protect the cable
from damage. Refer to Image 14.
3) Reduce the slack in each cable, making sure the fan assembly remains in the vertical position. Use 3
saddle clamps to crimp the end of the guy wire together (Image 14). Ensure saddle clamps are
positioned so that the teeth on the nut side grab the end of the cable that is most likely to slip.
4) Repeat steps 1 – 3 for the remaining three guy wires.
5) Once all guy wires are in place, use the turnbuckles to take out any remaining slack. Periodically
check the fan assembly with a level to ensure it remains in the vertical position. Continue adjusting by
means of the turnbuckles until all cables are satisfactory. Guy wires should be taut, but not over
stressed. Recheck all saddle clamps for tightness.
6) Tighten all jam nuts on turn buckles (Image 13). This step is required. Failure to install the guy
wires properly may void the manufacturer’s warranty AND become a safety hazard.
IMAGE 12
IMAGE 14
IMAGE 13
JAM NUTS
THIMBLE