10
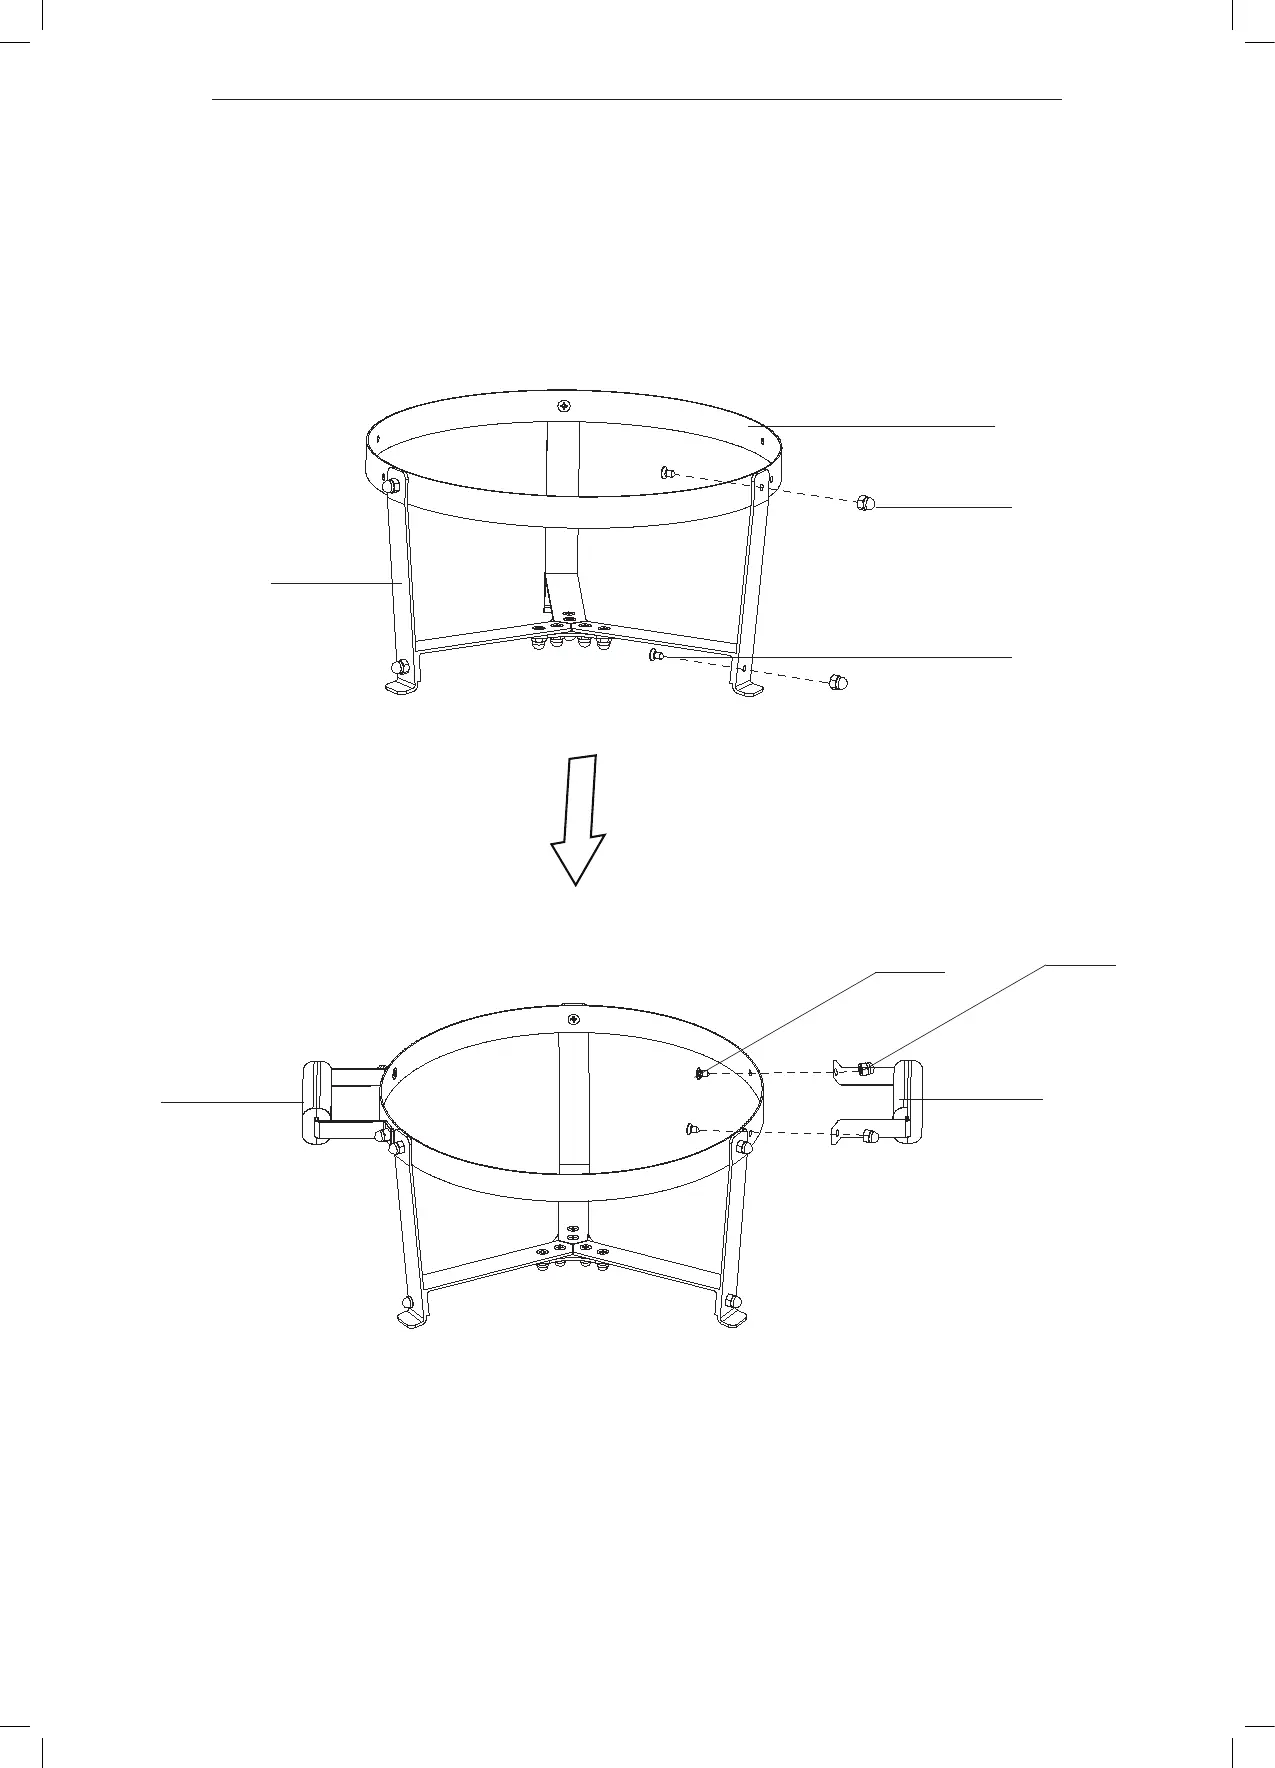
STAP 2 - Bevestig de 3 staanders (2) aan de ring (1) met 3 bouten (A) en 3 dopmoeren (B). Bevestig vervolgens de het
kruis van stap 1 aan de staanders met behulp van 3 bouten (A) en 3 dopmoeren (B).
STAP 3 - Bevestig nu de handles (5) d.m.v. voorbevestigde bouten en dop moeren aan de ring (1).
STAP 4 - Zet de Kamado-grill op het onderstel met het onderste luchtgat aan de voorzijde van het onderstel. Zo kan het
gat zonder problemen worden geopend en gesloten.
STEP 2-
STEP 3 - To attach the 2x handle (5) to the lid of the brace ring(1).start by aligning the bolt holes of the handle to
STEP 4 - Place the Kamado Grill on the cart with the bottom vent facing to the front of the cart allowing the vent
to open and close without any interruption.
Assemblyinstructions
The 3x bracket(2) to brace ring(1) using the 3x screws(A) with the 3x dome-headed nuts(B).
B.
A.
1.
2.
A.
B.
5.
Then using the 3x screws(A) with the 3x dome-headed nuts(B) for step 1.
pre-installed bolts on the lid. Secure the handle (5) with the 2x pre-attached dome headed nuts.
5.