47
SCHRITT 6 - Bestätigen Sie den Griff (5) des Kamado Grills mit Hilfe von vormontierte Schrauben und Hutmuttern
Der Kamado-Grill kann nun verwendet werden. Stellen Sie jedoch bitte sicher, dass Sie vor der Verwendung diese
Gebrauchsanweisung sorgfältig gelesen haben.
8
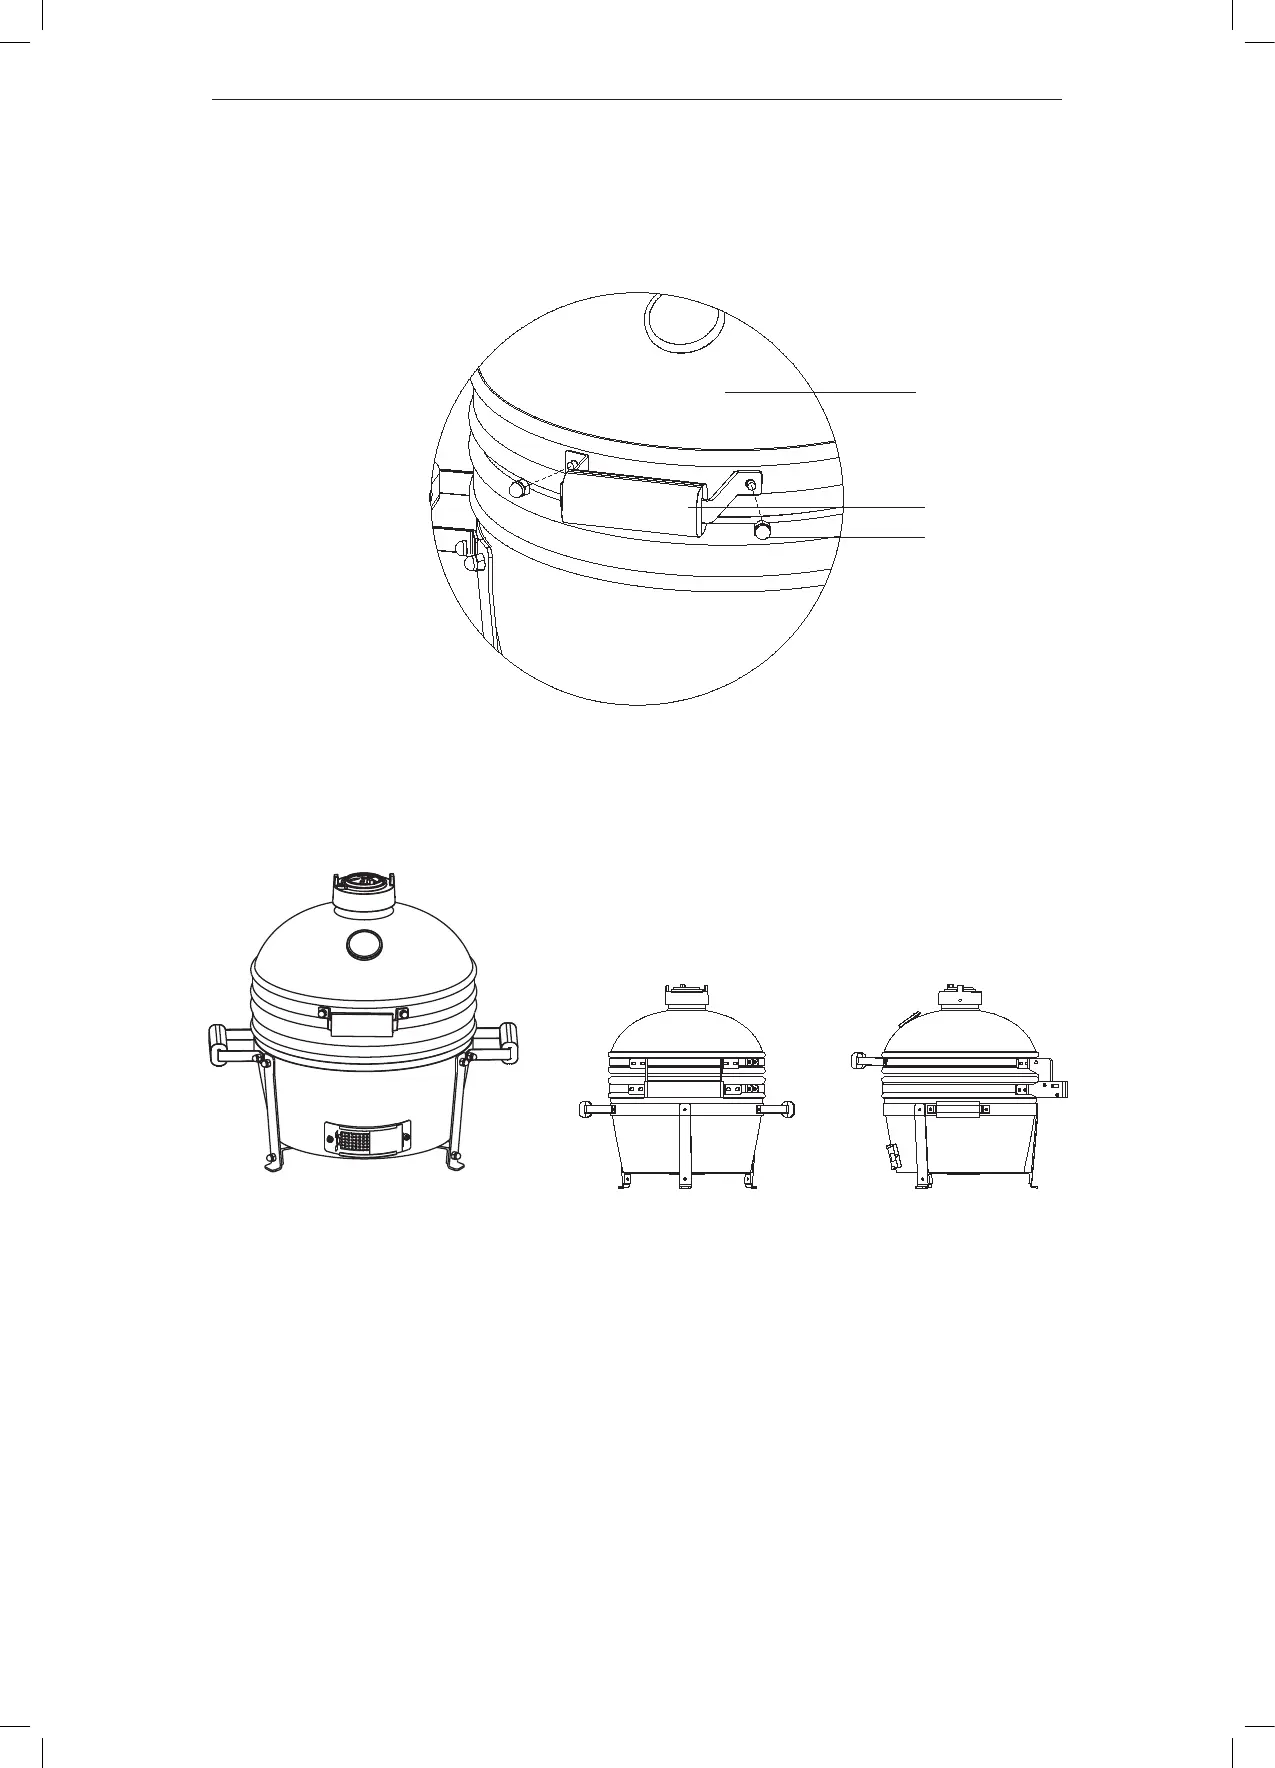
Assembly instructions
STEP 6 - To attach the handle (5) to the lid of the Kamado grill(9).start by aligning the bolt holes of the handle to
pre-installed bolts on the lid. Secure the handle (5) with the 2x pre-attached dome headed nuts.
B.
5.
9.
8
Assembly instructions
STEP 6 - To attach the handle (5) to the lid of the Kamado grill(9).start by aligning the bolt holes of the handle to
pre-installed bolts on the lid. Secure the handle (5) with the 2x pre-attached dome headed nuts.
B.
5.
9.