3 Mounting and installation [specialist]
2020/09 9976x0210x-mub-en – V01
7
3 Mounting and installation [specialist]
Not included in the scope of delivery!
Accessories: compression fitting
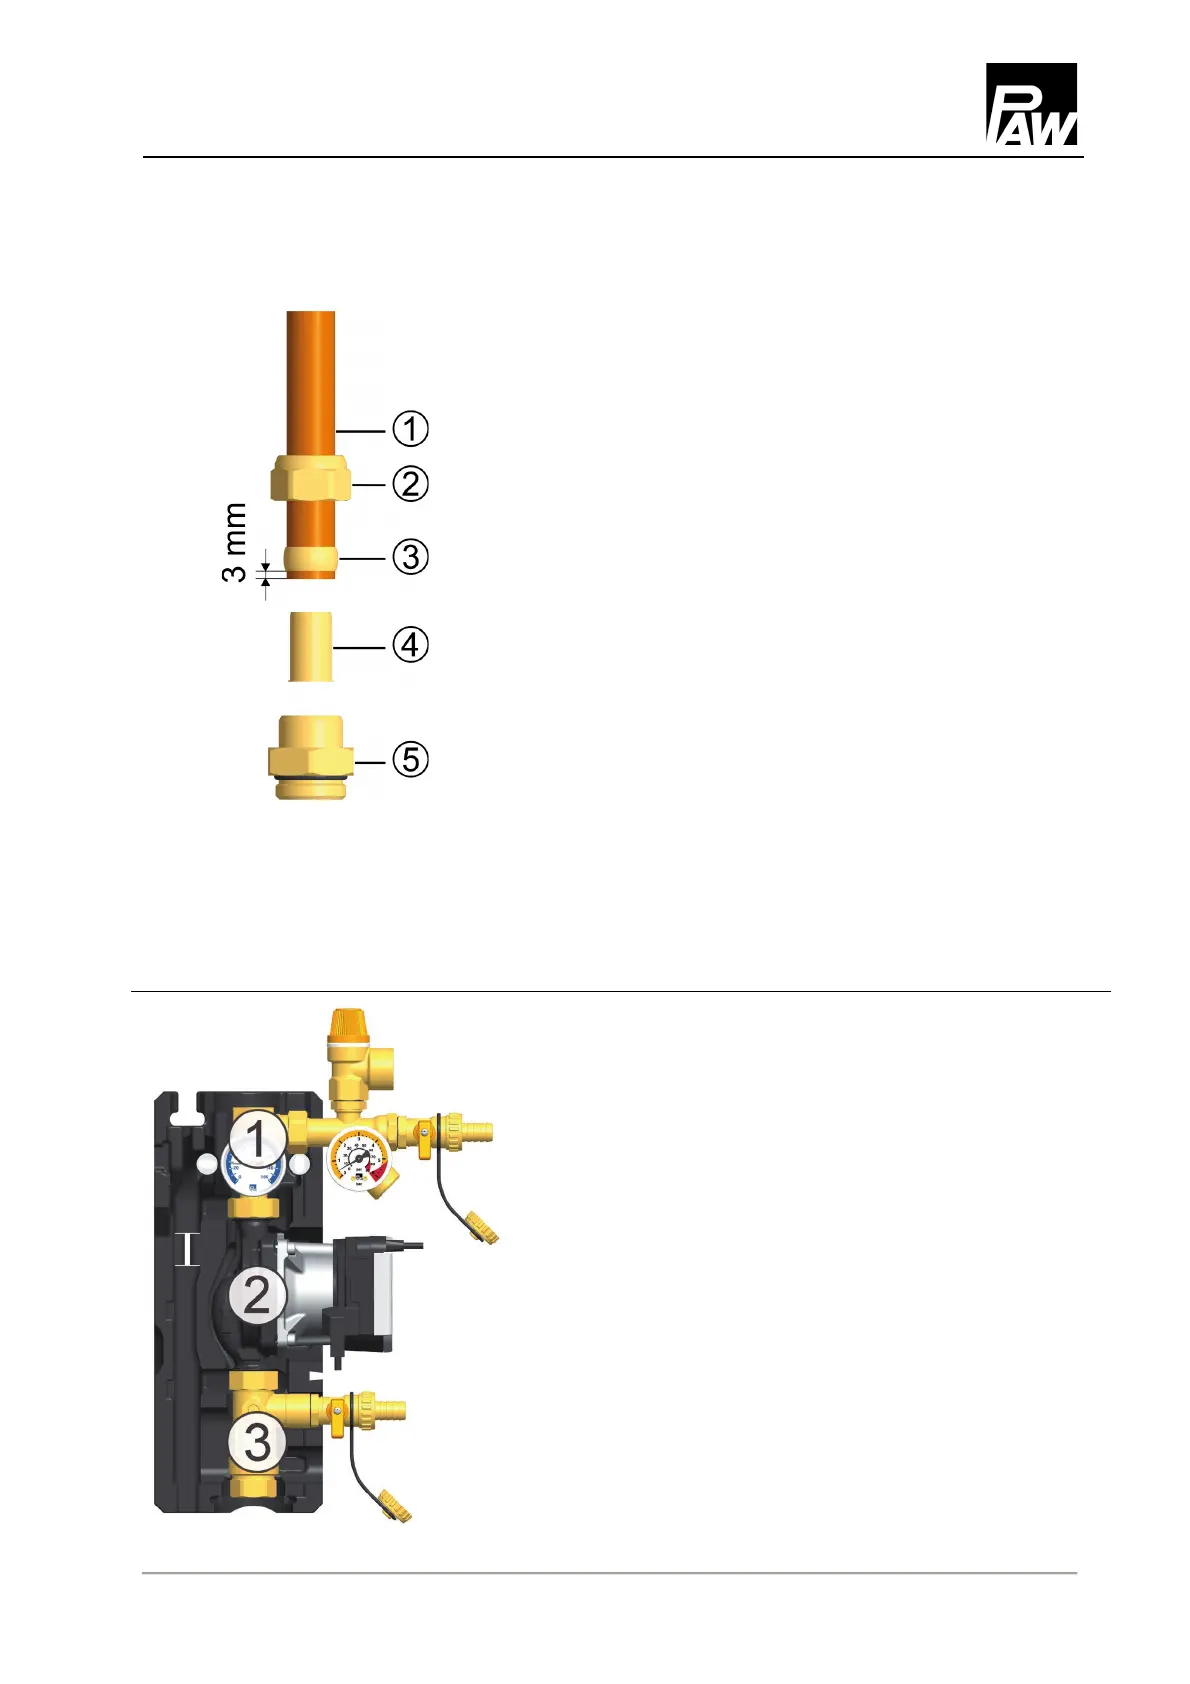
1. Push the union nut ② and the cutting ring ③ onto the
copper pipe ①. The pipe must protrude at least 3 mm
from the cutting ring in order to ensure the force
transmission and the sealing.
2. Insert the support sleeve ④ into the copper pipe.
3. Insert the copper pipe with the plugged-on individual
parts (②, ③ and ④) as far as possible into the body
of the compression fitting ⑤.
4. First, screw the union nut ② manually.
5. Tighten the union nut ② by rotating one full turn.
Secure the body of the compression fitting ⑤ against
distort in order to avoid damaging the sealing ring.
1. Remove the station from the packaging.
2. Remove the insulating front shell.