Perform Time Job Aid:
Course Overview and Installation
Page 4 Copyright © Paycor Inc. All Rights Reserved Updated: 5/26/15
Network Setup
Perform Time Clocks are set by default to DHCP mode for communication.
Static Communication
If your network requires Static Communication then that information will need to be entered
into the clock manually. Follow the steps below.
1. Press the Menu Key
2. Go to Comm.
3. Go to Network
4. Switch DHCP to OFF
5. Enter in Static Information. Use the Arrow Keys to Navigate. You will need to enter the:
a. IP Address
b. Sub-Net Mask
c. Gateway
d. DNS1
e. DNS2 (If applicable)
6. Highlight Okay and press the Menu/Enter Key.
7. The Clock is now ready for Static Communication.
Wi-Fi Setup
Only the PT100W and PT100FW are equipped with Wi-Fi capability.
Your wireless range is dependent on a number of factors, including router capabilities,
office physical operating environment, interference, and device.
Do not plug the WIFI device into an Ethernet port. Doing so will disable the WIFI and
require an update to correct.
WI-FI Password Setup
This device requires the use of a USB Drive in order to enroll the wireless password.
Follow the steps below to prepare the needed file:
1. Obtain a USB Drive and insert it into your computer.
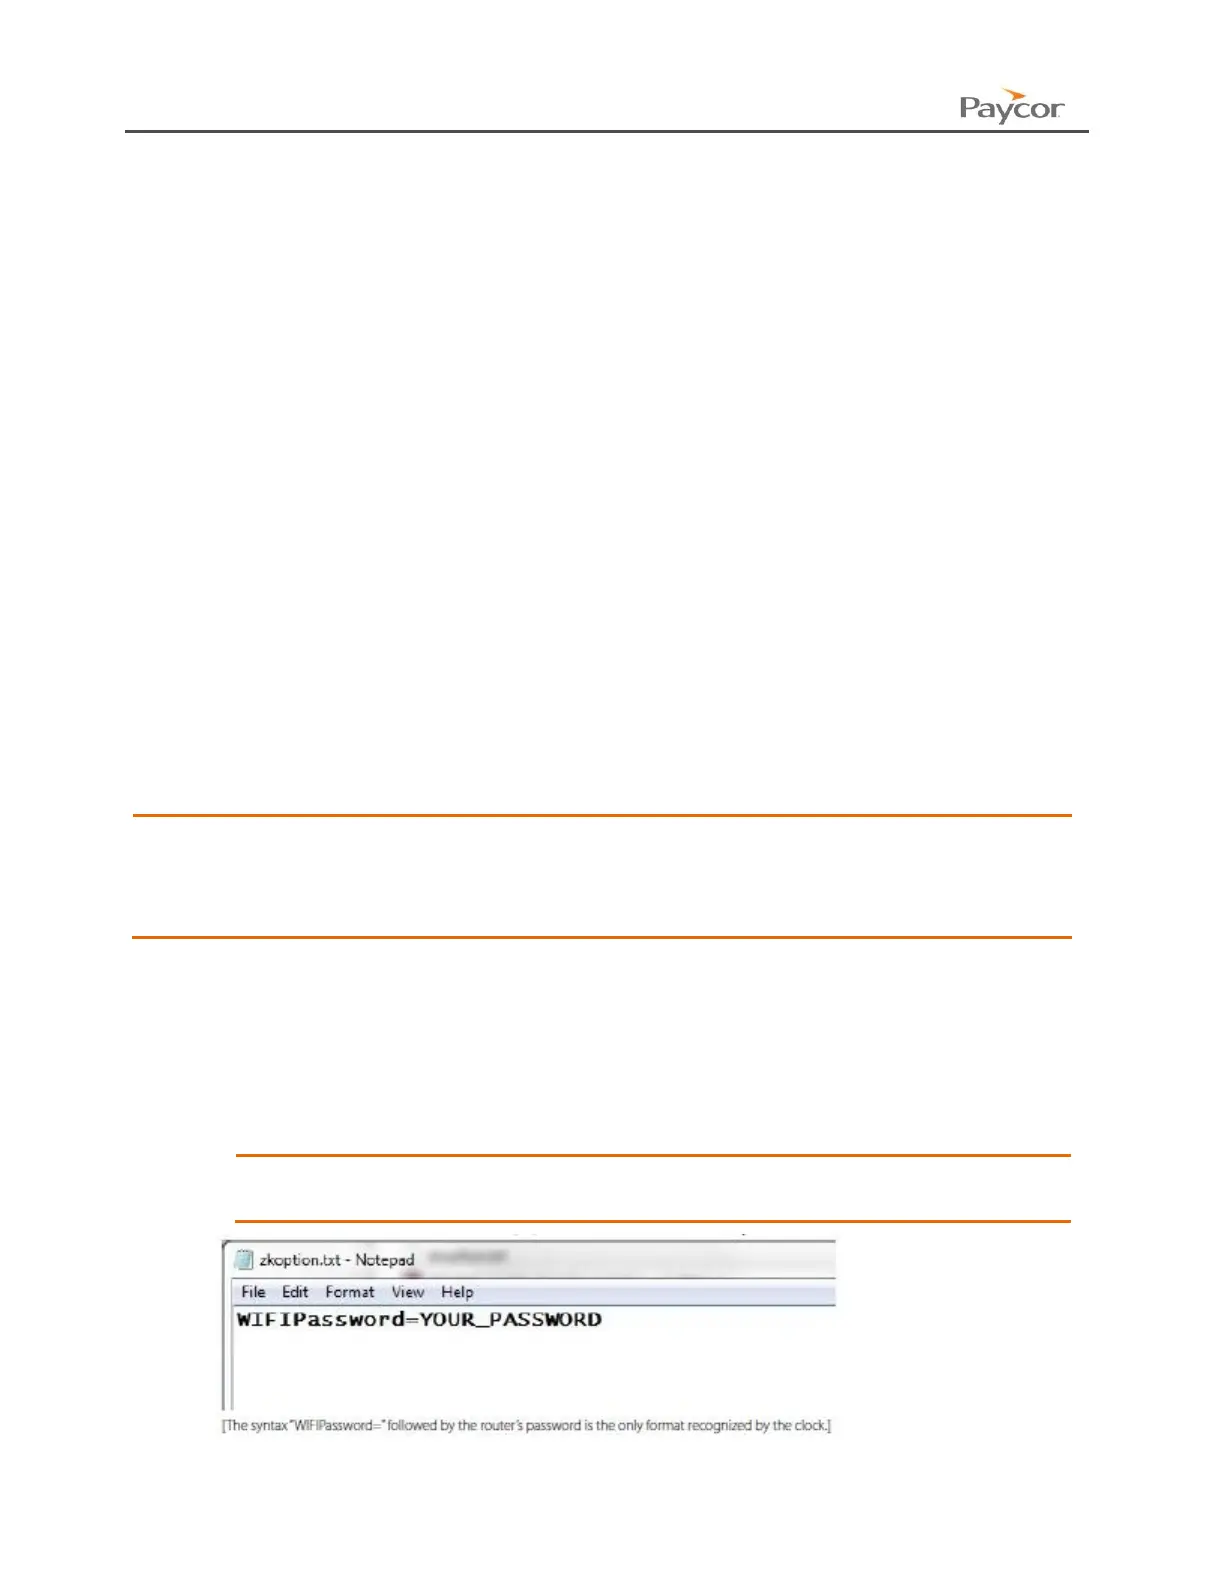
2. In the root folder of the USB Drive create a text file named “zkoption.txt”.
3. Open the “zkoption.txt” file with notepad or preferred text editor.
4. Type “WIFIPassword=” followed by your network’s password.
Remember to type your Wireless Network Password and not
“Your_Password” as seen in the image below.
5. Save the file and eject the USB Drive. You will use it later to load the password into the
clock.