1
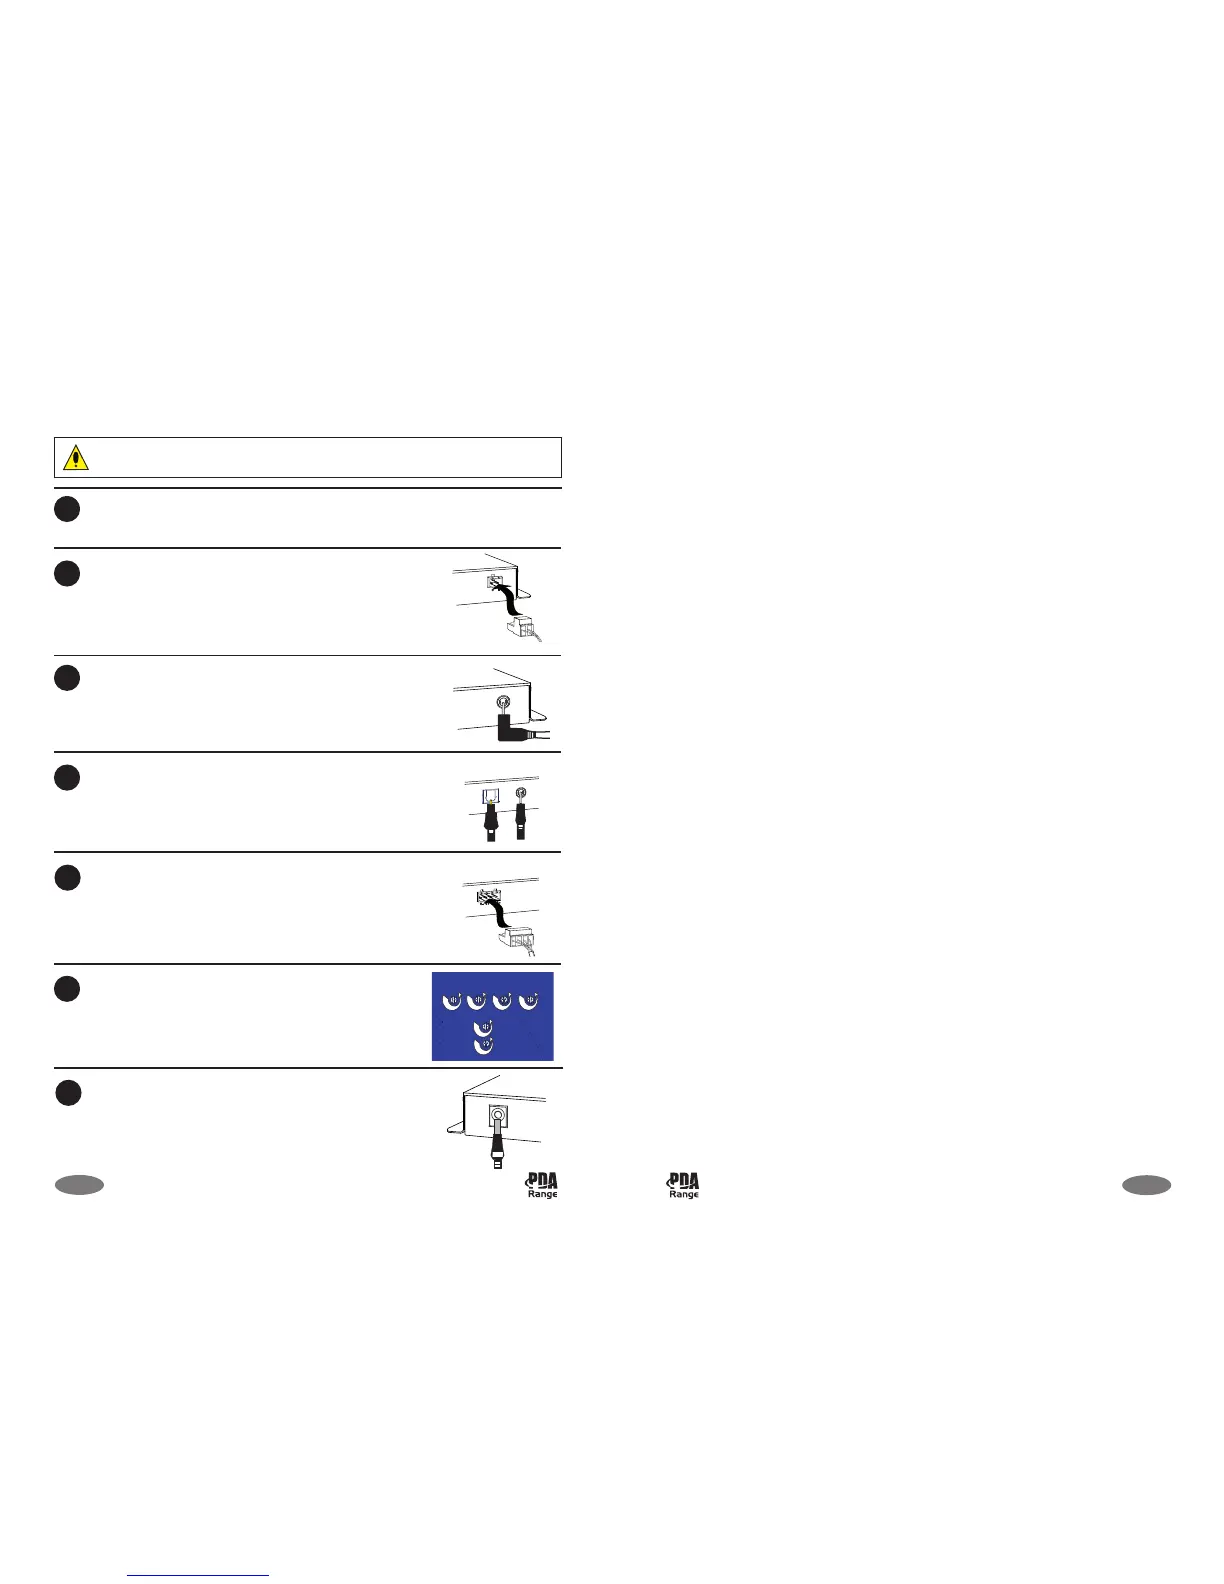
IMPORTANT: DO NOT power up the system before completing Step 7 below.
The amplifier MUST NOT be operated without a loop connected to it.
Install the loop cable.
BEFORE connecting the loop to the amplifier, use a multimeter to check the loop is not
shorted to ground at any point. It WILL damage the amplifier if it is.
Connect the loop cable (supplied) to the amplifier.
Remove approx. 6mm of the outer insulation from each
end of the loop cable, then secure both ends to the screw
terminals of the 2-way loop cable connector (supplied).
Next, plug the 2-way connector into the amplifier’s Loop
connector.
If relevant, plug the AMT microphone, or an alternative
electret microphone, into the amplifier’s Mic connector.
If relevant, plug the audio line level into the amplifier’s
Line input, or TOS-link connector cable (not supplied) into
the amplifier’s Digital connector.
Ensure the amplifier’s Outreach, Digital, Line, Mic, Metal
Compensation and Level pot controls are set to minimum
by turning them fully anti-clockwise.
Connect the plug-top power supply (supplied) to a
standard 13A, 230Va.c. mains socket and then to the
amplifier’s DC in connector. Ensure the amplifier’s green
Power On indicator lights.
SYSTEM SET-UP AND TESTING
2
3
4
6
7
10 of 12
If relevant, connect the outreach system to the amplifier.
Remove approx. 6mm of the outer insulation from all
cable ends, then secure the ends to the screw terminals of
the 4-way outreach connector (supplied). Next, plug the
4-way connector into the amplifier’s Outreach connector.
5
PDA103 Installation Instructions Approved Document No. DAU0000103 Rev 2
PDA103 KIT CONTENTS
The PDA103 audio frequency induction loop system (AFILS) amplifier is available in the
following kits.
PDA103C 1.2m
2
Counter Loop Kit:
1 x PDA103 AFILS amplifier
1 x 230Va.c. PL1/PSU1 plug-top power supply
1 x TX2 pre-formed counter loop cable and fixings
1 x AMT tie/desk microphone c/w 1.5m lead and attachments
1 x Accessory pack containing the installation instructions (this document), four cable ties,
four self-adhesive cable tie bases, one 4-way ‘outreach’ connector, one 2-way loop cable
connector, one ‘induction loop in use’ sticker.
PDA103R 50m
2
Small Room Loop Kit (‘outreach’ microphone version):
1 x PDA103 AFILS amplifier
1 x 230Va.c. PL1/PSU1 plug-top power supply
1 x APM ‘outreach’ plated microphone c/w 6m Belden cable
1 x 40m of 0.5mm
2
induction loop cable
1 x Accessory pack (as per the PDA103C kit).
PDA103L 50m
2
Small Room Loop Kit (tie/desk microphone version):
1 x PDA103 AFILS amplifier
1 x 230Va.c. PL1/PSU1 plug-top power supply
1 x AMT tie/desk microphone c/w 1.5m lead and attachments
1 x 40m of 0.5mm
2
induction loop cable
1 x Accessory pack (as per the PDA103C kit).
PDA103S 50m
2
Domestic TV/Music Lounge Loop Kit:
1 x PDA103 AFILS amplifier (with TOS-link connector)
1 x 230Va.c. PL1/PSU1 plug-top power supply
1 x APL dual phono line level ‘outreach’ plate c/w 6m Belden cable
1 x APS SCART to dual phono connection lead
1 x 40m of 0.5mm
2
induction loop cable
1 x Accessory pack (as per the PDA103C kit).
3 of 12
PDA103 Installation Instructions Approved Document No. DAU0000103 Rev 2
 Loading...