To maximize the effectiveness of the suction cap mount, it is recommended that the
application be performed under the following conditions:
Surface temperature should be between 21℃ and 38℃ (70℉ and 100℉).
Application below 10℃ (50℉) should be avoided.
Application should not occur in direct sunlight.
Mounting should be protected from exposure to direct sunlight for a period of 24 hours.
NOTE: UNDER EXTREME BRIGHT LIGHT CONDITIONS, THE SCREEN IMAGE MAY
TAKE A FEW SECONDS TO STABLIZE. PLEASE WAIT UNTIL THE IMAGE HAS
STABLIZED BEFORE BACKING UP.
MONITOR POWER CONNECTION
Use a 12 Volt cigarette lighter adaptor plugged into the vehicle’s cigarette lighter
socket.
Power Cable with 12 Volt Cigarette Lighter Adaptor
1. Insert the small 12 Volt DC plug of the power cable into the left side of the monitor.
2. Plug the 12 Volt cigarette lighter adaptor into the vehicle’s cigarette lighter socket.
3. Press the ON/OFF button to turn the monitor ON.
This device, as well as all other wireless devices, may be subject to interference.
Interference may be caused by cell phones, Bluetooth headsets, Wi-FI routers, power
lines and other various electrical equipment, etc.
MONITOR CONTROLS
BLUE LED Power Indicator
When the monitor is ON the blue LED will be lit. If there is power to the monitor, but the
monitor is OFF, the blue LED will be OFF.
Power Button
Press the Power button to turn the display ON, the blue LED will be lit to indicate the monitor
is ON. Press it again to turn the display OFF, the blue LED will turn off.
Contrast Control
There are 13 levels of contrast. To adjust the contrast, press the Contrast Control button.
Pressing the button to increase the contrast at the highest level will return to the lowest level.
Brightness
There are 13 levels of brightness. To adjust the brightness, press the Brightness Control
button. Pressing the button to increase the brightness at the highest level will return to the
lowest level.
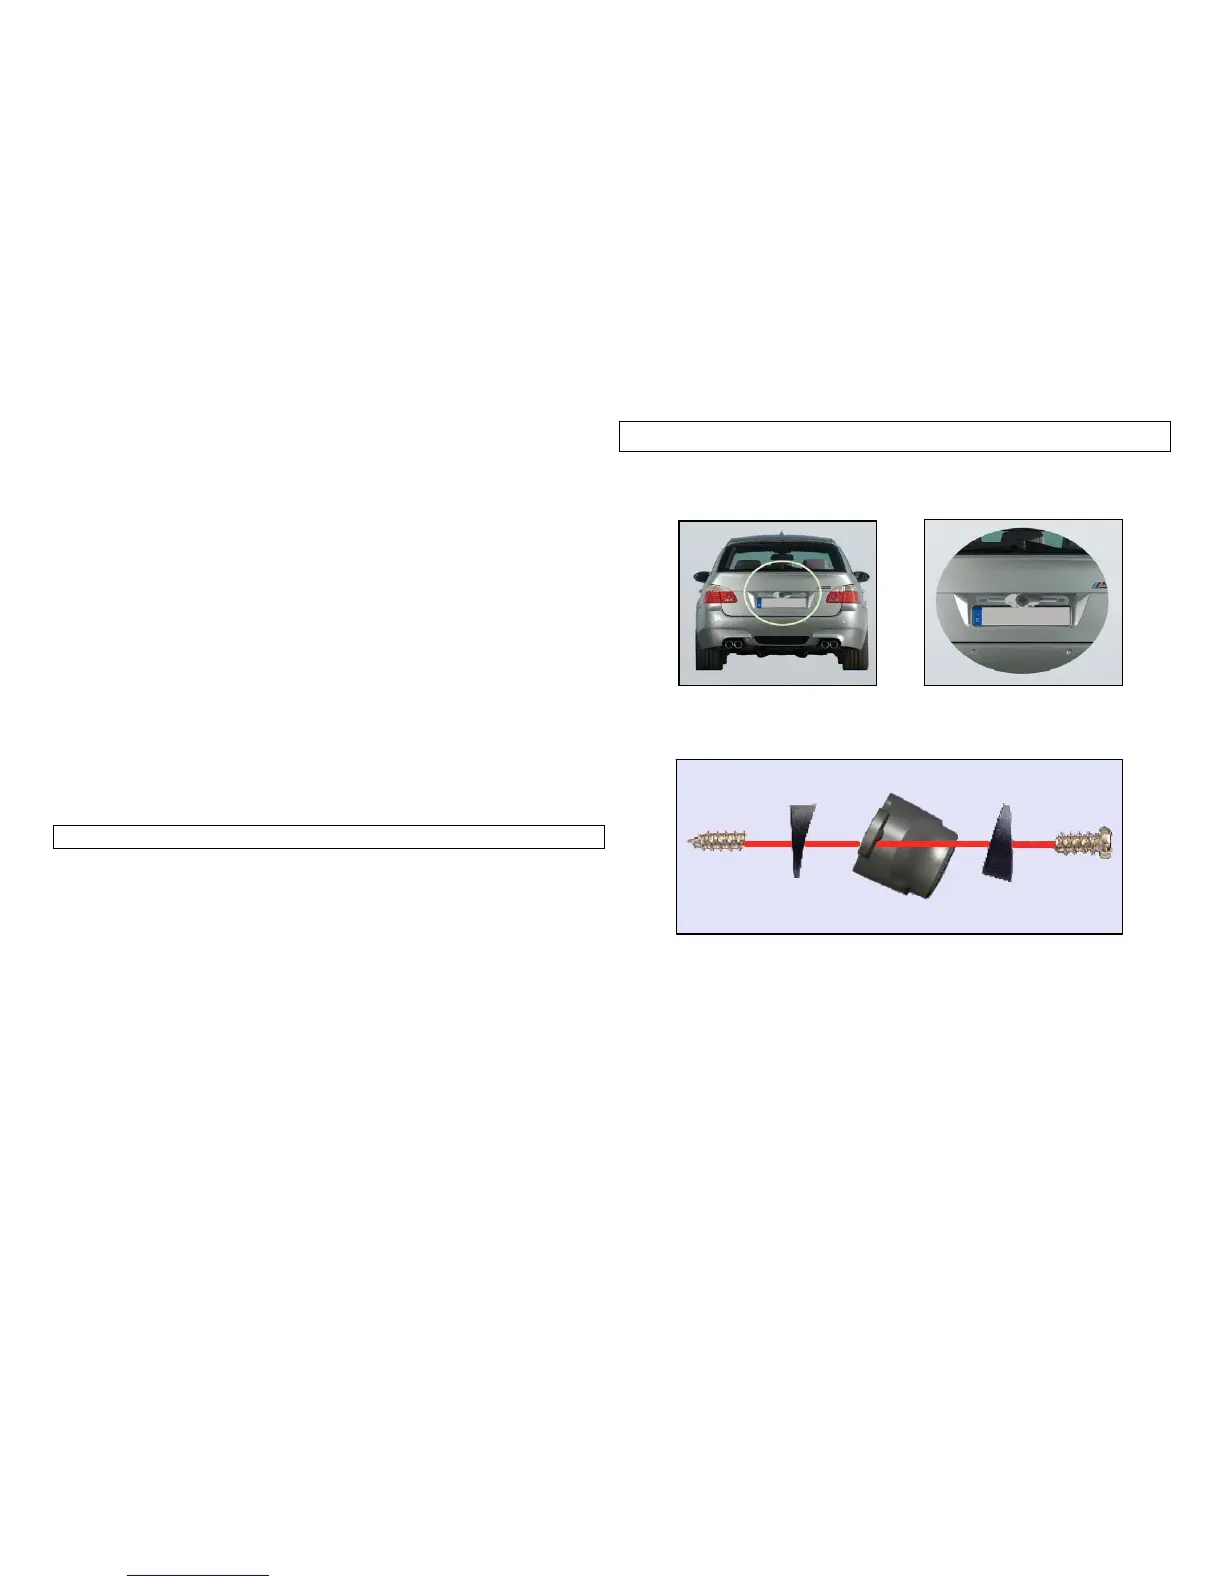
CAMERA INSTALLATION
You may mount the camera using the license plate’s top or bottom mounting bolts or
screws. Make sure that it’s field of view is not obstructed. Use the supplied wedge
shaped shims to adjust the angle that the camera is mounted.
1. Loosen the license plate bolts/screws, then remove the rear license plate.
2. Insert each license plate bolt into a supplied wedge, then through the bolt holes of the
camera, then through the remaining wedges and the license plate.
3. Align with holes on vehicle and temporarily tighten the license plate bolts/screws. The
wedges will angle the camera down.
4. You will need to choose a route for the camera’s power cable through the vehicle’s body
to the reverse light circuit.
5. Some vehicles may have a hole available to pass the wire through, such as where the
license plate light is mounted, or you can drill a hole close to where the power cable is
attached to the camera. Once you have chosen where the cable will enter the vehicle’s
body, remove the camera. If you are able to use an existing opening, skip the next two
steps.
6. If you are going to drill a hole, choose a location as close to the camera where the power
cable comes out of it. Before you drill a hole you MUST CHECK and see WHAT IS
BEHIND WHERE YOU ARE DRILLING. If there are any vehicles components, such as
electrical parts or fuel system components behind where you are drilling, you must take
whatever precaution is necessary not to damage them. Remove the license plate and
 Loading...