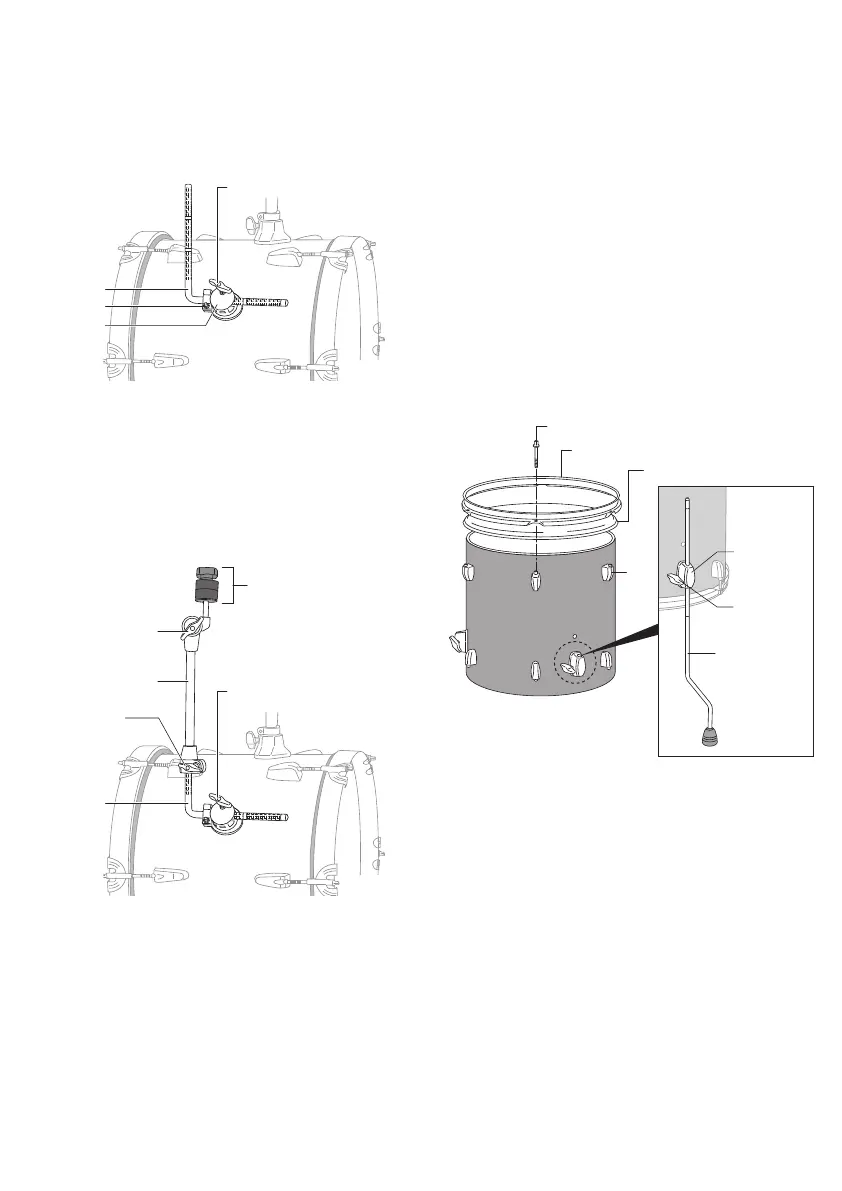
Floor Tom Assembly
The Floor Tom is packed with the Shell, Steel Hoops,
Heads and Floor Tom Legs unassembled. Please follow
the assembly instructions below to assemble the Floor
Tom.
1. Place the Shell on a clean, solid surface with the batter
side facing upwards as shown in Fig.12. Put the Head
on the Shell followed by the Steel Hoop.
2. Line up the ears of the Steel Hoop over the Lugs and
insert the Tension Rods through the ears. Finger
tighten them into all the Lugs on this side of the drum.
Using a Tuning Key, tighten the Tension Rods until
secure (Fig. 12).
3. Turn the drum over and attach the other Head and
Steel Hoop with the remaining Tension Rods.
4. Attach the Floor Tom Legs to the Floor Tom Leg
Brackets and set the height and angle to your
preference. Tighten the Wing Bolt to secure position
(Fig.12,13).
Fig.12
Fig.13
Tension Rod
Lug
Steel Hoop
Head
Floor Tom Leg
Wing Bolt
Floor Tom Leg
Bracket
Cymbal Holder Assembly
1. Insert the L-Rod into the Bracket and tighten the Wing
Nut (A), as shown in (Fig.10).
2. Set the Stop Lock inside the corresponding slot of the
Bracket, then tighten the Key Bolt to secure.
Wing Nut (A)
L-Rod
Upper Tube Assembly
Wing Nut (C)
Wing Nut (B)
Cymbal Tilter
Fig.10
Fig.11
Wing Nut (A)
L-Rod
Key Bolt
Bracket
3. Install the Upper Tube Assembly with Tilter onto the
L-Rod and set it to the desired height/angle and tighten
Wing Nut (B).
4. Loosen Wing Nut (C) of the Upper Tube Assembly
w/Cymbal Tilter to set the cymbal tilt.
5. Install the Cymbal onto the Cymbal Tilter and position it
to your playing preference and secure all Wing Nut and
Stop Lock (Fig.11)