25% 50% 75% 100%
HOW TO INSERT AND REMOVE THE CASCADE CABLE
1:When cascading multiple EP3000-48V units, it is important to maintain the uniqueness of the serial numbers.
2:Without connecting to the host, EP3000-48V units cannot be connected or activated.
3:After completing the cascade connection, when using EP3000-48V units, the charging and discharging power may not
be displayed on the host screen, but the host will calculate their battery levels.
4:After completing the cascade connection, when the host is powered on, the power packs will perform a self-check, and
the status lights may have a delayed response (within one minute). This is normal.
5:After completing the cascade connection, when the host is powered off, the power packs will wait to be fully balanced
with the host before shutting down.
CASCADE PROCESS NOTES
support@pecron.com
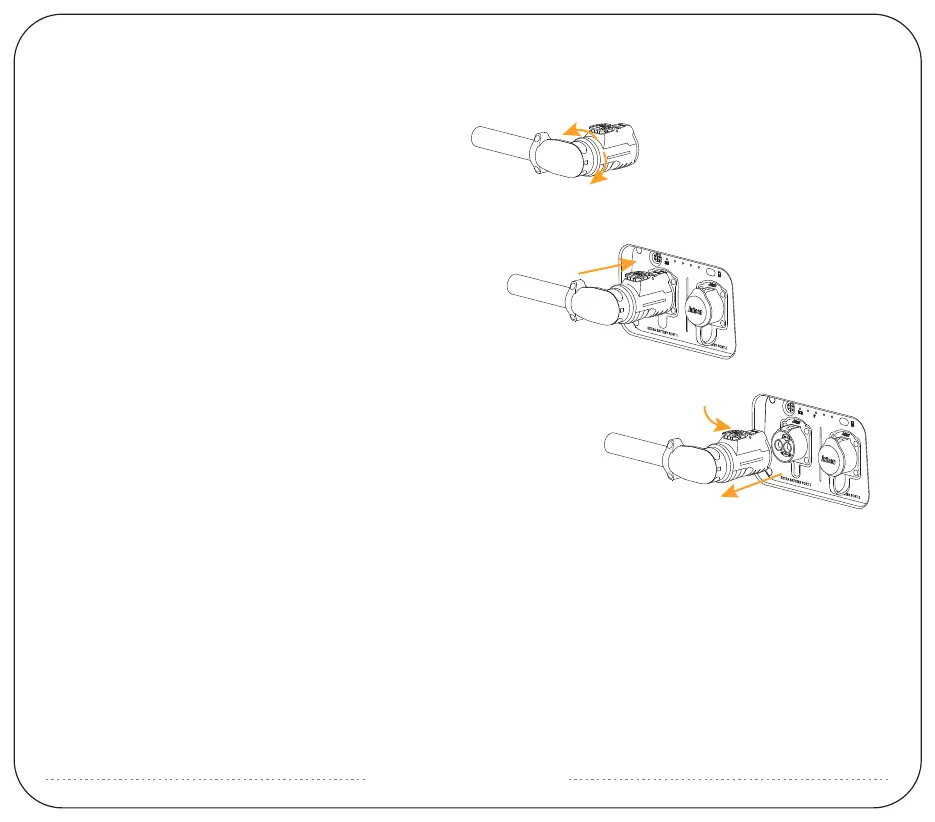
Inserting the cascade cable:
With the "PUSH" button facing upwards, align it with the
corresponding socket. Push it forward until you hear a "click"
sound, indicating that it is inserted in place.
Removing the cascade cable:
Press down and push the "PUSH" button downward, grip
the plug, and pull it outward.
25% 50% 75% 100%
Adjusting the angle of the cascade cable:
Before insertion, determine the desired angle and grip the
plug. Within the range of the rotating arrow, you can rotate
it 90° clockwise or 90° counterclockwise.
(Do not exceed this angle and do not rotate after insertion.)
 Loading...