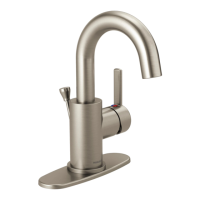
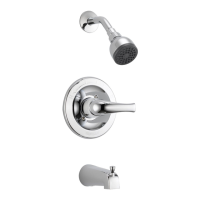
TWO HANDLE WASHERLESS LAVATORY
FAUCET MODEL P299696LF
LLAVE DE LAVAMANOS DE DOS MANIJAS SIN
ARANDELAS - MODELO P299696LF
ROBINET SANS RONDELLE À DEUX MANETTES
POUR LAVABO - MODÈLE P299696LF
Record Your Model Number Here For Future Reference
Anote Aquí Número del Modelo Comprado Para Referencia Futura
Inscrivez le numéro de modèle ici pour pouvoir le retrouver.
ASSEMBLY PARTS LIST
LISTA DE PIEZAS PARA LA INSTALACIÓN
LISTE DES PIЀCES
Description
Descripción
Description
Faucet
Llave
Robinet
1
1
1
1
2
2
Gasket
Empaque
Joint
Locknuts
Contratuercas Écrous de
Blocage
Coupling Nuts
Tuercas de Acoplamiento
Écrou de Raccordement
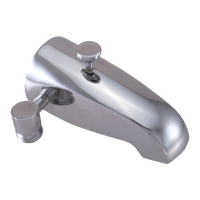
Pop-Up
Desagüe automático
Renvoi Mécanique
Lift Rod
Barra de Alzar
Tige de Manoeuvre
Quantity
Calidad
Quantité
You may need
Usted puede necesitar
Articles dont vous pouvez avoir besoin:
Water supply hook-ups:
(NOT PROVIDED)
Choose hook-ups for 1/2" I.P.S. connections: Ball
nose riser (3/8" O.D. copper tubing), or 1/2" I.P.S.
faucet connector.
Suministros de agua:
(NO PROPORCIONADAS)
Escoja conexiones para I.P.S. de 1/2": Tubos
montante bola-nariz (tubería de cobre de 3/8" D.E.),
o conector de llave I.P.S. de 1/2".
Raccords :
(NON FOURNIS)
Choisissez des raccords compatibles 1/2 po IPS.
Tubes-raccords à portée sphérique (tube en cuivre
3/8 po d.e.) ou raccords de robinet 1/2 po IPS.
Silicone sealant:
(NOT PROVIDED)
If sink is uneven use silicone sealant under base
of faucet.
Sellador de silicón:
(NO PROPORCIONADAS)
Si el fregaderos está desnivelado use sellador
de silicón debajo de la base del borde.
Composé D'étanchéité à la silicone :
(NON FOURNIS)
si la surface de l’évier est inégale, appliquez du
composé d’étanchéité à la silicone sous la base
du robinet.
Wrench(es):
(NOT PROVIDED)
For faucet removal/installation.
Llave(s):
(NO PROPORCIONADAS)
Para quitar/instalación de fregaderos.
Clé(s):
(NON FOURNIS)
pour pose et dépose de robinet
Sink Hole Dimensions
Dimensiones del Hoyo Fregaderos
’évier
Allow clearance for lift rod and handle movements.
Permita un espacio para los movimientos de alzar la barra y la manija.
Laissez le dégagement nécessaire aux mouvements de la tirette et des
manettes.
1-1/8" Dia.
(29 mm)
4"
(102 mm)
1" Max.
(25mm)
2"Max
(51 mm)
Estimated Time For Assembly
The estimated time to install this faucet is 45 minutes. The estimated
time to install the pop-up assembly is 30 minutes. These estimates do
not include removing the old faucet and pop-up assembly.
Tiempo Estimado para Instalar
El tiempo estimado para instalar esta llave de agua es 45 minutos. El
tiempo estimado para instalar el ensamble del desagüe automático es
30 minutos. Estos estimados no incluyen el tiempo que toma quitar la
llave de agua vieja y el ensamble del desagüe automático.
Durée d’installation estimée
La durée d’installation de ce robinet est estimée à 45 minutes. La
durée d’installation estimée du renvoi mécanique est de 30 minutes.
Ces estimations n’incluent pas la dépose du vieux robinet et du vieux
renvoi.
The Peerless
Installation Helpline
1-800-438-6673
www.peerlessfaucet.com
Instruction Manual Printed in China
Manual de Instrucciones Impreso en China
Manuel d’instructions Imprimé en Chine
08/29/2014 1
86626 Rev. A
P299696LF
86626