14
BURNER SETUP & BOILER OPERATION
A. BURNER INSTALLATION
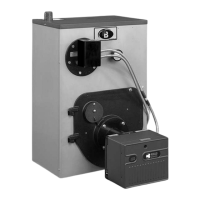
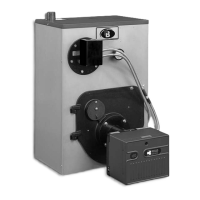
1. The oil burner is supplied with a mounting flange
fixed in position.
2. Mount the burner to the burner mounting plate (item
5) with four (4) 5/16" studs and nuts provided.
3. Care must be taken when routing the oil lines so not
to interfere with the opening and closing of the
burner mounting plate. Flexible oil lines or flared
copper disconnects with valves (when copper lines
are used) may be installed to assure full opening of
the burner mounting plate when servicing.
4. Oil burner specifications:
For information pertinent to the oil burner such as
nozzle sizing, fuel supply piping, adjusting or
servicing, refer to the charts in this section and the
burner installation manual.
B. BURNER START-UP AND ADJUSTMENT
1. Burner should start automatically when thermostat is
turned up and main boiler service switch is turned
on. If burner does not start, check to be sure there is
oil in the tank and push reset button on burner
control:
Beckett: Square red button.
Carlin: Round red button.
Riello: Round red button inside clear flexible
cover on back of burner cover.
If burner still does not start, contact serviceman.
2. Adjust burner and barometric draft control for
highest CO
²
(Maximum 13.1%) while maintaining a
0 Smoke and a minimum -.01" W.C. draft overfire.
All adjustments must be made using suitable
instruments such as found in a Bacharach
Combustion Test Kit.
3. Burner and boiler can be shut down by turning
down the thermostat and moving the main boiler
service switch to the "off" position.
4. See burner manufacturer’s manual for further
information regarding the burner.
C. CHECK BOILER CONTROLS
1. Limit and Operating Controls:
a. Lower the set point of each control until the
burner shuts down. Note that the system pressure
(or temperature) corresponds to the desired set
point.
b. Return the controls to the desired set point.
2. Low Water Cut-off (if used) - consult the
manufacturer's instructions for the low water cut-off
operational check procedure.
D1. FILL THE BOILER (WATER BOILERS)
1. Fill the boiler and system with water making certain
to vent air from all high points in the system. Water
should bleed from each air vent when it is opened.
2. The pressure reducing valve on the fill line will
typically allow the system to be filled and pressurized
to 12 psi. Consult the valve and expansion tank
manufacturer for more detailed information.
3. Check all joints and fittings throughout the system for
leaks. If leaks are found, drain the system and repair
as required.
4. See Section 1 - Preinstallation for boiler water
treatment requirements.
5. If the system requires antifreeze protection, use only
propylene glycol specially formulated for hydronic
systems. These contain inhibitors that prevent
corrosion of the boiler and system components. Do
not use ethylene glycol or automotive antifreezes.
a. Make sure that the antifreeze supplier can
provide periodic testing of antifreeze
concentration and inhibitor level.
b. If an automatic fill valve is used, the solution
strength in the system must be checked to assure
that the antifreeze concentration has not been
overly diluted.
5. BURNER SETUP & BOILER OPERATION
Burn only #2 Fuel Oil in this
appliance. Do not use gasoline,
crankcase drainings or any oil
containing gasoline.
CAUTION
Do not attempt to start the burner
when excess oil has accumulated,
when the unit is full of vapor, or
when the combustion chamber is
very hot.
CAUTION
Two-pipe oil supply for Riello burner
requires a separate kit. Order part
#C7001026 from Riello dealer.
NOTICE
Be sure high temperature gasket is
between the burner mounting flange
and the burner mounting plate.
NOTICE
Do not start the burner unless all
cleanout doors are in place.
CAUTION


 To Next Page
 Loading...