- 12 -
EN_English
WARNING!
_ IMPORTANT: Keep these instructions for future
reference. Read and keep them for safety use.
The child’s safety could be at risk if these
instructions are not followed.
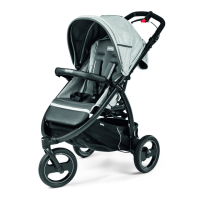
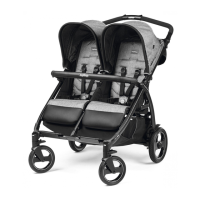
_ This item was designed for the transport of 2 children
in the seat.
_ Do not use this product for a number of occupants
greater than that intended by the manufacturer.
_ This product is approved for children from birth up to
_ For new born babies is recommended to use the
backrest in the most reclined position.
_ This product was designed for use in combination
+ Seggiolino Duette/Triplette Pop-Up is approved
Piroet + Navetta Pop-Up is approved for children from
_
product is suitable for a child who cannot sit up by
Don't apply and don't use any different mattress of
that specified by the Manufacturer in the Instruction
Manual of pram body.
pram body during use.
_
this vehicle does not replace a cot or a bed.
_ WARNING! Ensure that all the locking devices are
engaged before use.
Check that the Peg Perego Ganciomatic products are
correctly fixed to the item.
_ WARNING! Check that the pram body or seat unit or
car seat attachment devices are correctly engaged
before use.
_ WARNING!
use the harness crotch strap in combination with the
waist strap.
_ WARNING! To avoid injury ensure that your child is
kept away when unfolding and folding this product.
_ WARNING! This product is not a toy. Do not let your
child play with this product.
_ WARNING! The assembly and preparation of the
product must be carried out by an adult.
_ Do not use this product if there are parts missing or
signs of breakage.
_ WARNING! Never leave your child unattended.
_ Do not insert fingers into the mechanisms.
_ Be careful not to hurt the child when adjusting the
_
manufacturer’s instructions regards the maximum
loads transportable.
_ The front bar (if present) is not designed to support
the child’s weight. It is not designed to keep the child
in the seat and does not substitute for the waist belt.
_
in the cup holder (if present) in excess of those
indicated on the cup holders themselves and never
hot drinks. Do not put loads of more than 0.2 Kg in
the hood pockets (if present).
_
reach of the child.
_ Only replacement parts supplied or recommended by
the manufacturer/distributor shall be used.
_ WARNING! Don't use the rain cover (if present)
on a product without a hood or parasol that can
supervision. Don't use the rain cover indoors and
park the vehicle close to heat sources and keep well
away from the lighted cigarettes. Ensure that the rain
cover is not interfering with any moving parts of the
folding your carriage/stroller.
_ WARNING! This product is not suitable for running or
skating.
_
children.
_ WARNING! Do not add any mattress are not
approved by the manufacturer.
_ Do not use accessories which are not approved by
the manufacturer.
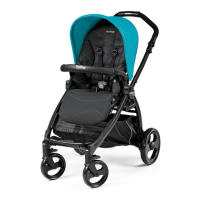
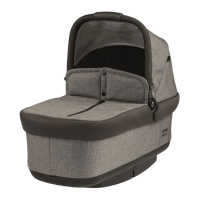
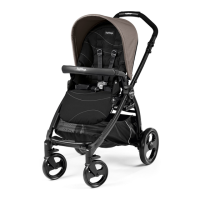
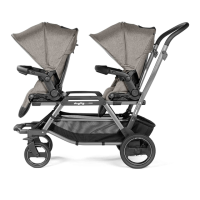
COMPONENTS OF THE ITEM
Check the contents of the packaging and if you have
_
INSTRUCTIONS
1
front wheels by inserting them until they click (fig_a)
and then proceed similarly with the rear wheels until
they click (fig_b).
Raise the handlebar in the direction of the arrow
(fig_a) and lock it until the final click (fig_b).
with your foot on the brake bar located on the rear
.
facing downward (fig_a). Press the silver buttons under
the metallic tube and slide it into its seats on the back
of the chassis (fig_b).
6
to the three grey buttons located above the rear bar.
Please note that the eyelets open (fig_a).
Fix the two upper eyelets of the basket to the two
grey buttons on the sides of the basket tube supports.
Please note that the eyelets open (fig_b).
Fix the two upper eyelets of the basket to the two grey
buttons on the front supports of the basket (fig_c). Run
and under the front chassis tubes (fig_d).
.
shown in the figure.
10
wheels (fig_a). Move the lever in the opposite direction
to make the wheels swivel (fig_b). The rear wheels are
fixed.
11
using the central external handles (fig_a) and the rear
handlebar (fig_b). The chassis must be lifted by two
people.
Figure C shows the correct way to lift it.
12
pivot outwards and remove the wheel as shown in the
figure (fig_a).
and remove the wheel (fig_b).
1
levers on the handlebar (fig_a) and rotate it forward
(fig_b) until it closes (fig_c).
You can fold up the frame without releasing the Pop-
fully forward.
 Loading...