18
are missing parts, or if it has been subjected to heavy
impacts as a result of accidents, as it may have suffered
structural damage which is not visible but is extremely
hazardous.
• If using a second-hand product, make sure it is a recent
model, comes with instructions, and is fully functional
in all parts. An obsolete product may not conform to
safety standards, due to natural ageing of materials and
updating of regulations. If you have any doubts, contact
the manufacturer’s customer service centre.
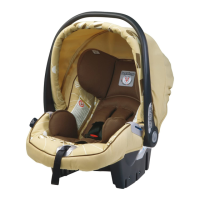
WARNING: FOR USE AS A
RECLINED CRADLE.
• Do not use the reclined cradle once your child can
sit unaided.
• This reclined cradle is not intended for prolonged
periods of sleeping.
• It is dangerous to use this reclined cradle on an
elevated surface, e.g. a table.
Instructions for use
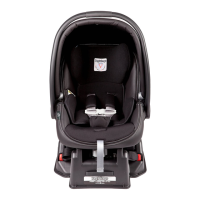
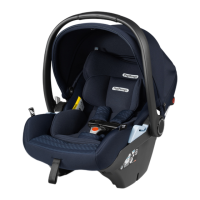
1• "Primo Viaggio SL" is provided with the Ganciomatic
System for attachment to/detachment from an "Isofix
Base" or "Belted Base" in the vehicle and Peg-Perego
strollers and chassis outside the vehicle.
To install "Primo Viaggio SL" (on an "Isofix Base", "Belted
Base", or Peg-Perego stroller or chassis) align it with the
attachment points and push down until it clicks into
place.
2• To release "Primo Viaggio SL" (from an "Isofix Base",
"Belted Base", or Peg-Perego stroller or chassis) raise the
handlebar to the transport position, push the lever on
the backrest upwards and at the same time raise the car
seat.
3• To engage the harness, place the two shoulder strap
tongues in position and insert them into the buckle
of the crotch strap until they click into place (fig. a). To
release the harness, press the red button on the crotch
strap buckle (fig. b) and remove the straps.
4• To slacken the harness, insert a finger through the seat
opening (fig. a), keep the metal button pressed, and with
the other hand pull on the straps (fig. b).
To tighten the straps until they are snug to the child’s
body, pull the central adjustment strap towards you (fig. c).
CAUTION: Do not over-tighten the straps, and
ensure you leave minimum slack.
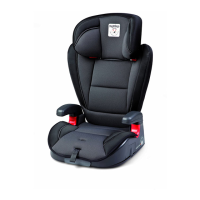
5• The harness and the “Side Impact Protection” headrest
can be adjusted simultaneously to 5 different heights so
as to follow the growth of the child.
To adjust the height, press the rear height adjustment
button (on the car seat backrest) and at the same time
raise or lower the straps and headrest to the required
position, ensuring that they click into place. Slacken
the shoulder straps before adjusting the height of the
harness and headrest.
6• Adjust the height of the headrest so that the straps are
just below the child's shoulders.
7• The seat is equipped with an anatomic booster cushion
for newborns, to be removed when the child is older.
8• The car seat handlebar has four fixed positions. To

 Loading...