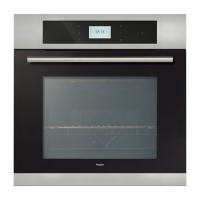
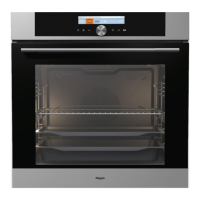
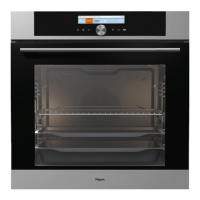
The Pelgrim MAC524RVS / MAC524MAT is a microwave oven designed for simple operation and optimum comfort, offering extensive setting options for various preparation methods.
Function Description:
The oven features 10 oven functions and 1 cleaning function. Users can select the appropriate function based on the dish to be prepared.
Oven Modes:
- Fast Preheat: Heats the oven to the desired temperature quickly. This function is not suitable for cooking food. The heating process completes when the desired temperature is reached.
- Top Heat + Bottom Heat Setting: Utilizes both top and bottom heating elements for baking and roasting. Suggested temperature: 200°C.
- Grill Setting: Heats food using the top heating element. Suggested temperature: 240°C. For grilling, the oven rack is typically placed on Level 4, and the baking tray on Level 2. Supervision of the cooking process is recommended as meat can burn quickly due to high temperatures. Preheat for 5 minutes.
- Top heat + Fan setting: Distributes heat from the top heating elements using a fan. Ideal for grilling meat, fish, poultry, and vegetables, providing a crispy texture. Suggested temperature: 170°C. For grilling, the oven rack is typically placed on Level 4, and the baking tray on Level 2. Supervision of the cooking process is recommended as meat can burn quickly due to high temperatures. Preheat for 5 minutes.
- Hot Air + Bottom Heat Setting: Combines hot air and the bottom heating element for crisping and browning food. Suggested temperature: 200°C. Baking tray or oven rack is often used on Level 2. Preheating is recommended.
- Hot Air Setting: Heats food using hot air from the fan and heating element located at the rear. Provides uniform heating, ideal for baking. Suggested temperature: 180°C. Place the tray on level 2. Preheating is recommended.
- ECO Hot Air: Heats food using hot air with less energy consumption. Cooking takes longer, but this function is used to roast meat or bake pastry. This mode uses residual heat for low energy consumption (in accordance with energy class EN 60350-1). The actual temperature in the oven is not displayed. Suggested temperature: 180°C. Place the tray on level 2.
- Aqua Clean: Uses hot steam to clean the oven cavity surface, making it easier to clean. The aqua clean program takes only 4 minutes. Wait ± 30 minutes after the program. Suggested power: 750W.
- Defrosting: Gently defrosts frozen food. The oven features automatic defrosting programs (A1 to A5). Microwaves gently defrost frozen food in a short period of time.
- Program A1 (Meat): Weight (kg) 1, Power (W) 90, Cooking time (minutes) 30.
- Program A2 (Poultry): Weight (kg) 1, Power (W) 90, Cooking time (minutes) 17.
- Program A3 (Fish): Weight (kg) 1, Power (W) 180, Cooking time (minutes) 12.
- Program A4 (Bread): Weight (kg) 0.5, Power (W) 180, Cooking time (minutes) 12.
- Program A5 (Frozen vegetables): Weight (kg) 1, Power (W) 90, Cooking time (minutes) 16.
- Weight can be adjusted by pressing the Temperature / power key. The cooking time will be adjusted automatically depending on the weight setting.
- Important: The Defrost Mode uses microwave energy to heat food. Guidelines for cookware and other microwave safety precautions must be strictly observed when using this mode.
- Microwave + Hot Air: Combines hot air and microwave to reduce cooking time while achieving a brown and crispy surface. Suitable for all kinds of meat and poultry, casseroles, gratin dishes, sponge cakes, light fruit cakes, pies, crumbles, roast beef, and chicken. Suggested temperature: 160°C, Power: 600W. Power levels: 90, 180, 360, and 600 W. Insert the glass tray into the first guide.
- Microwave: Uses microwave energy to cook and defrost foods quickly without changing color or form. Power level and cooking time are manually set. Suggested power: 750W. Power levels: 90, 180, 360, 600, 750, and 1000 W. Insert the glass tray into the first guide.
- 1000 W: Quickly reheating beverages, water, and dishes containing a large volume of liquid.
- 750 W: Cooking fresh or frozen vegetables.
- 600 W: Melting chocolate. Cooking fish and crustaceans. Reheating on two levels.
- 360 W: Cooking dried beans at low heat. Reheating or cooking delicate egg-based dishes.
- 180 W: Low-heat cooking of dairy products, jams. Manual defrosting.
- 90 W: Softening butter or ice cream. Defrosting cream-filled pastry.
- Important: Do not use metal cookware or utensils. Do not preheat the oven.
Control Panel:
The control panel features a display for cooking information and a timer clock.
- Multi-function selector (19): Used to set time, temperature, and power.
- Start/stop key (18): Confirms settings and starts/stops operation.
- Temperature / power key (16): Adjusts temperature or power.
- Timer key (17): Sets cooking time, end time, and minute minder.
- Child lock (14): Locks the control panel to prevent unintended use.
- Oven lighting on/off (15): Controls the oven light.
- Mode selector: Selects the desired oven function.
Usage Features:
- Setting the current time of day: When first plugged in, the display shows the Clock symbol and "12:00" blinking. Turn the 'Multi-function selector' to set the time and press 'start / stop' to confirm. Settings are stored automatically after three seconds if no button is pressed. The time can also be set by pressing the "timer button" twice.
- Using the oven: Place the dish in the oven. Turn the 'Mode selector' to the desired setting. Touch the 'Temperature / power key' and use the 'Multi-function selector' to set the temperature. Select a cooking time if needed by pressing the 'timer key'. Press 'Start / stop' to begin. The temperature symbol flashes until the oven reaches the selected temperature, then remains illuminated.
- Changing cooking temperature and microwave power: Turn the 'Mode selector' to choose the cooking mode. Touch the 'Temperature / power key'. For Combi function, touch twice to set the temperature, then twice to set the power. Turn the 'Multi-function selector' to set the desired temperature or power.
- Using the timer:
- Setting the clock: Press the 'Timer key' twice. Set the time of day using the 'Multi function selector'.
- Setting the 'cooking time': Defines the duration of the oven operation.
- Setting the 'end time': Sets the time at which the oven should stop operating. Ensure the clock is accurately set.
- Using the timer function: Select an oven function with the 'Mode selector'. Touch the 'Timer key' several times to select a timer function. The icon for the selected timer function lights up, and the adjustable cooking start/end time flashes. Press 'Start / stop' to start.
- Setting the minute minder: Can be used independently of oven operation (Mode selector in '0' position). Touch the 'Timer key' to select the minute minder. Set the time using the 'Multi function selector'. The longest setting is 23:59 hours. Press 'Start / stop' to start.
- Child lock: Activated by holding down the "child lock key" for a few seconds. A lock symbol appears on the display. To deactivate, press the key for a few seconds again. If the child lock is activated with no timer function engaged, the oven will not operate. If activated after a timer function has been set, the oven will operate normally.
- Oven lighting: Switches on automatically when the door is opened or when the oven is switched on. After cooking, the light remains on for a minute. The oven light can be switched off by pressing the 'Light key'.
- Acoustic signal: The loudness of the acoustic signal can be set when no timer function is activated (only the time of day is displayed). Press the 'temperature / power key' and hold it for 5 seconds. Fully lit bars appear on the display. Turn the 'multi function selector' to choose one of three volume levels (one, two, or three bars). After 3 seconds, the setting is automatically stored.
- Decreasing the display contrast: The cooking system selector knob should be on the "0" position. Press the LIGHT key and hold it for 5 seconds. Fully lit bars appear on the display. Turn the 'mode selector' to adjust the display dimmer (one, two, or three bars). After three seconds, the setting is automatically saved.
- Display lightning: Can be switched off if not used. Press the 'Child lock key' + 'Timer key' and hold for 5 seconds to switch off the display. If a timer function has been activated, then "OFF" and the 'TIMER' icon will appear to remind you of the activated function. Press the 'Child lock key' + 'Timer key' and hold for 5 seconds to switch on the display again.
- Power failure: If power fails for more than a few minutes, all settings, except for the acoustic signal and child lock, will be reset to factory defaults.
Maintenance Features:
- Cleaning your oven: Regular cleaning prevents grease and food particles from building up. Clean outside surfaces with a soft cloth and warm soapy water. Rinse and dry. Remove any splashes or stains on inside surfaces with soapy cloth. Rinse and dry. Wash the inside.
- Important: Do not spill water in the vents. Never use abrasive products or chemical solvents. Ensure door seals are clean to prevent particles from building up so the door can close properly.
- The Aqua clean function: Grease and grime can be easily removed from the oven walls with a damp cloth using the Aqua clean function.
- Using Aqua clean: Only use if the oven is cold. It is more difficult to remove grime if the program is used when the oven is hot.
- Remove all accessories. Pour approximately 0.15 litres of water into the bottom of the empty oven.
- Turn the 'Mode selector' to 'Aqua Clean' and press the 'Start / stop key'. The program takes 4 minutes.
- Wait ± 30 minutes. After 30 minutes, food residues on the oven enamel walls will have softened and can be easily cleaned with a damp cloth.
- Note: The duration of the cleaning program cannot be changed. Turn the 'Mode selector' to the '0' position to stop the cleaning program.
- Removing and cleaning the guide rails: Only use conventional cleaning agents. Remove the screw using a screwdriver. Remove the guide rails from the holes in the back wall. Store the guide rail spacers in a safe place to prevent sparks during use.
- Replacing the oven light bulb: The lamp is a consumable (halogen G9, 230 V, 25 W) and not covered by warranty.
- Disconnect the appliance from the power supply by removing the plug or switching off the circuit breaker.
- Please note: The light bulb can be very hot! Use protection to remove the bulb.
- Remove the four screws from the cover panel. Remove the cover panel and the glass.
- Remove the faulty halogen lamp and replace it with a new one.
- Replace the cover panel and the glass.
- Note: There is a gasket on the cover which should not be removed. Do not allow the gasket to be detached from the cover. The gasket should fit correctly onto the oven cavity wall.
- Re-tighten the cover screws firmly using a screwdriver; otherwise, sparks may appear.
Accessories:
The appliance comes with various accessories, depending on the model. Only use original accessories suitable for the chosen oven function's temperature settings.
- Enamelled baking tray: For pastries and cakes. Not for microwave functions. Suitable for pyrolysis cleaning.
- Oven rack: Mainly for grilling. Can also hold steam dishes or pans. Equipped with a safety peg. Not for microwave functions.
- Deep enamelled baking tray: For roasting meat and baking moist pastry. Can be used as a drip tray (placed on the first level during grilling). Not for microwave functions. Suitable for pyrolysis cleaning.
- Glass baking tray: For microwave and oven use. NOT suitable for pyrolysis cleaning.
Warranty:
Pelgrim offers a warranty period of up to 8 years upon registration of the appliance on pelgrim.nl (Netherlands) or pelgrim.be (Belgium).
Troubleshooting:
- Food remains uncooked: Ensure timer is set and 'Start' key is pressed. Firmly close door. Check for blown fuse or tripped circuit breaker.
- Food is either overcooked or undercooked: Ensure appropriate cook time and power level are used.
- Sparking and cracking (arcing) inside the oven: Ensure proper cookware without metal trimmings. Remove any forks or other metal utensils. If using aluminum foil, ensure it is not too close to inside walls.
- Electronic interference causes the display to be reset: Disconnect the power plug and reconnect it. Reset the time.
- Condensation appears inside the oven: This is a normal occurrence. Simply wipe away after cooking.
- The fan continues to operate after the oven has been turned off: This is a normal occurrence. The cooling fan may continue to run for a little while.
- Air flow is detected around the door and outer casing: This is a normal occurrence.
- Light reflection around the door and outer casing: This is a normal occurrence.
- Steam escapes from around the door or vents: This is a normal occurrence.
- A clicking sound occurs while the oven is operating, especially in defrosting mode: This is a normal occurrence.
- Storing and repairing your microwave oven: Repairs should only be made by a qualified service technician. If service is required, unplug the oven and contact Pelgrim Customer Service.
- When calling service, have the following information ready: Model number and serial number (found inside the oven door), warranty details, and a clear description of the problem.
- Temporary storage: If the oven must be temporarily stored, choose a clean dry place as dust and dampness can cause damage.