5. Using the (4) Large M6 Bolts and Washers provided, secure the
hopper assembly to the cabinet from the inside of the cabinet.
(This is easiest with two people.)
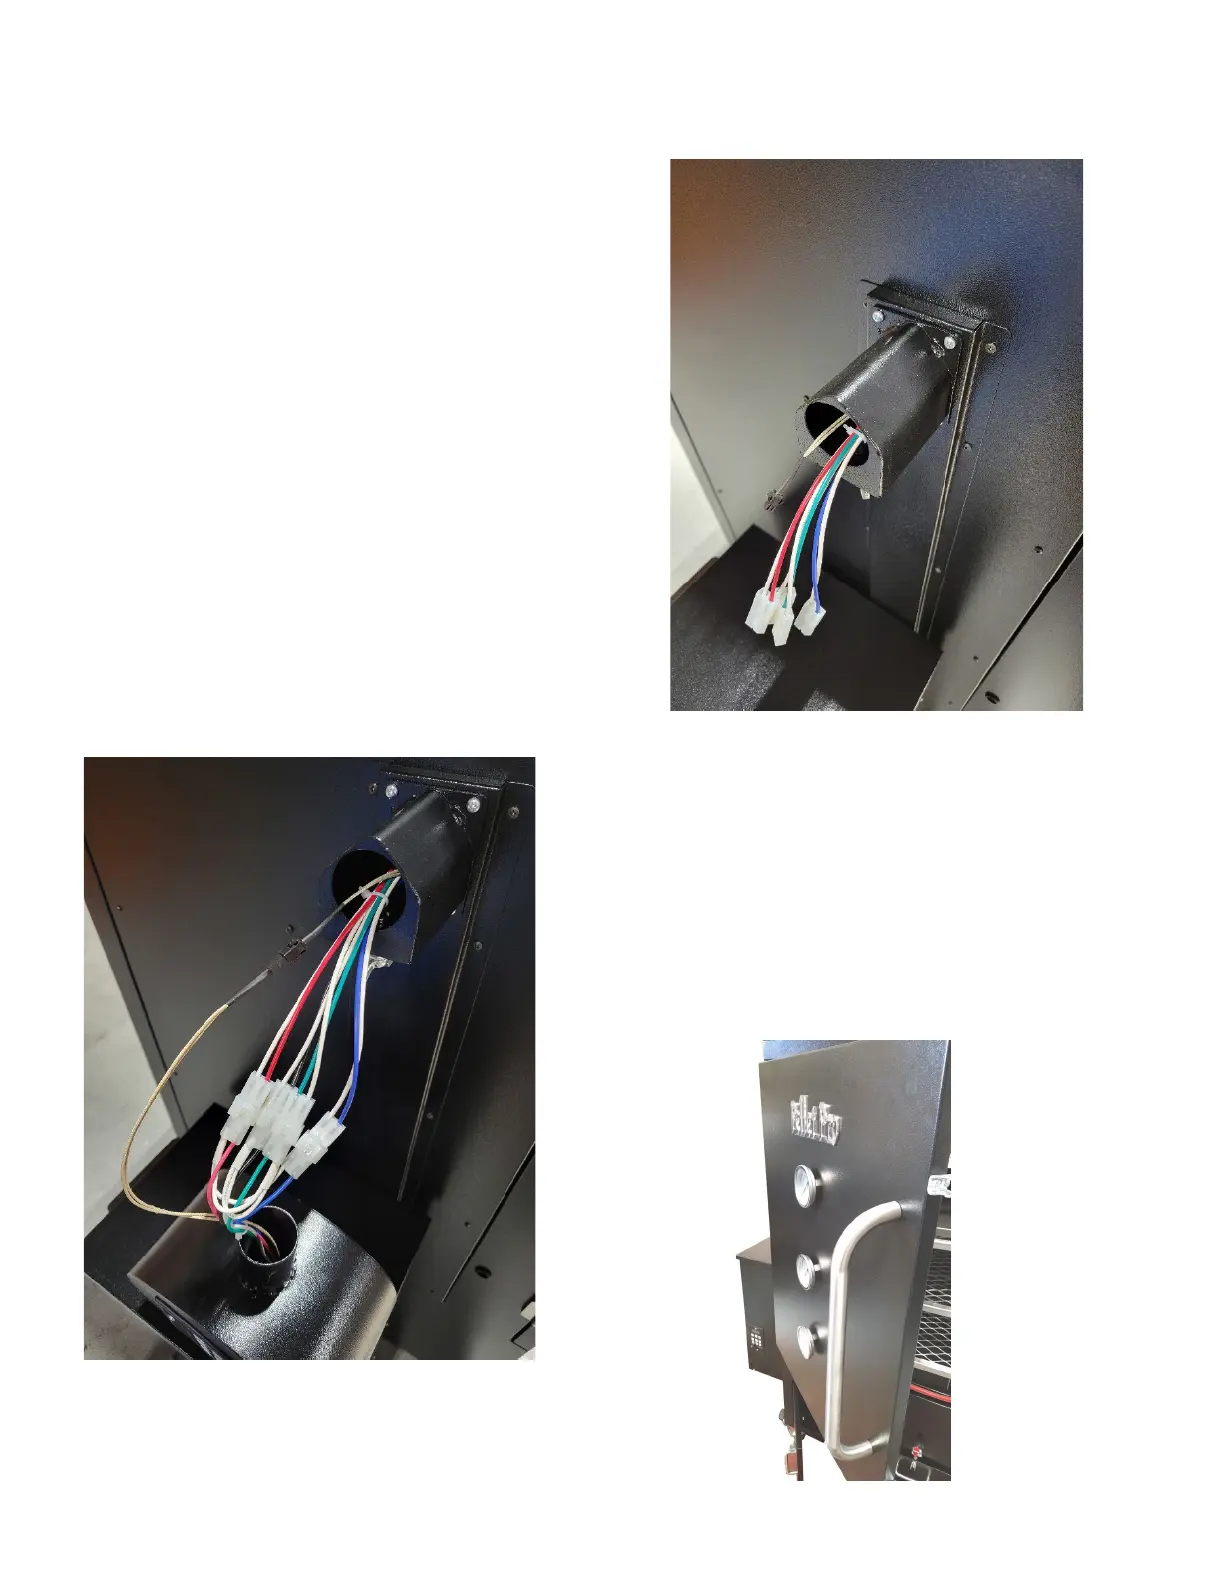
6. Locate the PID Controller Housing and remove the mounting
piece by loosening the large set screw.
7. Attach the mounting piece to the cabinet using the screws that
are affixed to the cabinet. See picture to the right.
8. Connect the corresponding color-coded Molex Connectors and
RTD probe wires. Hide any extra wiring inside of the controller
housing. Please see picture to the left.
9. Attach the three temperature gauges to the door. Be sure to
tighten only finger tight.