V46 and V47 Repair Parts and Service Instructions
7
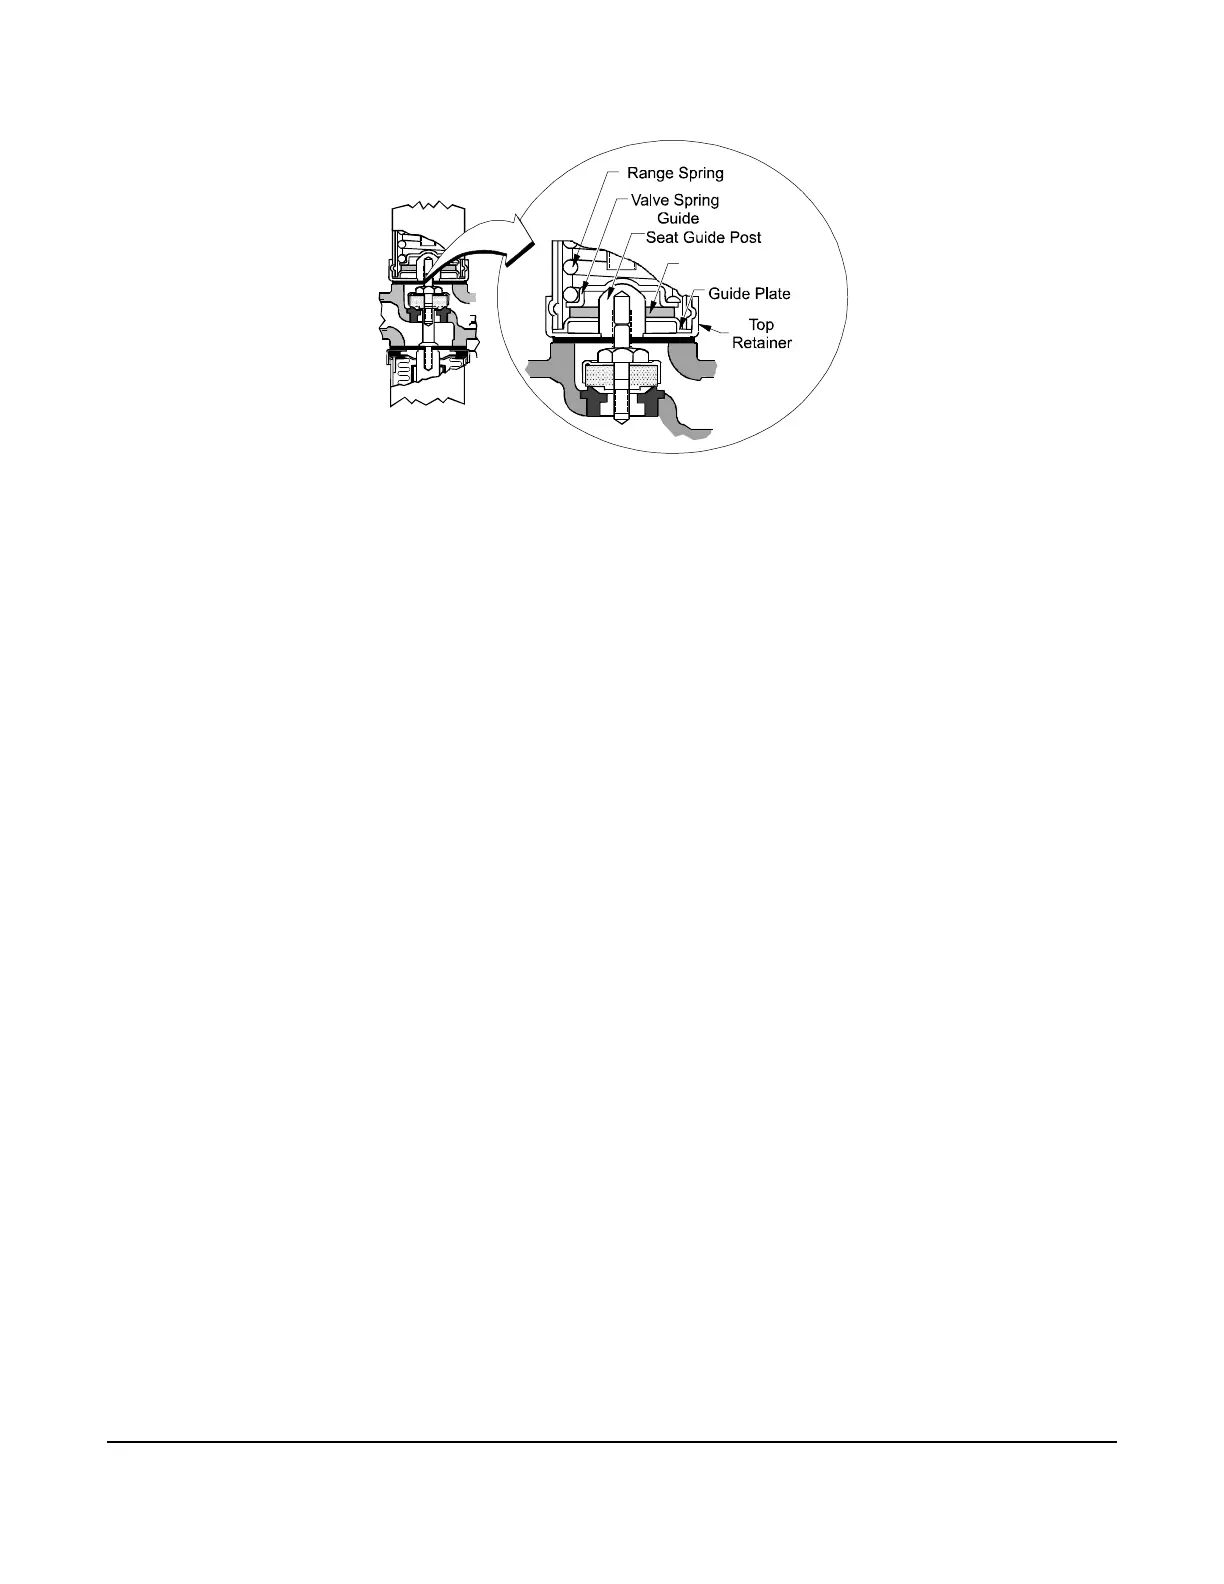
4. Remove the seat guide post (Figure 5).
5. Remove the rubber diaphragms (Figure 5).
6. Turn the disc stud counterclockwise to remove the valve stem assembly (Figure 5).
7. Remove the sensing element, bellows push rod, and diaphragms. See Figure 8.
8. Using the seat wrench supplied with the kit, remove the old valve seat and replace it with the new valve seat
(Figure 5).
9. Assemble the new valve stem, disc, disc cup, and disc stud, and place into the valve body (Figure 5).
10. On 1 in. and larger pressure valves and all temperature valves, replace the guide plate gasket and bellows
sealing ring (Figure 8).
11. If servicing a V47 or V46 valve other than low flow, place new diaphragms on the sensing element end of the
valve stem assembly. Use two diaphragms on 3/8 in., 1/2 in., and 3/4 in. valves and three diaphragms on 1 in.
and larger valves. Screw the diaphragm into place with the bellows push rod. Attach the sensing element to the
valve body. See Figure 5.
Figure 6: ISO-loss Washer
 Loading...
