Do you have a question about the Pentair 78241100 and is the answer not in the manual?
Lists part numbers and descriptions for replacement components.
This document provides comprehensive installation instructions for Pentair SpaBrite® and AquaLight® light niches, designed for use in swimming pools, spas, and fountains. The manual emphasizes critical safety information, particularly concerning electrical hazards, and outlines specific installation procedures for both vinyl liner/fiberglass and concrete/gunite pools.
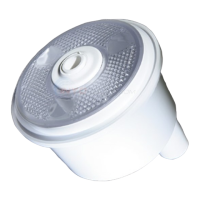
The Pentair SpaBrite® and AquaLight® light niches serve as the fixture housing for underwater lights in swimming pools, spas, and fountains. These niches are designed to securely hold the light fixture, provide a waterproof enclosure, and facilitate proper electrical bonding and grounding connections. They are essential components for installing underwater lighting systems, ensuring both the functionality of the light and the safety of the pool environment. The niche allows for the light to be positioned at a specific depth and orientation, with the pilot screw hole at the 12 o'clock position, which is crucial for the correct operation and appearance of Pentair lights. The design accommodates various pool construction types, including vinyl liner/fiberglass and concrete/gunite, with specific installation methods tailored to each. The niche also provides a pathway for electrical conduit and bonding wires, connecting the light fixture to the junction box or low voltage transformer and the pool's bonding grid.
The light niches are designed for specific applications, with distinct installation methods depending on whether they are used in a swimming pool/spa or a fountain. For swimming pools and spas, the wet-niche luminaire (light) must be installed using the fixture housing (forming shell) only, and the fountain fixture stand should not be used. For fountain applications, the wet-niche submersible luminaire (light) can be installed using either the fixture housing (forming shell) or a fountain fixture stand. This flexibility allows for appropriate installation based on the intended use and specific fixture requirements.
The installation process for vinyl liner/fiberglass pools involves punching or drilling sealing and retainer holes, along with a large panel hole, as per the provided template. A double wall gasket is placed around the niche flange, and the stainless steel light niche is inserted through the wall panel from the inside of the pool. The retainer screw holes are aligned, and fillister head retainer screws are used to fasten the back-up ring and rear gasket to the back of the wall panel, sandwiching the wall panel between two gaskets. For vinyl pools, the vinyl liner is installed next. The front gasket, with larger holes for the retainer screw heads, is aligned with the brass-chrome sealing ring and fastened tightly to the light niche using flat stainless screws. The pilot screw hole of the sealing ring must be at the center top. Screws are inserted and tightened through the sealing ring, front gasket, vinyl liner (if present), light niche flange, double wall gasket, wall panel, rear gasket, and into the back-up ring. Finally, for vinyl liner pools, the liner is cut along the inside diameter edge of the sealing ring.
For concrete/gunite pools, the niche's position on the vertical wall is crucial, with the top of the light lens requiring a minimum depth of 18 inches below normal water level, unless the light is UL listed for shallower depths. The conduit is connected to the niche using a recommended thread sealant, and the niche is secured to rebar with tie wires, ensuring the pilot screw receptacle is at the top. The conduit must be supported to hold the niche at the proper distance from the rebar, so the front of the mounting ring is flush with the desired finish surface. If the pool surface is to be plastered, concrete cut-back must be allowed for plaster thickness, ensuring the finished concrete surface is cut back behind the niche flange and is flat and flush with the brass mounting ring for a snug fit between the light and wall.
A critical usage feature across all installations is the proper orientation of the niche, with the pilot screw hole at the 12 o'clock position. This ensures the correct alignment of Pentair lights. The junction box or low voltage transformer must be located at least eight inches above the maximum water line and at least four inches above ground level or the pool deck, whichever is greater. Additionally, it must be no less than 48 inches from the inside wall of the pool, unless separated by a solid fence, wall, or other permanent barrier, adhering to NEC 680.24.
While the manual primarily focuses on installation, several aspects relate to the long-term integrity and safety of the niche, which can be considered maintenance-related features. The emphasis on proper bonding and grounding connections is paramount for preventing electrical hazards. The niche-fixture housing must be bonded to all other metallic items within five feet of the pool using a No. 8 AWG bond wire, as per NEC 680.26. If non-metallic conduit is used, a No. 8 AWG bonding/grounding wire must be installed through the conduit from the junction box to the bonding/grounding lug inside the niche. The wire/lug connection must be sealed with a listed sealant, such as 3M™ Scotchcast™ Potting Kit 2136 or equivalent, to protect against possible pool water corrosion, adhering to NEC 680.23. This sealing prevents water ingress and corrosion, which could compromise the electrical connection over time.
The use of specific Pentair lighting fixtures with this niche is also a maintenance-related instruction, as it ensures proper bonding and grounding connections. Using non-Pentair fixtures could create electrical hazards. The instruction to never replace lights by splicing wire underwater or behind the niche highlights a critical safety and maintenance practice, emphasizing that any electrical work should be done in a dry, accessible location, typically at the junction box, to prevent water intrusion and electrical shock.
The durability of the installation is also supported by the detailed instructions for securing the niche and ensuring proper sealing. For vinyl liner/fiberglass pools, the use of gaskets and the specific tightening sequence of screws contribute to a watertight seal, preventing leaks that could lead to structural damage or electrical issues. For concrete/gunite pools, the precise cut-back for plaster thickness and ensuring a flat, flush surface around the niche's mounting ring are crucial for a snug fit and long-term integrity, preventing water from seeping behind the niche and causing damage.
The manual also implicitly supports ease of future maintenance by providing a list of replacement parts, including screw kits, sealing rings, front gaskets, back-up rings, and rear gaskets. This ensures that if any component of the niche assembly needs to be replaced due to wear or damage, the correct parts are identifiable and available, facilitating repairs without needing to replace the entire niche. The detailed diagrams and part numbers aid in accurate identification and ordering of these components.
Overall, the Pentair SpaBrite® and AquaLight® light niches are designed with a strong emphasis on safety, proper electrical integration, and structural integrity, which are all critical for the long-term, trouble-free operation of underwater lighting systems in various aquatic environments.
| Model Number | 78241100 |
|---|---|
| Product Type | Underwater Light |
| Type | LED |
| Voltage | 12V |
| Light Color | White |
| Beam Angle | 120 degrees |
| Housing Material | Stainless Steel |
| Cable Length | 50 feet |
| IP Rating | IP68 |
| Installation Depth | Up to 10 feet |