1. This impact wrench is rated to 1 in. USS bolt size. Rating will decrease for U-Bolts, Long
Cap Screws, Spring Fasteners and rusted or corroded fasteners. All of these factors
absorb power and reduce torque capability.
2. Use the simplest socket to wrench hook-up. Any additional extensions, U-joints or
adaptors will absorb power and reduce torque capability.
3. Use only 3/4 in. Drive impact sockets designed for impact wrenches.
4. Forward/Reverse. Move lever in direction indicated by arrow. Push lever to the right
below “F” for Forward and to the left below “R” for Reverse operation. Do not attempt to
change direction while tool is running.
5. If fastener bogs, slows or binds
the tool, or if the fastener fails
to move after 5 seconds, use a
larger size impact wrench with
a higher torque rating.
Overloading this tool will cause
premature wear and/or
permanent damage to internal
and external drive parts and
will void warranty.
6. Direction selector lever also
controls the air power regulator
with 3 forward speeds and 3
reverse speeds for varying
levels of torque as indicated by
numbers 1, 2 and 3 for each
direction.
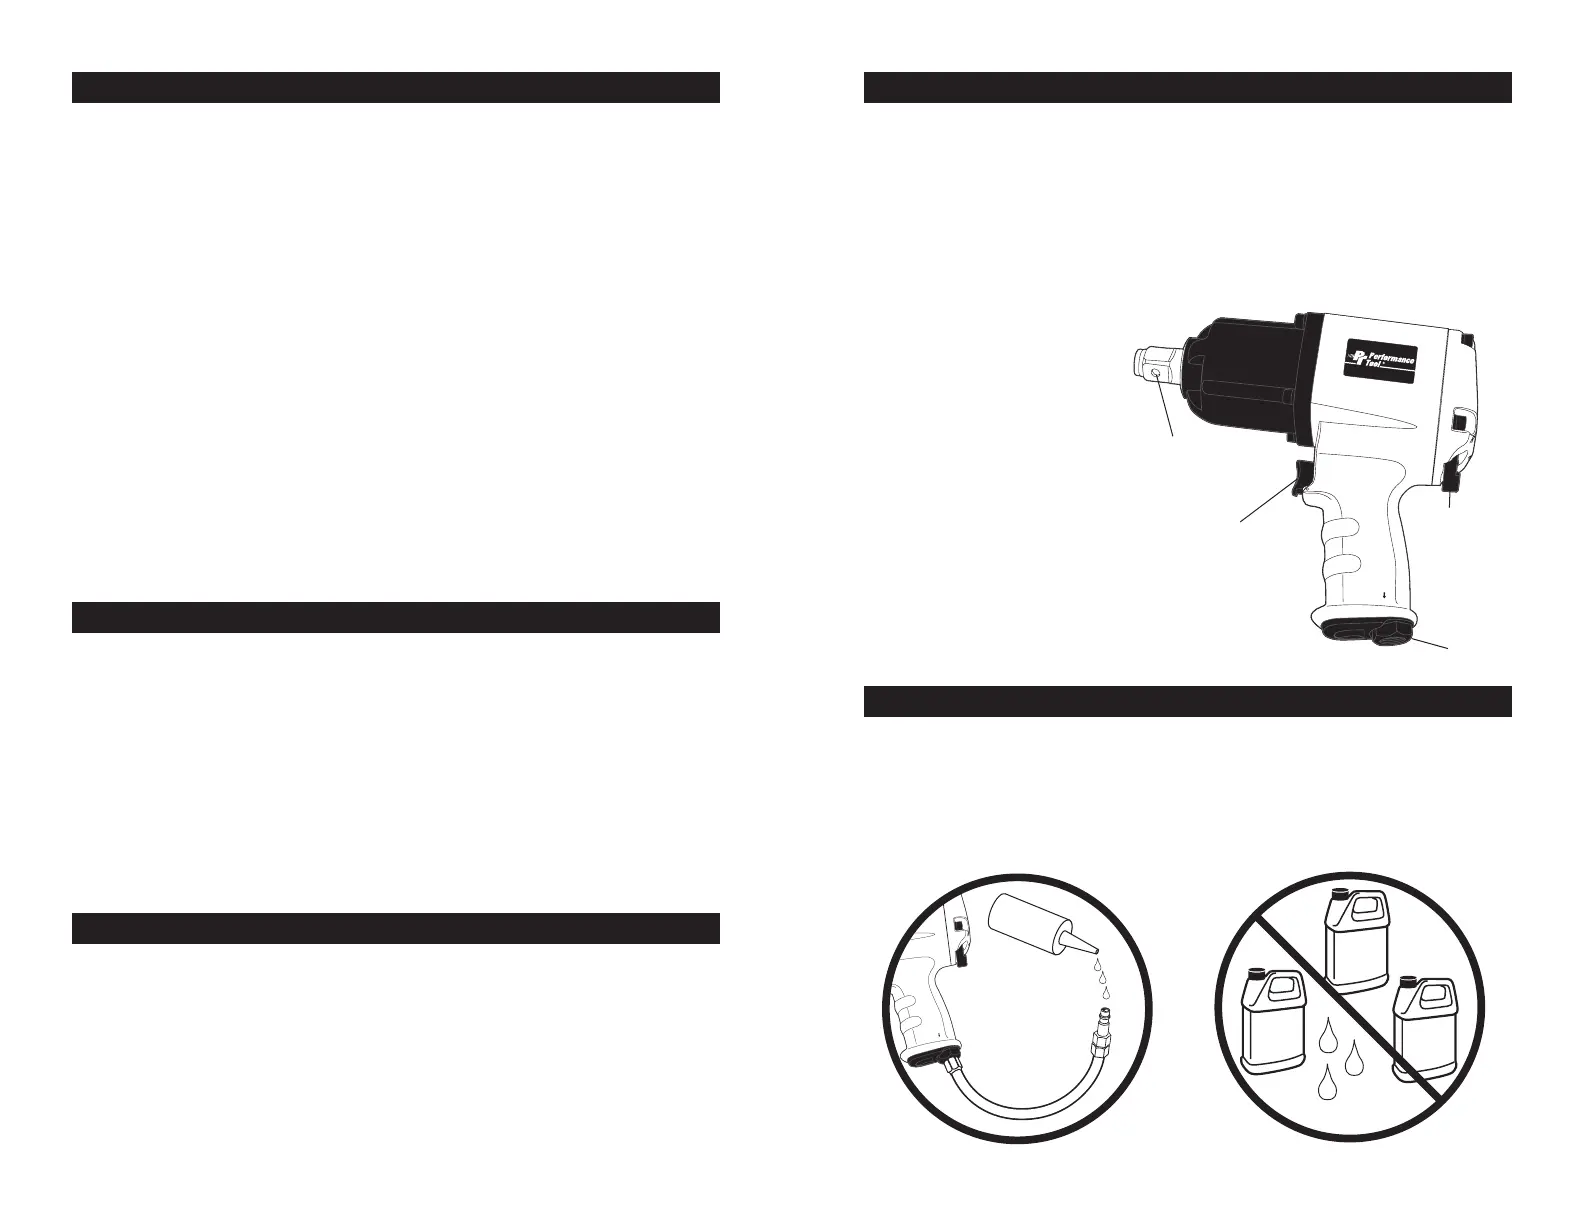
Oil tool before each use. 4 to 5 drops of a good grade Air Tool Oil placed in the air inlet is
sufficient. Use proper air pressure and CFM rating listed for this tool.
Drain water from hoses and compressor tank. Water in the air supply line will cause
gumming and loss of power. Clean the air filter on the supply line and flush the tool with
gum solvent or a 50/50 mix of air tool oil and kerosene. It may be necessary to
disassemble the tool to properly clean and re-lubricate.
LUBRICATION & MAINTENANCE
Motor
Oil
Trans.
Fluid
Brake
Fluid
Water
No
Whip
hose
Air Tool
Oil
Yes
IMPORTANT SAFETY INFORMATION
ASSEMBLY / INSTALLATION
1. You will need to prepare the 3/8" Hose Barb or a Quick-disconnect Coupler Plug to
connect to the air inlet on the impact wrench. Wrap the Coupler Plug with pipe thread
seal tape before threading it into the Air Inlet. Connect the Hose Barb to a 3/8" I.D. Hose
end. If using a 3/8" Coupler Plug connect to a Quick-Disconnect coupler on a 3/8" ID Air
Source Hose to the tool.
Note: If you are not using an automatic oiler system, before operation, add a few drops of
Pneumatic Tool Oil to the airline connection. Add a few drops more after each hour of
continual use.
2. Set the air pressure on your compressor to 90 PSI. Do not exceed the recommended air
pressure of 90 PSI.
3. Check the air connection for leaks. Once you are satisfied there are no leaks, turn off the
air compressor and disconnect the tool.
Clean air of correct air pressure is recommended for the power supply for this tool. A
maximum of 90 PSI at the tool is recommended for most air tools of this class. Check
specifications section for recommended pressure. (Depending on length of air hose and
other circumstances, air pressure at compressor may need to be increased to 100 PSI to
ensure 90 PSI at the tool.)
Water in the air hose and compressor tank contributes to reduced performance and
damage of the air tool. Drain the air tank and filters before each use and as necessary to
keep the air supply dry.
Hose length over 25’ causes loss in line pressure. Increase hose I.D. or increase
compressor pressure to compensate for the pressure loss. Use an in-line pressure
regulator with gauge if air inlet pressure is critical.
AIR SOURCE
13. Check for damaged parts. Before using any tool, any part that appears damaged
should be carefully checked to determine that it will operate properly and perform its
intended function. Check for alignment and binding of moving parts; any broken parts
or mounting fixtures; and any other condition that may affect proper operation. Any
part that is damaged should be properly repaired or replaced by a qualified technician.
14. Maintenance. For your safety, maintenance should be performed regularly by a
qualified technician using original PERFORMANCE TOOLS® replacement parts.
Failure to do so can lead to accidents for the operator. Use of any other parts will void
the warranty. Only use accessories intended for use with this tool. Approved
accessories are available from Performance Tool®. Use only accessories that are
recommended by the manufacturer for your model. Accessories that may be suitable
for one tool may become hazardous when used on another tool.
WARNING: Repetitive motions or exposure to vibration may be harmful to your hands and arms.
WARNING: This product and its packaging contain a chemical known to the State of California
to cause cancer, birth defects, or other reproductive harm.
WARNING: The warnings, cautions, and instructions discussed in this instruction manual cannot
cover all possible conditions and situations that may occur. It must be understood by the
operator that common sense and caution are factors which cannot be built into this product, but
must be supplied by the operator. Read and understand all of the instructions provided in the
instruction manual of this product, as well as, any other tool (s) used with this product.
OPERATION
Air Inlet
Forward/
Reverse
Lever
Pin Lock Hole
Trigger
 Loading...