1. Remove the air inlet protective cap from the air inlet.
2. Mount a male plug by hand into the air inlet.
NOTE: Use thread sealant tape on the male plug and tighten it with a wrench for
airtight connection. Do not overtighten.
3. Place 2 - 3 drops of air tool oil into the male plug before each use.
4. Choose the correct impact socket (not provided) as needed and mount it onto the anvil.
5. If necessary, use an extension bar (not provided) and then mount impact socket onto
the bar.
6. Connect air supply hose to the male plug.
7. Set the working pressure at 90psi/6.3bar for best tool performance.
NOTE: Working pressure refers to the air line pressure set to tool when tool is under
working conditions.
OPERATION
1. How to install/tighten threaded fasteners.
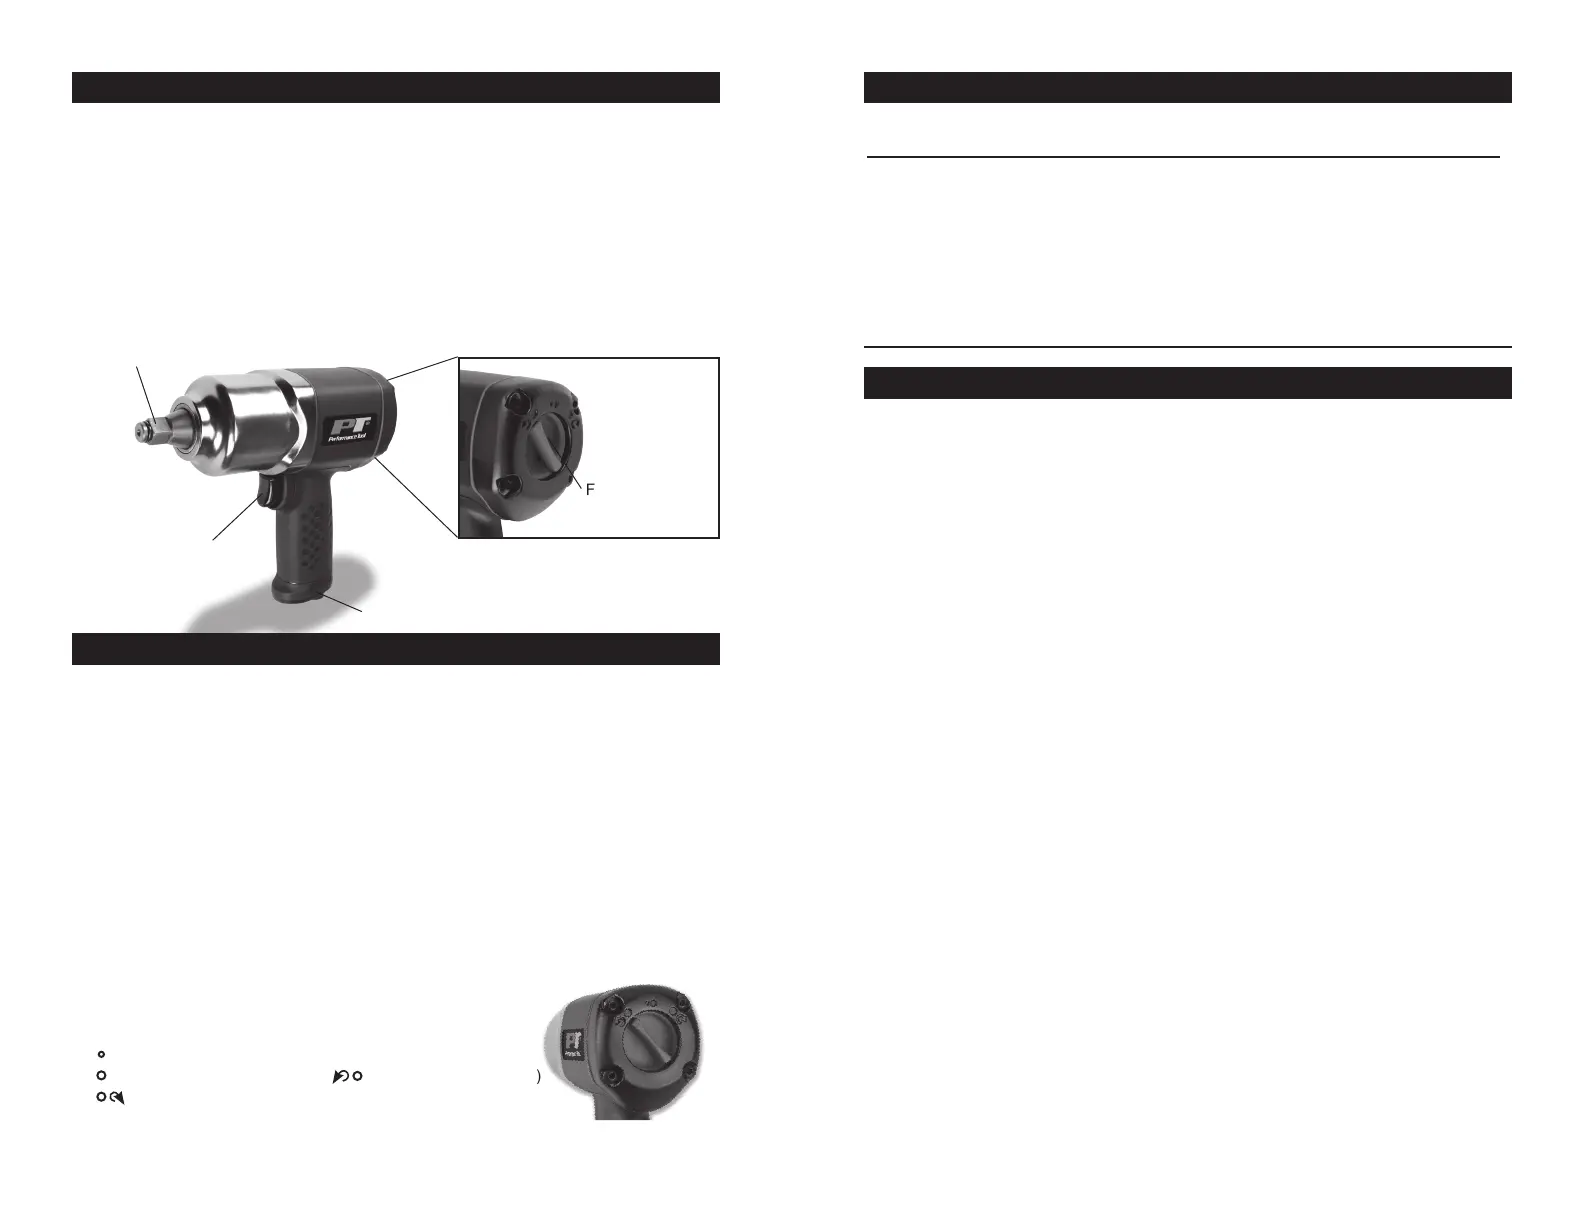
Turn the switch forward and have the arrow on the switch pointing at either of the three
dots on the back housing as shown. Press the variable speed trigger to apply the
needed force for your application. The tool anvil runs clockwise.
2. How to remove/loosen threaded fasteners.
Turn the switch backward and have the arrow on the switch pointing at the large dot on
the back housing as shown in the picture above. Press the trigger. The tool anvil runs
counterclockwise.
NOTE: This tool features a power regulator valve. Turn the switch slowly forward until
desired output is achieved. The three dots (small, medium, large) do not denote a
specific power output but are only for reference. "Setting 1" (small dot) is the least
amount of power, which is suitable for just mounting threaded fasteners on workpiece
while "Setting 3" (large dot) is the greatest amount of power, which is for tightening
threaded fasteners on workpiece. This tool operates in maximum power in reverse,
which releases threaded fasteners from workpiece with ease. Choose the correct speed
level needed on workpiece when mounting or releasing threaded fasteners by
understanding the reference torque listed below.
ASSEMBLY
Air Inlet
Forward/Reverse
Switch
Anvil
Trigger
Adjustable Torque Settings:
Setting Torque in Forward Torque in Reverse
1 0 - 295 ft/lbs (+/-10%)
2 0 - 450 ft/lbs (+/-10%) 0 - 1010 ft/lbs (+/-10%)
3 0 - 885 ft/lbs (+/-10%)
NOTE: Make sure that this tool has the correct torque to tighten/release threaded fasteners. The
torque applied to threaded fasteners can be found in their instructions or manuals. Overtightening
of your fasteners will strip threads or break bolts resulting in costly or time consuming repairs.
4
INSUFFICIENT POWER:
Probable Cause Solution
Dirty or clogged air passages......... Flush and lubricate tool, drain air tank and supply line
Insufficient air supply ...................... Increase line pressure, Make sure compressor
matches tool's air pressure and consumption needs
Air leakage ...................................... Use PTFE tape at all fittings and joints. Check tool for
worn or damaged O-rings & seals.
Worn/damaged wear & tear parts .. Replace as necessary.
Tool matching ................................. Be sure you are using a tool suited for the torque
requirements of the job at hand.
TROUBLESHOOTING
CARE & MAINTENANCE
An in-line oiler is recommended to be installed on air supply line as it increases tool life
and keeps the tool in sustained operation. The in-line oiler should be regularly checked
and lled with air-tool oil. Proper adjustment of the in-line oiler is performed by placing a
sheet of paper next to the tool's exhaust ports and holding the throttle open approximately
30 seconds. The in-line oiler is properly set when a light stain of oil collects on
the paper. Excessive amounts of oil should be avoided.
In the event that it becomes necessary to store the tool for an extended period of time, it
should receive a generous amount of lubrication at that time. The tool should be run for
approximately 30 seconds to ensure oil has been evenly distributed throughout the tool.
The tool should be stored in a clean and dry environment.
Recommended lubricants: use air-tool oil or any other high-grade turbine oil containing moisture
absorbent, rust inhibitors, metal wetting agents and an EP (extreme pressure) additive.
Clean the tool all over with a cotton rag after each use. Keep the tool in a dry and safe
place out of reach of children.
5
 Loading...