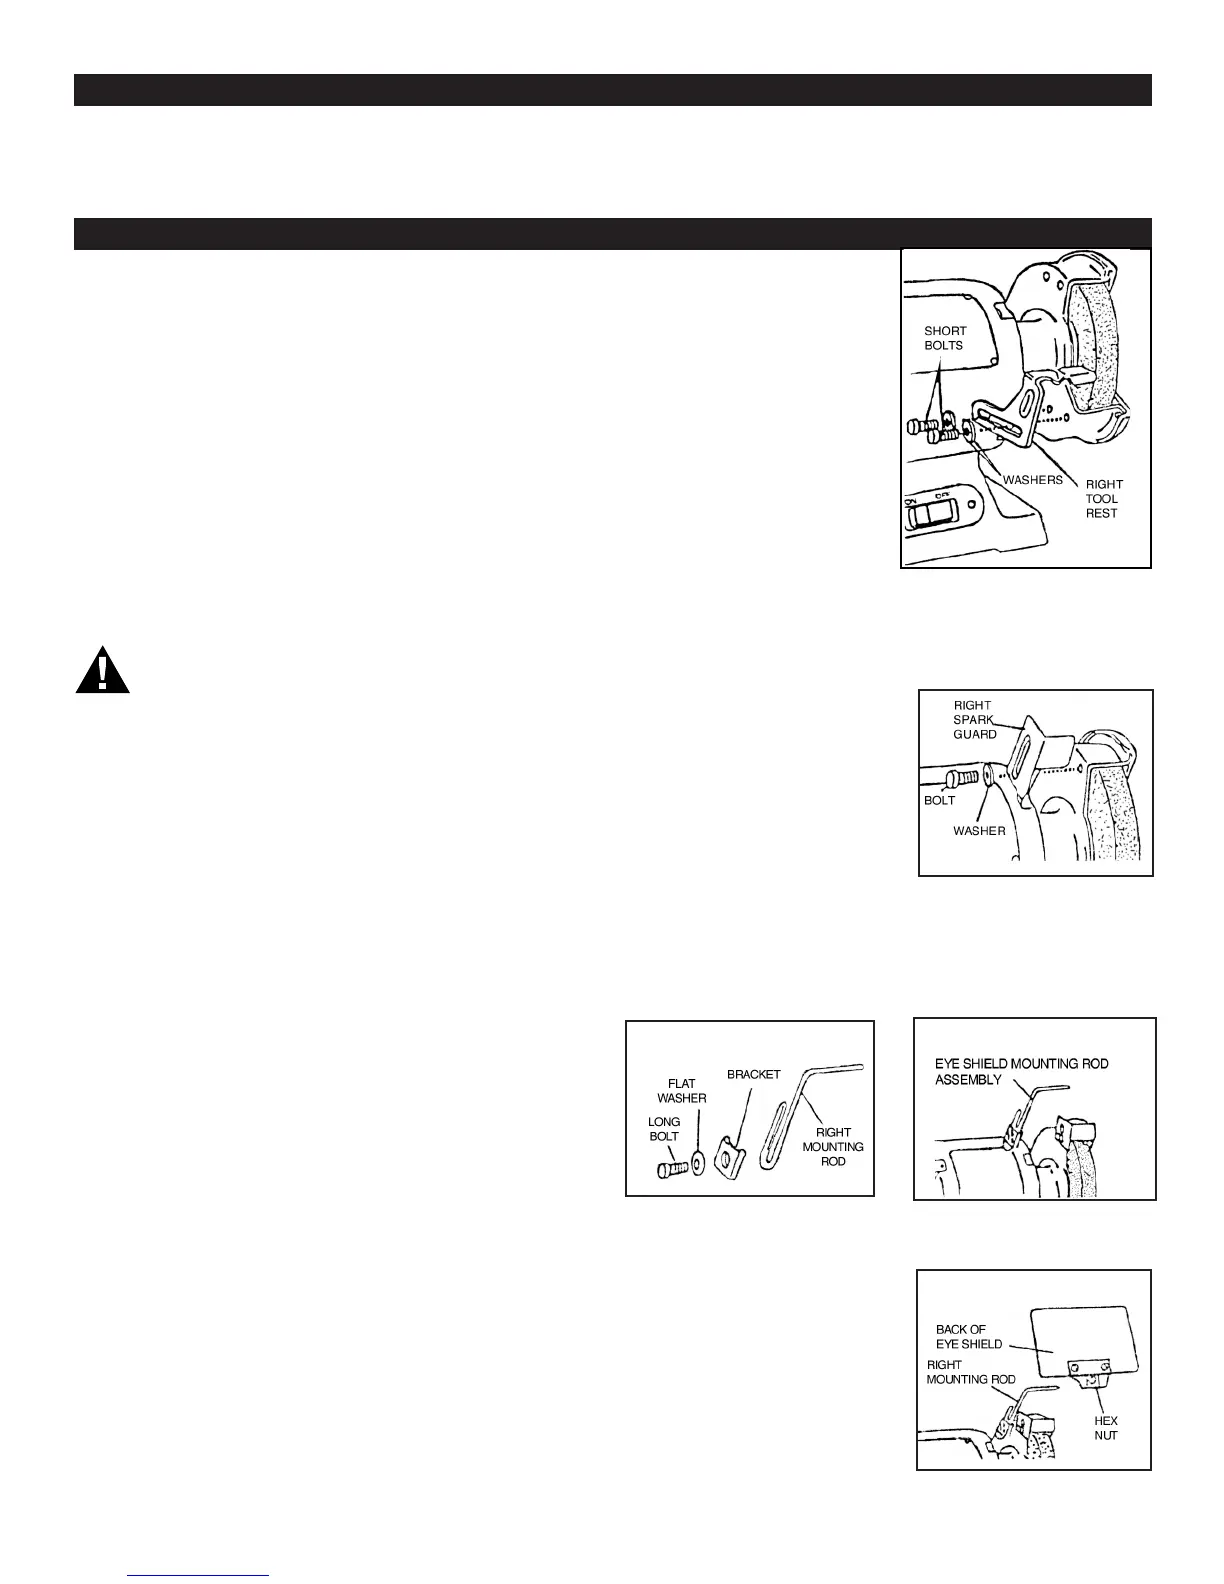
INSTALLING TOOL RESTS
Remove the tool rests from the
package and install them to the
wheel guards as shown in Figure 1.
Use the bolts and washers to secure
them in place.
Note: There is a left and right tool
rest. Refer to Figure 1 to ensure that
you install them correctly.
When in actual use, the tool rests
should be adjusted to within 1/16”
of the grinding wheel.
INSTALLING THE SPARK GUARDS
Select the two spark guards and the two smaller bolts and washers. Install
the spark guards to the wheel guards of your grinder as shown in Figure 2.
Adjust them to within 1/16” of the grinding wheel.
Note: There is a left and right spark guard. Refer to Figure 2 to ensure that
you install them correctly.
INSTALLING THE EYE SHIELDS
Note: There is a left and right eye shield mounting rod. Examine Figure 3
to ensure that you install them correctly. The one pictured in Figure 3 is for
the right wheel guard as you face the front of the tool. Assemble one rod,
one bracket, one bolt and one flat washer as shown and install it to the
wheel guard of the grinder. Position it with the arm high, as shown in
Figure 4, and tighten the bolt securely.
Note: The eye shields are identical and will fit properly on either side of the
grinder. However it may be necessary to loosen the center hex nut in
order to slip the shield over the mounting rod.
After you have installed each eye
shield mounting rod to the grinder,
attach the eye shields to the rods,
as shown in Figure 5. Install them in
such a way that the three hex nuts
on each eye shield are on the back
side, away from the operator when the
tool is in use.
Tighten the center hex nut so that the
shield can be moved but will be tight enough to stay in place. ALWAYS
position the eye shields between your eyes and the grinding wheel.
Eye Shield W50020
ON/OFF Toggle Switch W50021
36 Grit Grinding Wheel W50022
60 Grit Grinding Wheel W50023
REPLACEMENT PARTS
BENCH GRINDER ASSEMBLY
LOOSE PARTS CONTENTS:
Tool Rest 2 each
Mounting rods 2 each
Eye Shields 2 each
Brackets 2 each
Spark Guard 2 each
3/4 in. Bolts 2 each
1/2 in. Bolts 4 each
5/8 in. Bolts 2 each
Large Washers 6 each
Washers 2 each
The following tools (not included) are needed for assembly and
alignment: 8, 10, and 12mm Combination wrench, Phillips
screwdriver, Adjustable wrench
WARNING: If any parts are missing DO NOT operate this
machine until the missing parts are replaced. Failure to do
so could result in possible serious injury. If parts are missing,
contact customer service at 1-800-426-1262.
DO NOT begin assembly of your bench grinder until you are certain
the tool is NOT plugged in.
DO NOT begin assembly until you are certain the bench grinder is in
the “OFF “ position.
DO NOT begin assembly until you are certain that the grinding
wheels are securely tightened to your bench grinder.
1. Inspection- To be certain the grinding wheels have not been
damaged in shipment, inspect carefully. If you suspect a wheel of
being fractured, REPLACE IMMEDIATELY. Fractured wheels may
shatter causing serious injury or property damage.
2. Mount bench grinder (hardware not included) on a firm level
surface where there is plenty of room for handling and properly
supporting the workpiece. Keep in mind the nearest electrical
receptacle.
3. Avoid a dangerous environment. Use the grinder in a dry, indoor
place protected from the rain. Keep work area well lit.
4. Disconnect tools before servicing or when changing accessories
such as grinding wheel.
5. Keep guards in place and in working order. To avoid accidental
starting, make sure the power switch is in the “OFF” position before
plugging in.
6. Use recommended accessories. Consult the owners manual for
recommended accessories. The use of improper accessories may
cause risk of injury to yourself and others.
Fig. 1
Fig. 2
Fig. 3
Fig. 4
Fig. 5
4
 Loading...