Installing closed back accessories – cont’d
1. Place the inner accessory washer (1) onto
the spindle (2) (Fig. 3).
NOTE: Make sure the keys (3) of the inner
accessory washer are engaged in the matching
slots (4) in the tool less accessory holder.
2. Place the accessory mount (5) onto the
pins in the inner accessory washer (6).
3. Place the outer accessory washer (7) over
the accessory mount.
NOTE: Make sure the slots in the outer
accessory washer (8) are engaged with the
mounting pins of the inner accessory washer.
4. Screw the accessory screw (9) into the
spindle and tighten using the 5mm hex key
(10).
NOTE: After tightening the accessory screw,
check to make sure the accessory is properly
aligned with the mounting pins.
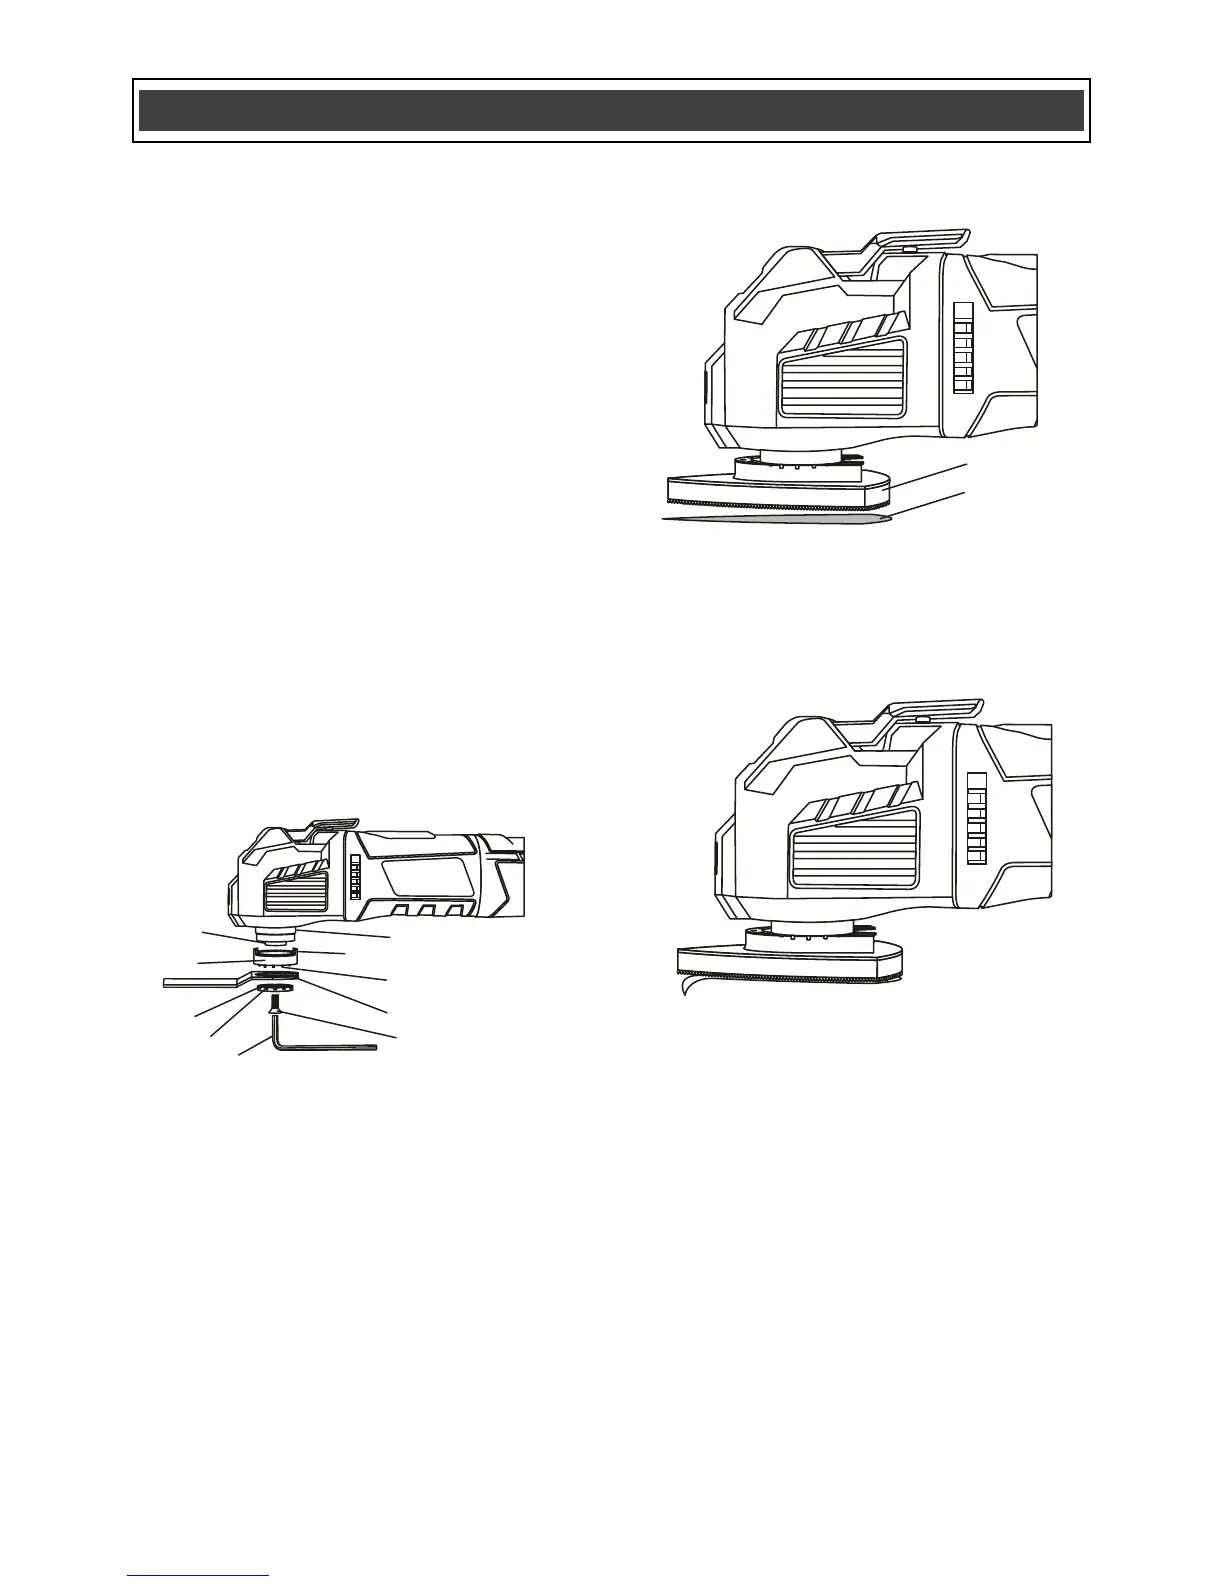
INSTALLING SANDPAPER
1. Install the hook & loop sanding pad (1)
onto the tool (Fig. 4).
2. Firmly press the sandpaper (2) onto the
hook & loop pad.
NOTE: Press the sandpaper firmly onto the
hook & loop pad.
3. To remove the sandpaper, simply peel the
sandpaper away from the hook & loop pad
(Fig. 5).
ON/OFF SWITCH
1. To turn the tool ON, slide the ON/OFF
switch (1) toward the front of the tool
(Fig. 6).
2. To turn the tool OFF, slide the ON/OFF
switch toward the rear of the tool.

 Loading...