I
G
E
F
11
2. Attach the eyeshield assembly(C) to the wheel guard using a flat washer(I),
lock washer(J) and eyeshield knob(H).
NOTE: The eyeshield assembly w/ magnifier mounts on the left side.
WARNING: The use of attachments or accessories from other types of
grinder might be hazardous and could cause serious personal injury.
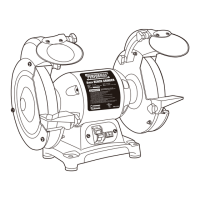
MOUNTING WORK REST(Fig. 5)
1. Turn off and unplug the grinder
NOTE:
The grooved tool rest mounts on the left side.
NOTE:
Adjust the distance between the wheel and the tool rest to maintain
1/16 in. or less separation as the diameter of the wheel decreases with use.
WARNING: Always make sure your bench grinder is securely mounted to a
workbench. Failure to do so could result in an accident or possibly serious
personal injury.
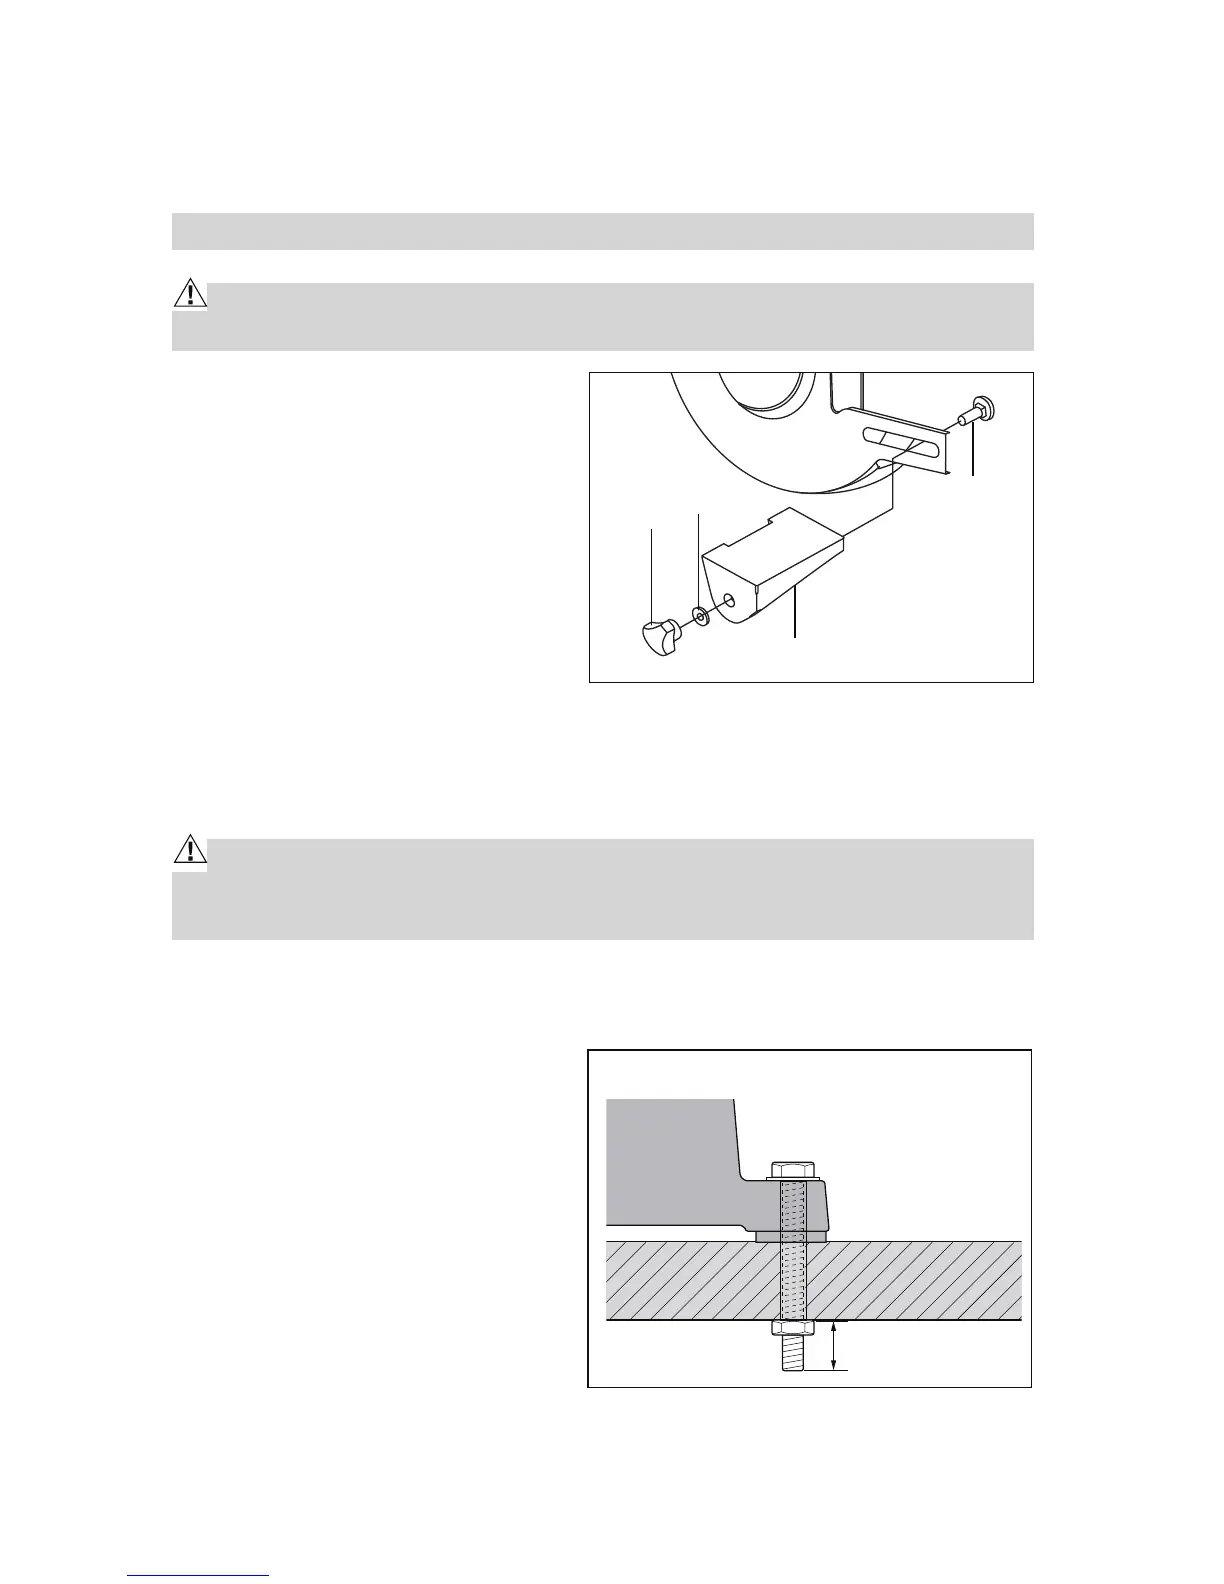
MOUNTING GRINDER
NOTE:
Hardware not included.
TO WORKBENCH (Fig.6)
If grinder is to be used in a
permanent location, it should be
fastened securely to a firm supporting
surface, such as a workbench with
bolts.
1. Turn off and unplug the grinder
2. Mark the position of the four
mounting holes provided in the
base of the machine on the
workbench.
X
Fig. 6
Fig. 5
2. Using the carriage bolt(F), flat
washer(I) and tool rest knob(G),
attach the tool rest(E) to the
inside of the wheel guard as shown.
3. Drill a hole at each of the marked positions.
 Loading...