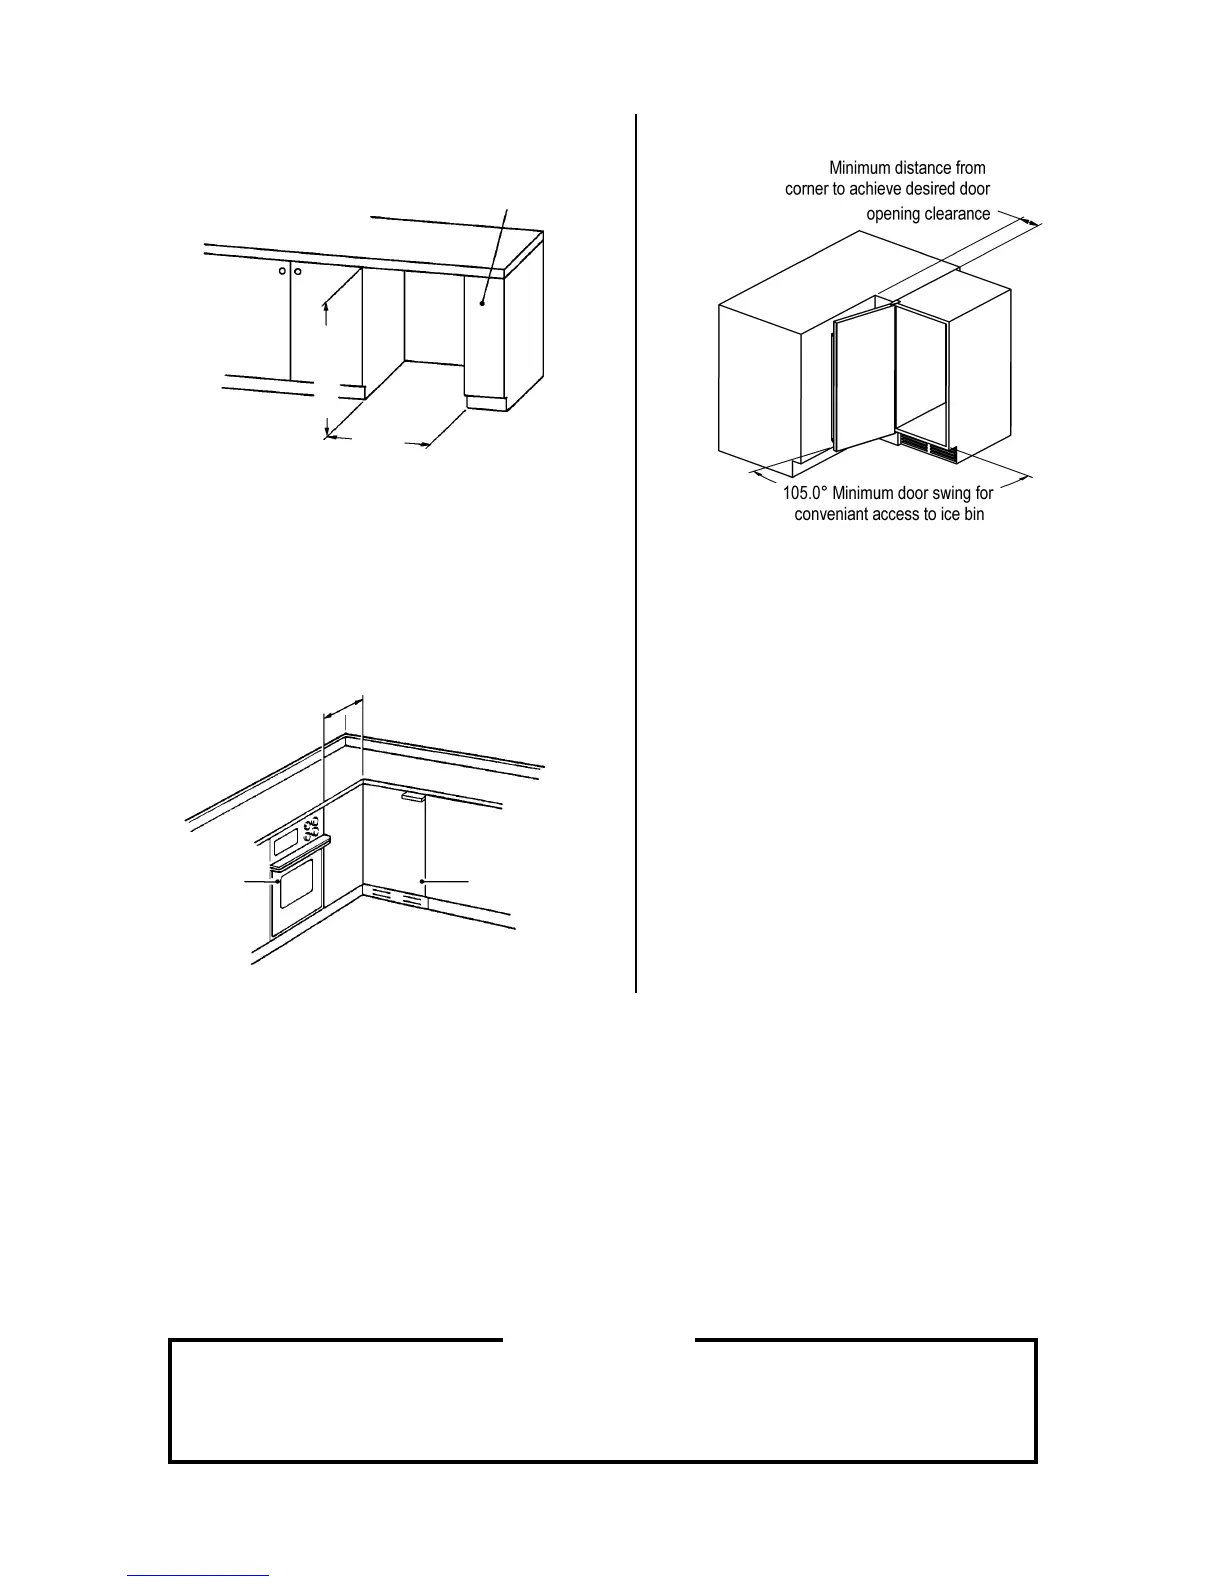
4 7/8"
Fig. 4
7
3) To build in between a unit and an open
space:
15"
Cabinet
Min. 34"
Do not build in the Ice Maker at a corner where
the Door will hit other equipment such as an
oven handle or where the Ice Maker cannot
be pulled out for service.
[b] BUILDING IN THE ICE MAKER
1) Make water supply and drain connections.
2) Plug in the Ice Maker.
3) Build in the Ice Maker:
Level the Ice Maker left-to-right and front-to-rear
IMPORTANT
While building in the Ice Maker, do not damage the water supply and drain
connections and the Power Cord.
Fig. 3
Use a cabinet or the like to support the counter
before building in the Ice Maker.
Min. 23"
Oven
Ice Maker
Fig. 5
4) To build into an L-shaped kitchen:
Slowly push the lower part of the Ice Maker into place. Beware of adjacent equipment.