This document is a comprehensive Use & Care Guide for Perlick Residential Undercounter Refrigeration units. It covers various aspects of the appliance, from initial setup and operation to maintenance and troubleshooting, ensuring users can maximize the functionality and longevity of their Perlick product.
Function Description
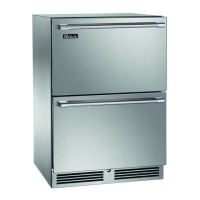
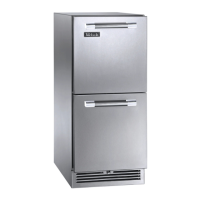
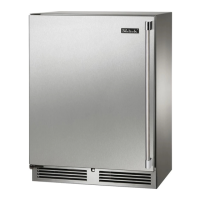
Perlick undercounter refrigeration products are designed for residential use, offering innovative solutions for various spaces within a home, including kitchens, bedrooms, entertainment rooms, basements, and bathrooms. These units are built with commercial-grade stainless steel, emphasizing beauty and durability. The core function is to provide reliable refrigeration, with models offering single-zone, dual-zone, and freezer capabilities, as well as specialized units like beverage centers and wine reserves. The appliances feature advanced temperature controls, interior lighting, and robust construction to maintain optimal conditions for stored items.
Usage Features
The guide details several key usage features:
- Master Switch: Signature Series products are equipped with a master power switch located behind the louvered toe kick, allowing users to turn the unit on or off.
- Interior Light: Door units include an interior light that illuminates when the door is opened. Specific models (HP24 and HH24) feature adjustable blue and white LED lighting, while HC and HA models have specialty appliance lights. A manual light switch is also available for displaying products through a glass door. Users are advised to keep the manual light switch in the OFF position when closing solid doors to prevent increased cabinet temperature and harder refrigeration system operation.
- Loading Product: Before storing perishables, the unit should be turned on and allowed to operate for at least 24 hours to stabilize temperatures. It's crucial not to block internal louvers and fan guard openings to ensure optimal performance.
- Checking Product Temperature: To accurately check the temperature, a thermometer should be placed in a plastic bottle partially filled with water, left in the unit for 24 hours without opening the door, and then checked.
- Digital Temperature Control (Signature Series Models):
- On/Off: Press the ON/OFF button to turn the unit on or off.
- Dual-Zone Instructions (HP24Z, HP24C, HP24D):
- Lower Compartment Temperature: Press and hold SET until "St1" with "F" flashes, then press SET again to display the current temperature. Use UP/DOWN arrows to adjust.
- Upper Compartment Temperature: Press and hold SET until "St1" with "F" flashes, then press DOWN once to see "St2". Press SET again to display the current temperature. Use UP/DOWN arrows to adjust.
- Temperature Scale: Press and hold the DOWN arrow for 3 seconds to switch between Fahrenheit and Celsius.
- Manual Defrost (HP24Z only): Press and hold the DEFROST button (melting snowflake) for 3-5 seconds.
- Single-Zone and Freezer Control (15", 24" Single-Zone, Sottile, 48", ADA Freezer):
- Set Target Temperature: Press and release SET to view the current setpoint.
- Change Setpoint Temperature: Press and hold SET until the setpoint with "F" flashes. Use UP/DOWN arrows to adjust.
- Manual Defrost (Freezer Models Only): Press the DEFROST button.
- Maximum/Minimum Stored Temperature: Press UP/DOWN arrows to view. To reset, press and hold SET until 'rst' flashes.
- Digital Temperature Control (C-Series Models):
- Setpoint Temperature: Press SET to display "SP", then press SET again to view and modify with UP/DOWN arrows.
- On/Off: Press and hold the ON/OFF button for at least 5 seconds to turn the unit off ("OF" displayed) or on.
- Dial Temperature Control (ADA-Compliant Models, excluding HA24F): A straight slot screwdriver is used to adjust the dial control located at the top rear panel.
- Colder Temperature: Turn the adjusting screw clockwise.
- Warmer Temperature: Turn the adjusting screw counterclockwise.
- Temperature Control OFF: Turn the adjusting screw completely counterclockwise until a click is heard.
Maintenance Features
Proper maintenance is crucial for the longevity and performance of Perlick units. The guide provides detailed instructions for seasonal maintenance and general cleaning:
- Seasonal Maintenance for UL-Approved Outdoor Models (Winterizing):
- Turn the unit OFF using the controller button (and master switch for Signature Series, or unplug/turn off circuit breaker for C-Series).
- Remove all contents.
- Remove the front grille.
- Clean the condenser with a vacuum cleaner to remove debris.
- Reinstall the front grille.
- Clean the interior and exterior with stainless steel cleaner and polish.
- Note: Do not cover the unit. Storing indoors is optional. Operating the unit below recommended temperatures voids the warranty.
- Spring Start-Up:
- Remove the grille.
- Check and clean the condensing unit with a vacuum cleaner.
- Reattach the front grille.
- Clean the interior and exterior with stainless steel cleaner and polish.
- Plug in the unit or turn on the circuit breaker.
- Turn on the master switch (if applicable) and press the OFF button once to turn the unit on.
- Allow 24 hours for the unit to stabilize operating temperature before use.
- LED/Light Bulb Replacement:
- Signature Series: Contact a Perlick Factory Authorized Service Center.
- C-Series & ADA-Compliant Series: Remove the glass light cover, unscrew the old bulb, and replace it with an identical or smaller bulb (Perlick part number 63716-1).
- Stainless Steel Care & Cleaning:
- Stainless steel can corrode if its passive layer is broken by mechanical abrasion, deposits/water, or chlorides.
- Prevention: Use non-abrasive tools (soft cloths, plastic scouring pads). Clean with polish lines, always scrubbing parallel to the grain. Use alkaline, alkaline chlorinated, or non-chloride cleaners at recommended strength. Rinse and wipe dry immediately after using chlorinated cleaners. Allow to air dry to maintain the passive film.
- Cabinet Interior/Exterior: NEVER use hydrochloric acid or abrasive cleansers. Glass panels can be cleaned with standard glass cleaner. Non-metallic surfaces and removable parts should be washed with a mild solution of soap, lukewarm water, and baking soda, then rinsed and dried thoroughly. Avoid getting water on lights, controllers, fan motors, and unfinished wood wine rack faces.
- Cleaning the Condenser: The condenser (behind the front grille cover) should be cleaned every three months using a soft bristle brush and vacuum to remove dust and lint. Avoid damaging or crushing the condenser fins or tubing.
The guide also includes a detailed troubleshooting section to help users diagnose and resolve common issues, such as no interior light, light staying on, noisy operation, temperature alarms, and the unit not running. It emphasizes the importance of disconnecting main electrical power before attempting any repairs or maintenance.