This manual describes the Perlick Residential Undercounter Refrigeration unit, a sophisticated appliance designed for residential use, offering advanced features for temperature control and product preservation. It is essential to read the instructions thoroughly before installation and operation to prevent damage and ensure safety.
Function Description
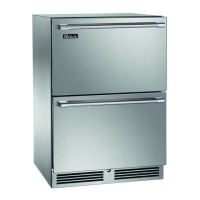
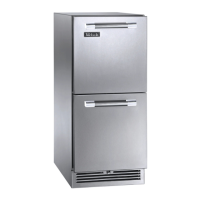
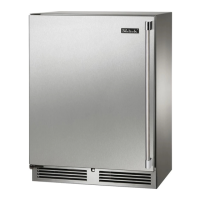
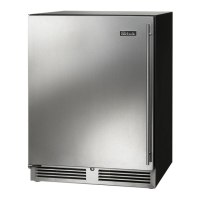
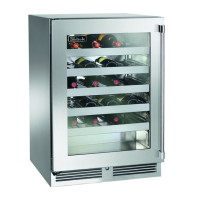
The Perlick Undercounter Refrigeration unit is designed to provide precise temperature control for various items, including beverages, food, and wine, depending on the model. It comes in several configurations, including single-zone and dual-zone models, as well as shallow depth and ADA-compliant options. The primary function is to maintain a stable internal environment to preserve the quality and extend the shelf life of stored products.
Usage Features
General Operation:
The unit is equipped with a master power switch located behind the louvered toe kick. To turn the unit on or off, the toe kick must be removed to access this switch. For Signature Series-Dual Zone Freezer Models (HP24Z), an anti-sweat heater and switch are included to prevent condensation on the front face of the cabinet, particularly between the top and bottom drawers. This switch is located below the master power switch.
Digital Temperature Control:
The appliance features a digital temperature controller for precise management of internal temperatures. HP & HH models typically have a blue display, while HC & HA models feature a red display.
- On/Off: The unit can be turned on or off by pressing the dedicated ON/OFF button on the control panel.
- Setting Target Temperature (Single Zone Models): For 15", 24" Single Zone, 24" Shallow Depth, and ADA Controls, the target temperature is set by pressing and releasing the SET button to view the current setpoint. To change it, press and hold the SET button until "F" flashes, then use the UP and DOWN arrow buttons to scroll to the desired temperature.
- Setting Target Temperature (Dual-Zone Models):
- Lower Compartment: To change the lower compartment temperature, press and hold the SET button until "St1" with "F" flashing appears. Press SET again to display the current temperature, then use the UP or DOWN arrow keys to adjust.
- Upper Compartment: To change the upper compartment temperature, press and hold the SET button until "St1" with "F" flashing, then press the DOWN arrow once to display "St2". Press SET again to display the current temperature and use the UP or DOWN arrow keys to adjust.
- Temperature Ranges: The controllers are programmed to allow temperature adjustments within specific ranges, which vary by model (e.g., HP24Z: Upper 30°-42°F / Lower -10°-15°F; HP24C: Upper 45°-65°F / Lower 33°-42°F).
- Viewing Stored Temperatures:
- Maximum Stored Temperature: Press the UP arrow button to view the maximum stored temperature. To reset it, press and hold the SET button until 'rst' flashes.
- Minimum Stored Temperature: Press the DOWN arrow button to view the minimum stored temperature. To reset it, press and hold the SET button until 'rst' flashes.
Interior Lighting:
Door units are equipped with an interior light that illuminates when the door is opened. All models feature adjustable blue and white LED lighting. A manual light switch is also provided for continuous display of products through glass doors. It is crucial to ensure the manual light switch is in the OFF position when closing solid wood or stainless steel doors to conserve energy and extend LED life.
Loading Product:
Before loading perishables, the unit should be turned on and allowed to operate for at least 24 hours to stabilize temperatures. When loading, avoid blocking internal louvers and fan guard openings to maintain optimal performance.
LED Functions and Alarms:
The control panel includes various LED indicators:
- Compressor On: A snowflake icon (without flashing) indicates the compressor is running.
- Anti-short Cycle Delay: A flashing snowflake icon indicates the anti-short cycle delay is active.
- Defrost On: A dripping snowflake icon indicates the defrost cycle is active.
- Alarm On: A bell icon indicates an active alarm.
- Programming Mode: A flashing "F" indicates the unit is in programming mode.
An audible alarm will sound if the door is left ajar for more than one minute. Fully closing the door will clear the alarm. Prolonged door opening can damage the equipment.
Manual Defrost (Freezer Models Only):
For freezer models (e.g., HP24Z), a manual defrost can be initiated by pressing and holding the DEFROST button (melting snowflake icon) for 3-5 seconds. The melting snowflake icon will illuminate during defrost.
Maintenance Features
Seasonal Maintenance for UL-Approved Outdoor Models (Winterizing):
This process should be performed when daily low temperatures are at or below specific thresholds (e.g., Freezer models: 32°F; Refrigerator models: 38°F).
- Turn the unit OFF using the controller's OFF button. For Signature Series models, also turn off the master switch behind the grille. If accessible, unplug the power cord; otherwise, turn off the circuit breaker.
- Remove all contents from the unit.
- Remove the front grille.
- Clean the condenser using a vacuum cleaner to remove accumulated debris (leaves, dirt).
- Reinstall the front grille.
- Clean the interior and exterior of the unit using stainless steel cleaner and polish (refer to specific cleaning instructions).
Operating the unit at temperatures lower than recommended will void the warranty. Do not cover the unit; while not required, it can be removed and stored indoors.
Spring Start-Up:
This process should occur after daily low temperatures rise above the specified thresholds.
- Remove the grille.
- Check and clean the condensing unit with a vacuum cleaner.
- Reattach the front grille.
- Clean the interior and exterior of the unit using appropriate cleaners.
- Plug the unit in or turn on the circuit breaker.
- Turn on the master switch (if Signature Series) and press the OFF button once to turn the unit on. The display will show the actual internal temperature.
- Allow the unit to run for 24 hours to stabilize the operating temperature before use.
General Cleaning and Care:
- Safety First: NEVER attempt to repair or perform maintenance without disconnecting the main electrical power to the unit.
- Condenser Cleaning: The condenser, located behind the front grille, should be cleaned every three months using a soft bristle brush and vacuum to remove dust and lint. Avoid damaging or crushing the condenser fins or tubing.
- Cabinet Interior/Exterior Cleaning:
- NEVER use hydrochloric acid (muriatic acid) on stainless steel.
- Do not use abrasive cleansers or cloths on any interior or exterior surfaces or removable parts.
- Glass panels can be cleaned with standard glass cleaner.
- For non-metallic surfaces and removable parts, wash with a mild solution of soap, lukewarm water, and a little baking soda. Rinse and dry thoroughly. Avoid getting water on lights, controllers, fan motors, and unfinished wood wine rack faces.
Stainless Steel Care & Cleaning:
Stainless steel is a "passive" metal with a protective chromium layer. This layer can be damaged by mechanical abrasion, deposits and water, and chlorides, leading to corrosion.
- Preventing Rust:
- Use non-abrasive tools (soft cloths, plastic scouring pads) for cleaning.
- Clean with the polish lines or "grain" of the steel. If no grain is visible, polish in a consistent straight pattern.
- Use alkaline, alkaline chlorinated, or non-chloride containing cleaners. Avoid cleaners with quaternary salt.
- Clean food equipment frequently to prevent stubborn stains. Chlorides in water are a common cause of damage; heat increases their effect.
- If chlorinated cleaners are used, immediately rinse and wipe equipment dry. Oxygen helps maintain the passive film.
LED Replacement:
For LED replacement, contact a Perlick Factory Authorized Service Center.
Disposal:
To prevent child entrapment when disposing of an old refrigerator or freezer:
- Remove the doors.
- Leave shelves in place so children cannot easily climb inside.
Troubleshooting:
The manual provides a comprehensive troubleshooting guide for common issues such as:
- No interior light
- Light staying on when the door is closed
- Noisy operation
- LED controller display errors (e.g., P1, P2, HA, LA, dA)
- Unit not running
- Compartments warmer than usual
- System running for a long period
- Condensation forming outside or inside the unit
For any persistent issues or service needs, contact Perlick Technical Service. It is recommended to use only genuine Perlick replacement parts and accessories to ensure proper function and maintain warranty validity.