Single and Tandem Assembly
1.
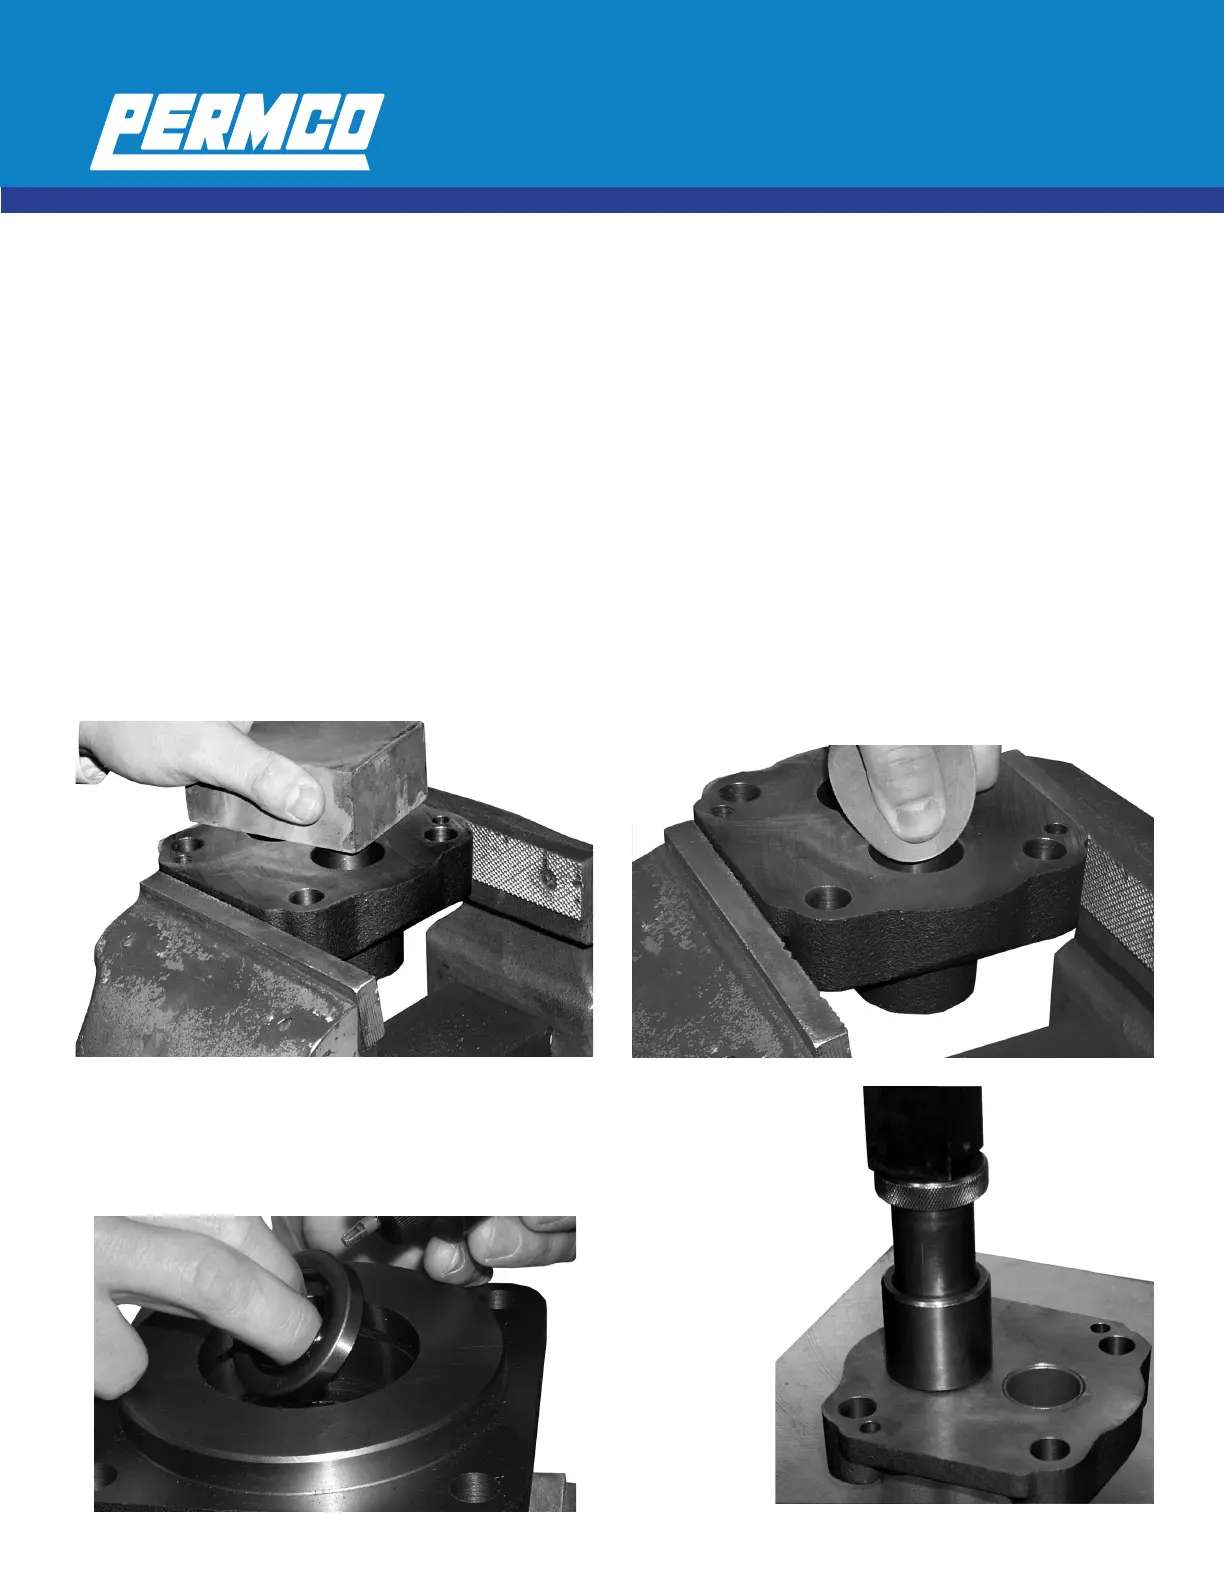
Stone all faces with a medium grit stone.
2.
Deburr all bushing bores with emery cloth to assure
bushings do not become galled during installation.
3.
Apply a thin film of Permatex Aviation Form-A-Gasket #3
around the O.D. of the lip seal. With the metal side up,
press the seal into bore until it is flush with the recessed
face.
4.
It is recommended
that insertion tools
manufactured by
Permco be used for
pressing in bushings.
Refer to sketches for
bushing orientation
and plug (check valve)
location.
1. Shaft End Cover, Gear Housing, Bearing Carrier, and Port End Cover: Stone or file mating surfaces to remove
any raised metal generated in shipping or handling.
2. Gear Shafts, Gears: Stone faces of gears to remove any raised metal generated in shipping and handling.
3. Bearing Carrier and Port End Cover: Probe all bushing drain passages to insure that none are blocked.
4. Gear Housing: Use a deburring knife to break the edge on the gear bores and dowel pin holes to ease as-
sembly. Clean foreign material from dowel pin holes and gasket grooves.
5. Shaft End Cover, Bearing Carrier, and Port End Cover: Use a deburring knife to break the edge of bushing and
dowel pin holes to ease assembly. Clean foreign material from dowel pin holes. Use a flapper wheel or emery
cloth on edge of the bushing bores to create a small radius.
6. Shaft End Cover, Bearing Carrier, and Port End Cover: Mark the faces to indicate low and high pressures.
This will ensure proper bushing orientation.
 Loading...