EasyManua.ls Logo

Pet Stop Charging Cradle Plus User Manual

Pet Stop Charging Cradle Plus
2 pages
To Next Page IconTo Next Page
Page #1 background imageLoading...
Page #1 background image
Charging Cradle Plus
The Charging Cradle Plus is capable of charging a charge cradle compatible Ecolite, and
also verifying the Ecolite is functional including the animal correction.
Prior to use, please insert power jack into bottom of Cradle. The Cradle will power off
when not in use to conserve power.
Step 1: Insertion
Insert the Ecolite into the Charging Cradle Plus.
Observe proper orientation: Correction Posts go down into the holes in the Cradle,
charge boss faces forward and indexes with notch in Cradle. Press down on Ecolite until
the retaining arm swings over the top of the Ecolite.
Step 2: Initial Test
The Cradle will now perform a functional test of the Ecolite. While testing, Red and
Green lights will alternate to indicate the Cradle is working. It will try all possible signals
that the Ecolite can be programmed for (PetStop, IFCO 700 Series and IFCO 800 Series).
If the Ecolite passes test, the Green light will blink to indicate the Cradle has turned on
the charger and is waiting for the Ecolite to charge. If you simply wanted to test the
Ecolite and not charge it, you can remove the Ecolite now for use. Otherwise, leave in
Cradle while the Ecolite charges. Also - you do not need to charge the Ecolite
completely. It can run for several days on a 15 minute charge.
If the Ecolite fails the test, it could simply need charging. The Cradle will blink the Red
light to indicate the initial test has failed, and it will turn on the charger.
Question and Answer IconNeed help?

Do you have a question about the Pet Stop Charging Cradle Plus and is the answer not in the manual?

Pet Stop Charging Cradle Plus Specifications

General IconGeneral
BrandPet Stop
ModelCharging Cradle Plus
CategoryBattery Charger
LanguageEnglish

Summary

Charging Cradle Plus Operation

Step 1: Insertion

Insert the Ecolite into the Charging Cradle Plus, observing proper orientation for the correction posts and charge boss.

Step 2: Initial Test

The Cradle performs a functional test, indicating success or failure with Red and Green lights, and offers options to charge or use the Ecolite.

Step 3: Charging

Charging begins, with Red or Green lights blinking. The Cradle monitors charging progress for up to 4 hours.

Step 4: Failed to Charge

If charging fails within 4 hours, the Red light turns solid, indicating a defective Ecolite unable to accept charge.

Step 5: Charge Complete

Upon successful charging, Green light turns solid. A second test may occur if the initial test failed.

Step 6: Remove Ecolite

Pull the Ecolite straight up to remove it from the cradle, potentially pushing the retaining arm away.
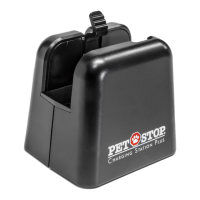