Important Notice:
1. The transmi t t er will go i n to Standby M o de if there i s no operati o n after 20
sec o n d s and will t urn off after 20 min u t e s.
The receiver will go into Standby Mode if unused for 4 minutes. Any movement
from the dog will activate the receiver.
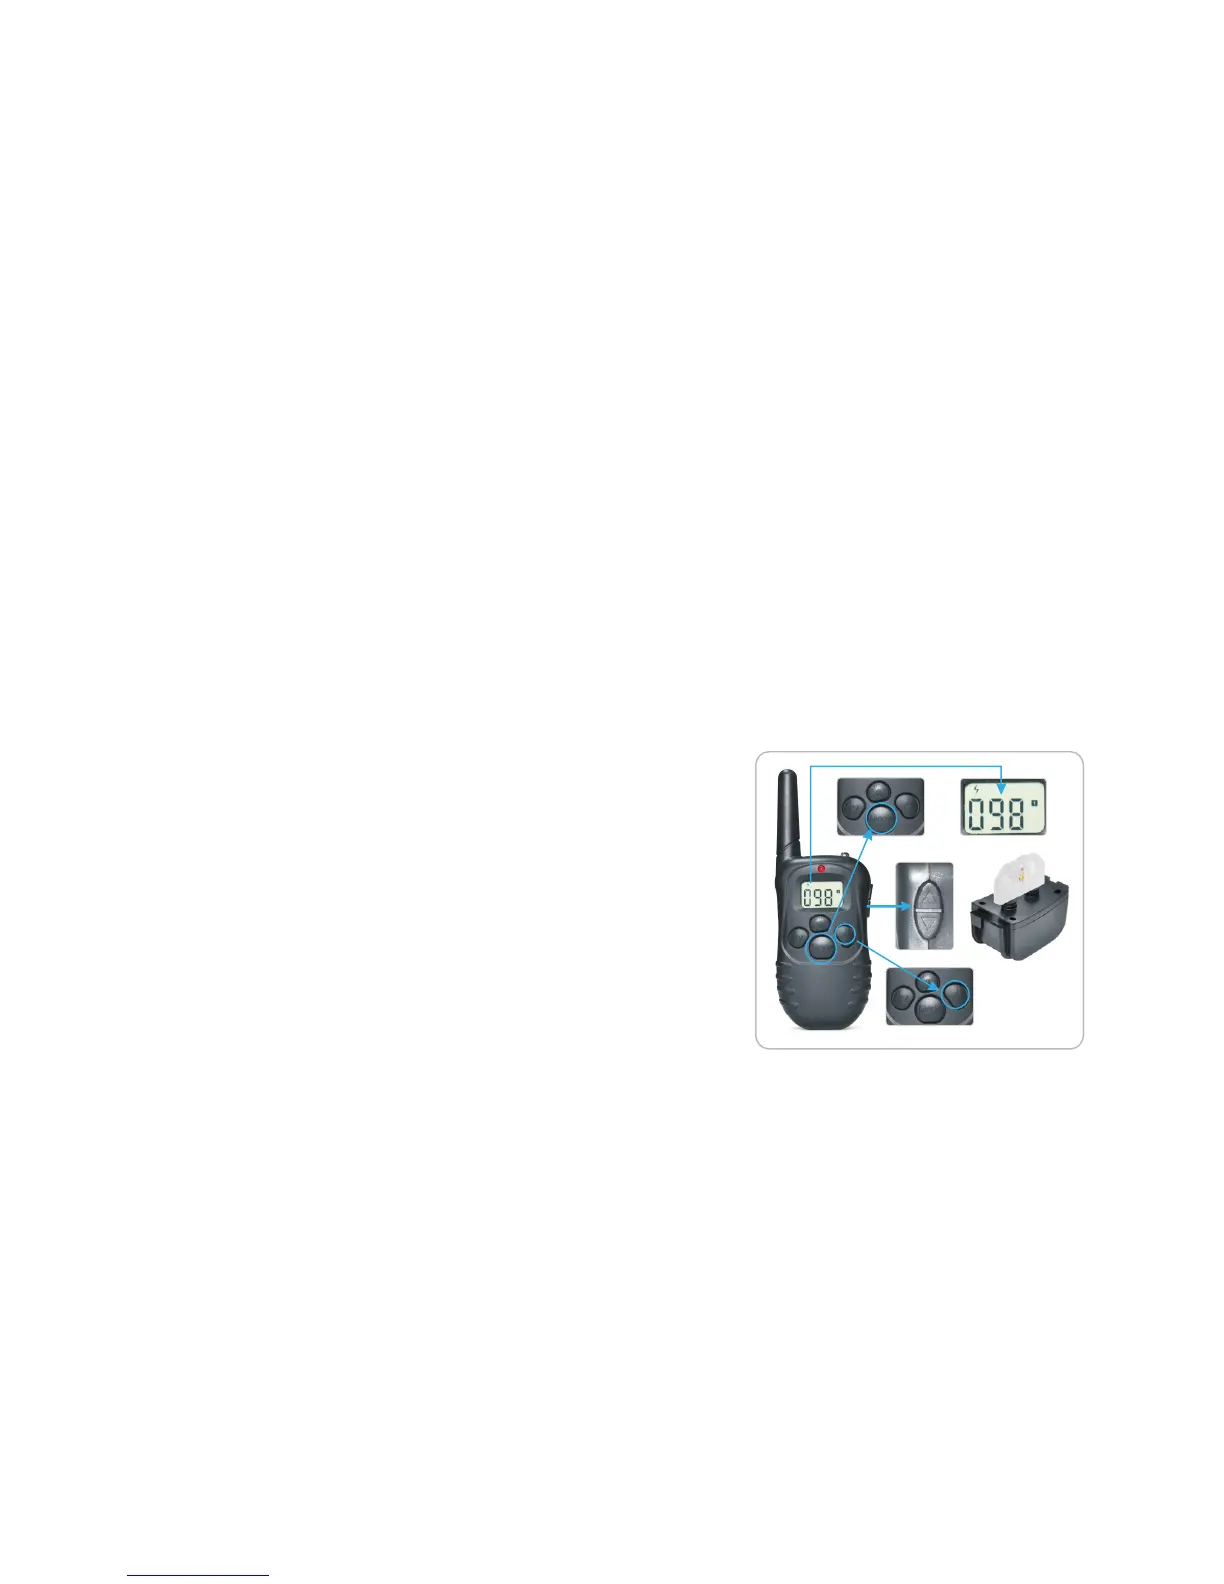
2. “1/2” button to choose channel for connection. Channel 1 can only
the first receiver and Channel 2 can only operate the second receiver.
operate
-5-
-6-
4) Charge the transmitter for at least 6 hours for the first charge or until the
light indicates charging is complete.
5)After charging is complete, the red light will turn off automatically.
2. Charge the collar receiver:
1) Connect the charger connector to the DV-5V hole.
2) Plug the charger into a standard outlet.
3) The red light will appear on the receiver.
4) Charge the receiver for at least 6 hours for the first charge or until the light
indicates charging is complete.
5) After charging is complete, the red light will turn off automatically.
3. Connect transmitter and receiver:
1) Turn on the transmitter by pressing any button on the transmitter.
2) Press “1/2” button to choose channel for pairing, choose channel
first receiver.
1 for the
3) Lift the Rubber cover of the reset hole on the receiver. Press the Reset button
inside of the receiver with a pen or paper clip, and the red LED light will turn on.
4) After a beep from the receiver, press the “Y” button on the transmitter within 10
seconds.
5) The collar receiver will beep if connected successfully.
6) To encode the second receiver, press the “1/2” button and select
for the second receiver and follow the same procedure.
channel 2
HOW TO USE
Note: Please charge before using the product!
1. Charge the remote transmitter:
2) Plug the charger into a standard outlet.
3) The red light on the transmitter will light up.
1) Connect the charger connector to the charging jack.
4. Test static shock function:
1) Place the test light to the metal screws (ensure contact points are not attached
when attempting to test the shock function).
2) Select Static Mode by pressing the “Mode” button.
3) Select static stimulation level by pressing UP/DOWN button and choose
between 1-100 stimulation levels.
4) Press “Y” button, and the LED will flash on.
Important:
If the transmitter is in sleep mode (the LCD display is turned off) you must press
the “Y” button once to wake up the unit, then press the “Y” button again to send
Please see diagram below on how to attach the test light:
3. In working mode, if you want to reconnect the receiver to the transmitter,
press the reset button with a pen or paper clip, there will be a beep sound to
indicate that it is ready to encode.
simply
4. The design of the receiver is to be rainproof. The rubber cover has to put in the
right position to ensure rainproof.
Important Notice:
If wishing to test the static function on yourself, remember to place your
hand against both contact points. Otherwise, the connection won't be completed
and no stimulation will be felt.
finger or

 Loading...