13
2.6 Installation Gruppe 2 + 3 (15 - 36 kg)
2.6 Installing Group 2 + 3 (15 - 36 kg)
2.6.1 Entfernen des Rückhaltesystems für Kleinkinder - Removing the child restraint system
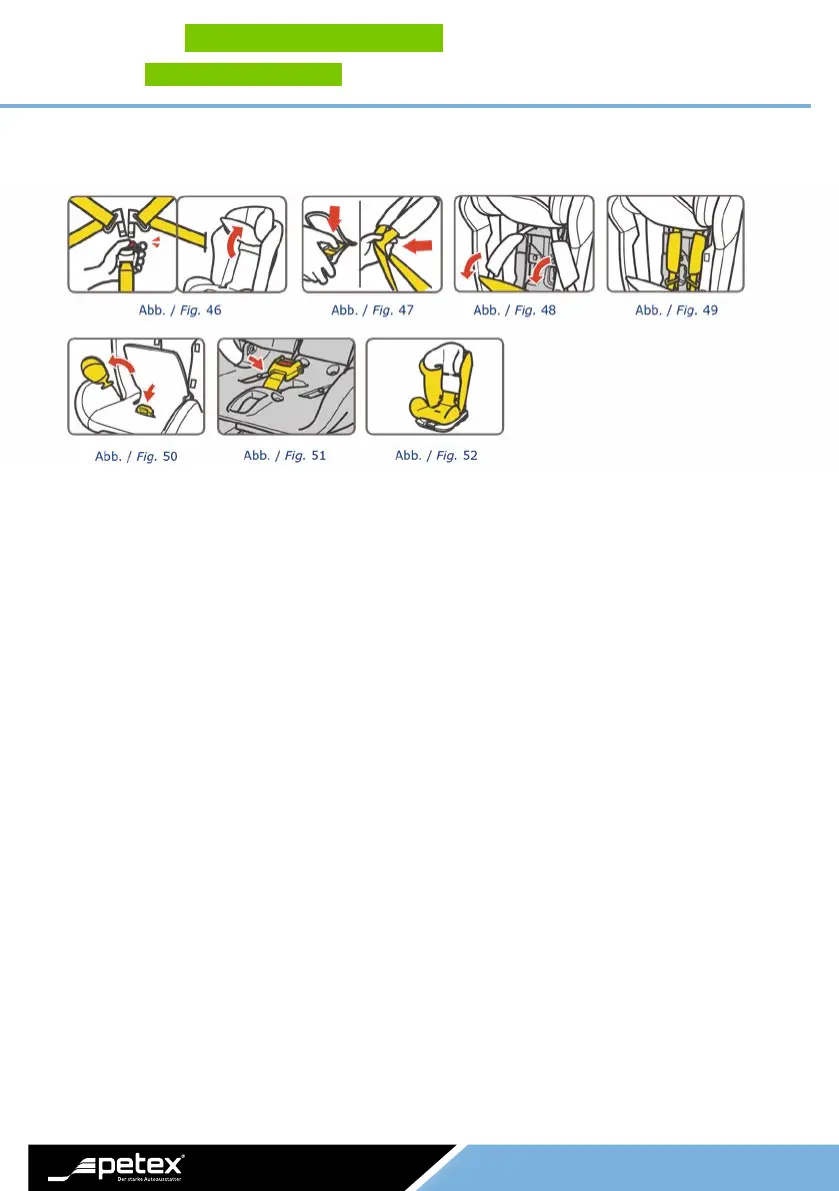
1. Önen Sie den 5-Punktgurt (F), ziehen Sie die Kopfstütze nach oben (A), klappen Sie das Rückenkissen
nach oben (Abb. 46).
2. Drücken Sie den Knopf zum Lösen des Haltegeschirrs (H) und lösen Sie die Schultergurte (D), (Abb. 47).
3. Klappen Sie die obere Lasche nach oben und ziehen Sie die untere Lasche nach vorne (Abb. 48).
4. Verstauen Sie die Schulterpolster (C) und Schultergurte (D) in deren Aufbewahrungsvorrichtungen
(Abb. 49).
5. Entfernen Sie das Schrittpolster (E), (Abb. 50).
6. Ziehen Sie das Gurtschloss (F) in Richtung Unterseite der Sitzschale und verstauen Sie das Gurtschloss
sowie die Gurtschnallen in ihren Haltevorrichtungen (Abb. 51).
7. Befestigen Sie den Sitzbezug wieder mittels der Druckknöpfe (Abb. 52).
1. Release the 5-point buckle (F), pull up the headrest (A), turn up the back cushion (Fig. 46).
2. Press the harness adjustment button (H) and loosen the shoulder straps (D), (Fig. 47).
3. Lift the upper ap upward and pull the lower ap forward (Fig. 48).
4. Store the shoulder pads (C) and the shoulder straps (D) in their storage compartments (Fig. 49).
5. Detach the crotch pad (E), (Fig.50).
6. Pull the buckle (F) to the back of the seat pad, and then store buckle and buckle tongues in their storage
compartments (Fig.51).
7. Reattach the snaps to recover the seat pad. The reassembled seat pad is shown as above (Fig.52).
 Loading...