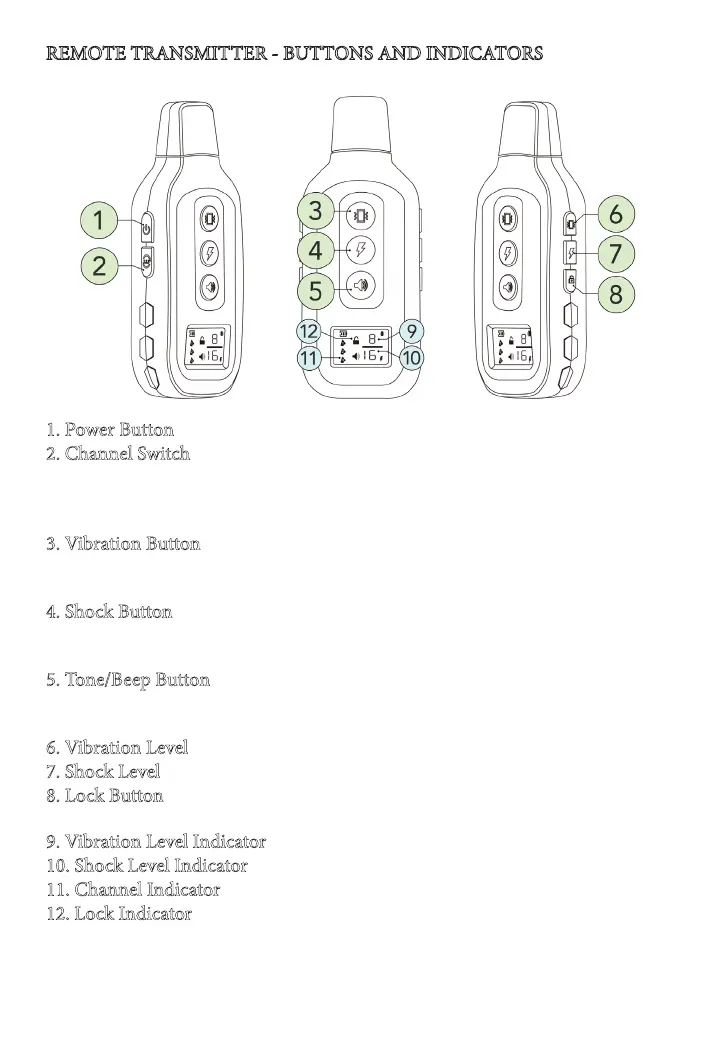
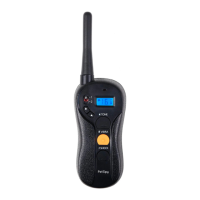
1. Power Button - press and hold the button to turn the remote on and o.
2. Channel Switch - press the button to choose which collar is being controlled.
Keep in mind that one collar can only work with one channel at the time.
Please refer to
Synchronizing Remote Transmitter with Receiver Collar
para-
graph to learn how you can reprogram the system.
3. Vibration Button - press and hold the button to deliver Vibration correc-
tion to your dog. It will time out aer 10 seconds or as soon as the button gets
released.
4. Shock Button - press and hold the button to deliver Static Shock correction
to your dog. e shock correction will automatically time out aer 10 seconds
or as soon as the button gets released.
5. Tone/Beep Button - press the button to send an audible tone to your dog.
When the dog is well trained, the tone button alone can help you eectively
interact with the dog.
6. Vibration Level - press the button to change the intensity of vibration.
7. Shock Level - press the button to change the intensity of static shock.
8. Lock Button - press the button to lock the remote from accidental use. To
unlock the remote, press the same button again.
9. Vibration Level Indicator - shows the selected level of vibration from 1 to 16
10. Shock Level Indicator - shows the selected level of static shock from 1 to 16
11. Channel Indicator - shows which collar is currently under control.
12. Lock Indicator - shows when remote is locked.
REMOTE TRANSMITTER - BUTTONS AND INDICATORS