Using the D500X for the first time
Make sure that batteries have been installed and that at least one FAT32 formatted CF card
has been installed. The cards must be installed in the slots in rising order, starting with CF
card slot #1.
Caution. Always follow the instructions supplied with the CF card you are using.
Specifically, always switch off the power to the D500X using the INT/EXT Power
switch before removing or inserting a CF card. To safely switch the power off, first
put the D500X to sleep with the 1/0 key and then set the INT/EXT switch to OFF (or
remove the external power supply). Failure to follow these steps may cause loss of
recorded files and/or corruption of the CF card.
Be careful not to drop any small objects into the housing through the CF card slots.
They can cause damage to the CF card holder pins and metal objects may cause a
short circuit that can damage the detector.
To turn the detector on, set the Power switch to the INT or EXT position depending on if you
are using internal or external batteries. During start-up, status messages will be shown on the
display and a list of the installed CF cards will appear. This may take a few tens of seconds,
depending on the size and number of CF cards. Press ENTER to continue to the “D500X
READY screen”:
First adjust the Input Gain (volume) control by pressing the left/right arrow keys. The “dB
indicator” will show the signal level. The gain should be adjusted to keep the dB indicator
below maximum reading.
The D500X can make recordings in the manual mode, in which the REC button is pressed to
start the recording or in the automatic mode, in which the detector starts recording as soon as
an ultrasound of sufficient loudness and duration is detected.
To make a “manual” recording, select one of the profiles with that recording mode, e.g.
“Profile 8”. To enter the profile selection mode, press ENTER and use the left/right arrow
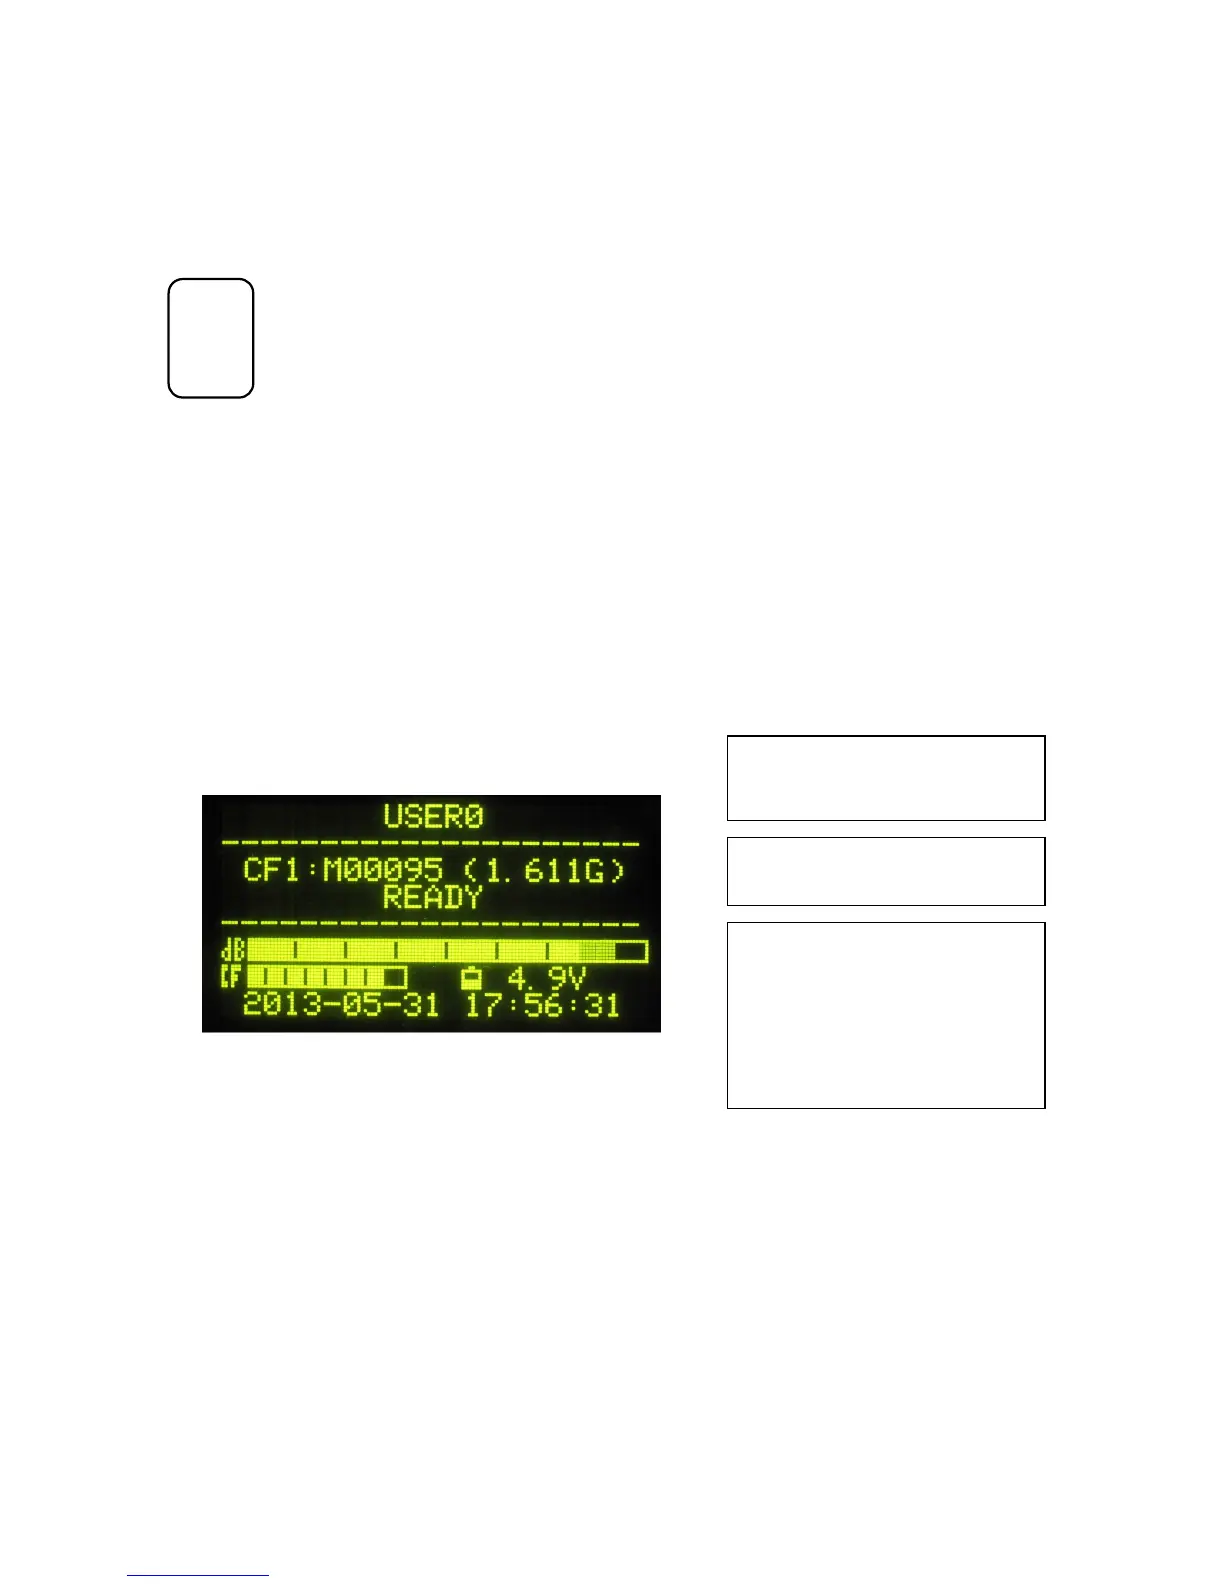
The mid section shows the currently used CF
card, the last file name (with the wav extension
excluded) and the remaining card space.
The lower section of the screen contains
indicators for the signal level, total remaining
CF card space (on all cards) and battery
voltage. The date and time are also shown.
To avoid distorting the signal, the level
indicator (“dB”) should be kept below
maximum (the right-most segment) by
adjusting the input gain.
The name of the active profile is shown in the
first l
 Loading...