26
5. Adjustment of synchronizer
Note:
The following machine positions or functions are controlled by the synchronizer:
1. A change of feeding direction
2. Sideways needle bar movement
3. Take-up lever/needle "up" positioning
4. Needle "down" positioning
This adjustment must only be carried out when compelling reasons exist! It must be performed
with maximum accuracy.
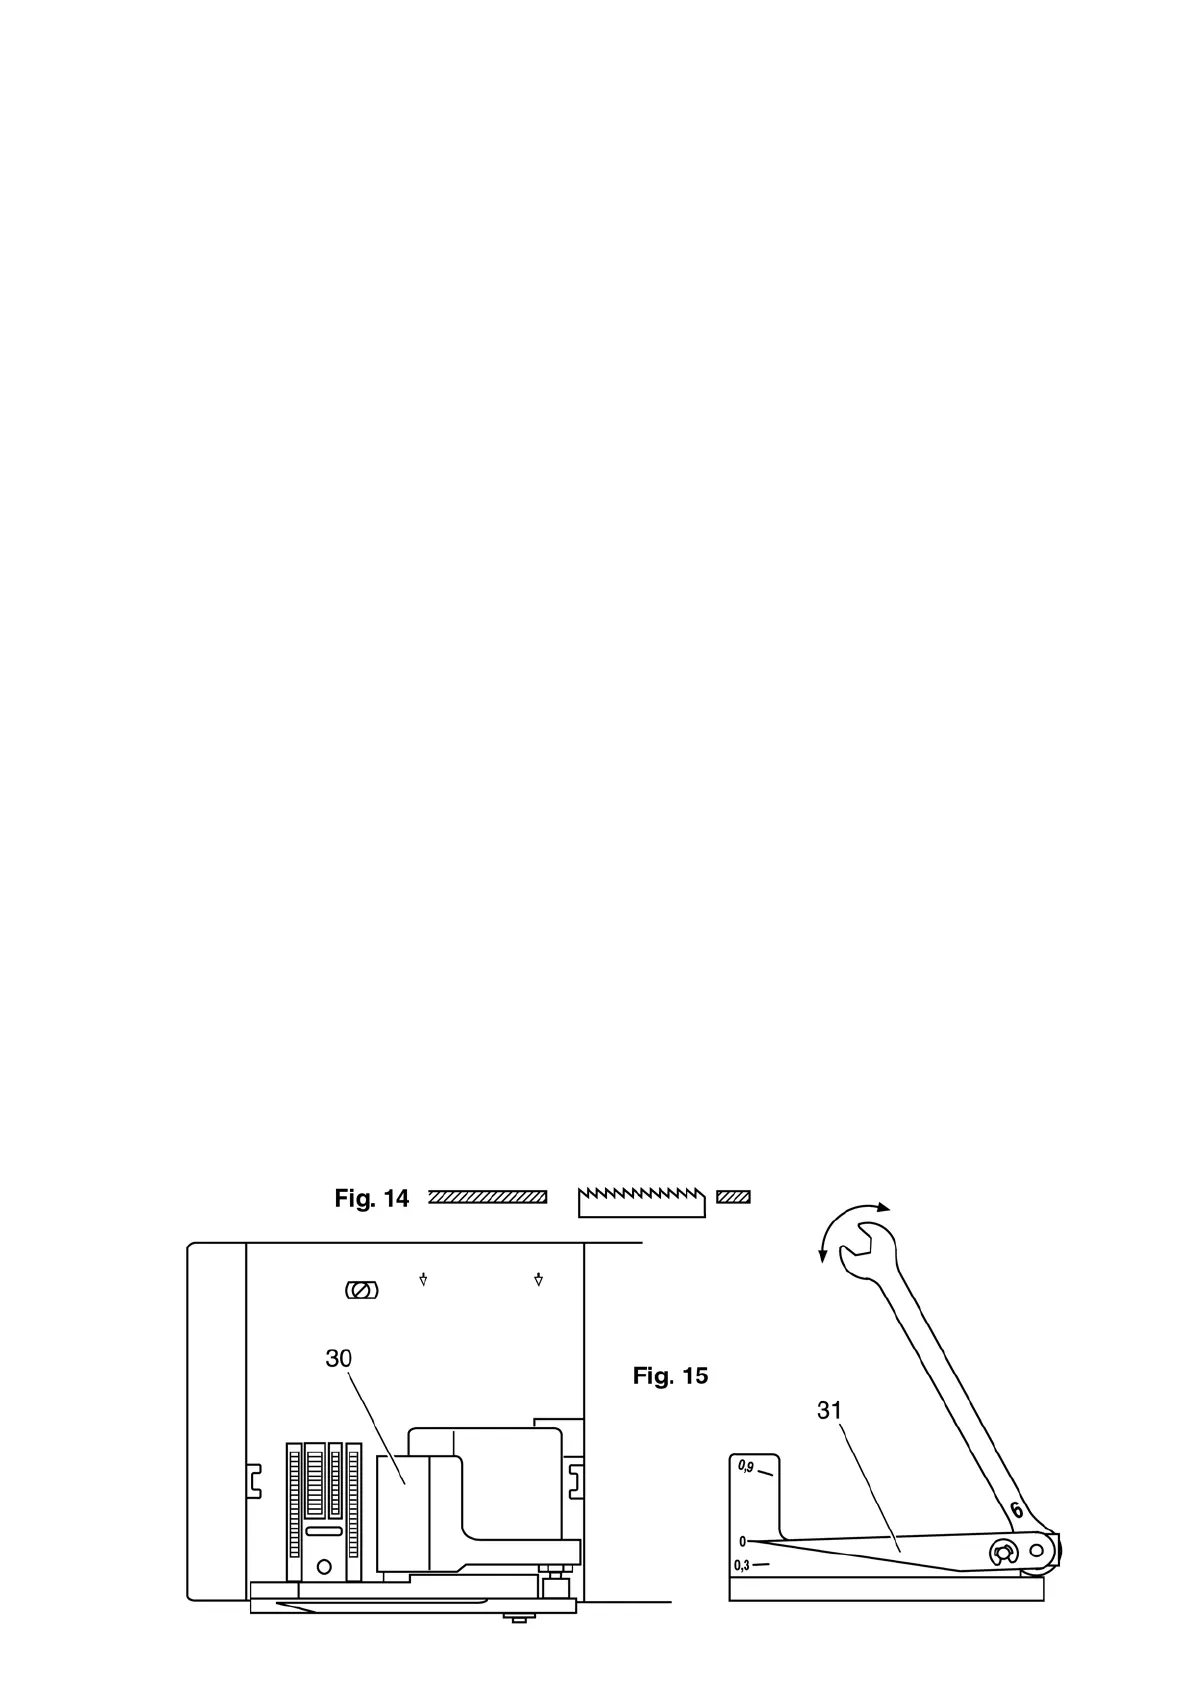
Requirement:
A change of feeding direction or stitch length must take place when the feed dog has moved below the
needle plate surface by 0.3 ± 0.02 mm (fig. 14).
Check:
● Remove the needle.
● Remove the presser foot.
● Switch on the master switch.
● Set stitch pattern "01" and stitch length to approx. 0.5 mm.
● Set adjustment gauge (63-114 690-23) on the needle plate so that feeler lever 30 rests on the needle
plate just right of the feed slots (fig. 15).
● Turn the hexagon with a 6 mm spanner (wrench) until pointer 31 is exactly at "0".
● Turn the handwheel a full rotation forwards, then keep on turning it until the feed dog (needle bar)
is in its top position.
● Change the stitch length.
● Set the adjustment gauge with feeler lever 30 to the left on the feed dog (fig. 32).
● Turn the handwheel very slowly forwards until pointer 30 is at 0.3 (fig. 33). In this position the feed
dog must make a visible and audible (switching) movement.