EasyManua.ls Logo

Pfister Venturi LF-049-VN User Manual

Default Icon
8 pages
To Next Page IconTo Next Page
Page #1 background imageLoading...
Page #1 background image
473650700
January 14, 2020
Installation Support • Soporte de Instalación • Support d’Installation
Installation Videos Available
Videos de instalación a disposición
Vidéos d’installation disponibles
Personal Assistance, Product Specs, &
“How-to” Questions:
Asistencia personal, especificaciones del
producto y preguntas sobre “cómo hacerlo”:
Aide personnelle, spécifications du produit
et questions « pratico-pratiques » :
1800PFAUCET (7328238)
pisterfaucets.com/support
pisterfaucets.com/videos
1
Parts in the Box
Piezas en la caja
Pièces dans la boîte
Copyright © 2020, Pister Inc.
Required Tools
Herramientas necesarias
Outils nécessaires
Additional Helpful Tools
Otras herramientas útiles
Outils supplémentaires utiles
Adjustable Wrench
Llave ajustable
Clé réglable
8" - 20" Widespread Faucet
Grifo de largo alcance de 8 a 20 pulgadas
Robinet Élongé de 8 à 20 po
Quick Installation Guide
Guía de Instalación Rápida
Guide dInstallation Rapide
Supplied Install Tool
Instalar la herramienta
Outil d'installation fourni
Flashlight
Linterna
Lampe De Poche
Cloth
Paño
Chion
Safety Goggles
Gafas de seguridad
Lunettes de sûreté
Bucket
Balde
Seau
WARNING / ADVERTENCIA / AVERTISSEMENT
Locate water supply inlets and shut of the water supply valves. These are usually
found under the sink or near the water meter. If you are replacing an existing faucet,
remove the old faucet from the sink and clean the sink surface thoroughly.
Ubique las entradas del suministro de agua y cierre las válvulas de suministro de agua.
Generalmente se encuentran debajo del fregadero o cerca del medidor de agua. Si se trata de
un reemplazo de grifo, quite el grifo viejo y limpie completamente la supericie del fregadero.
Recherchez les entrées d'approvisionnement et fermer leurs robinets. Ces robinets se
trouvent généralement sous l'évier ou près du compteur d’eau. Si vous remplacez un robinet
existant, retirez, le vieux robinet et nettoyer soigneusement la surface de lvier.
Turn O Water Supply Cierre el suministro de agua Couper l’alimentation en eau
Top Tray
Bandeja superior
Plateau supérieur
Supplied Hex Wrench
Proveído Llave hexagonal
Fourni Clé hexagonale
To reduce the risk of injury or property damage, read all instructions before installing product. Wear safety goggles. Product must be installed in
accordance with all state & local plumbing & building codes. This product may take two people to install. Call a professional if you are uncertain about
installing this product.
Para disminuir el riesgo de lesiones o daños a la propiedad, lea todas las instrucciones antes de instalar el producto. Utilice gafas de seguridad. El producto deberá
instalarse de acuerdo con la normativa de plomería y construcción estatal y local. Este producto se puede tomar a dos personas para instalar. Llame a un profesional si
no está seguro sobre cómo instalar este producto.
Pour réduire le risque de blessures ou de dommages, lire toutes les instructions avant d’installer le produit. Porter des lunettes de sécurité. Le produit doit être
installé en conformité avec tous les codes de construction et de plomberie locaux et de l'état. Ce produit peut prendre deux personnes pour installer. Appelez un
professionnel si vous n’êtes pas certain de la façon d’installer ce produit.
LF-049-VN
Venturi
J
H
C (X2)G
D
(X2)F
E
A (X2)
K
B (X2)
Lower Tray
Bandeja inferior
Plateau inférieur
1322303
Cold
Fría
Froid
Hot
Caliente
Chaud
SAMPLE COPY
Question and Answer IconNeed help?

Do you have a question about the Pfister Venturi LF-049-VN and is the answer not in the manual?

Pfister Venturi LF-049-VN Specifications

General IconGeneral
Product TypeKitchen Faucet
BrandPfister
Model NumberLF-049-VN
CollectionVenturi
StyleModern
Number of Handles1
Handle StyleLever
Valve TypeCeramic Disc
MaterialMetal
FinishVenetian Bronze
Installation TypeDeck Mount
Number of Holes Required1
ADA CompliantYes
Lifetime Limited WarrantyYes

Summary

Installation Support & Resources

Personal Assistance & Product Information

Get help with product questions, specifications, and how-to advice.

Installation Video Access

Find available installation videos for visual guidance.

Preparation & Tools

Required Installation Tools

List of essential tools needed for the installation process.

Helpful Installation Tools

Additional tools that can aid in a smoother installation.

Parts Included in the Box

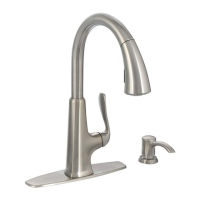
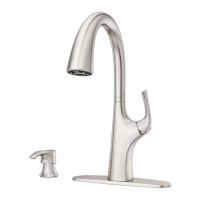
Identification of all components provided with the faucet.

Step 1: Turn Off Water Supply

Locate and Shut Off Water Valves

Find and close the main water supply valves before proceeding.

Step 2: Valve Installation

Position Hot and Cold Valves

Place the hot valve left of spout, cold valve right, aligning with sink holes.

Align Valve Handles Correctly

Ensure valve body arrows point towards the sink for proper handle alignment.

Step 3: Secure Valve Bodies & Install Handles

Thread and Tighten Valve Components

Connect valve bodies using provided tool and secure with nuts.

Nut Selection for Deck Thickness

Choose correct mounting nuts based on sink deck thickness for secure fit.

Verify Correct Handle Rotation

Confirm handles rotate smoothly and correctly before final tightening.

Step 4: Install Spout

Install the Spout Assembly

Insert the spout (E) through the faucet base and into the valve body.

Secure Spout with Retaining Components

Use washer (F) and nut (G) to secure the spout assembly.

Step 5: Hose Connections

Connect Hoses to Spout Connector

Attach hoses (J) to the spout's integrated connector securely.

Ensure Secure Hose Connections

Pull on hoses and connector to confirm secure attachment.

Step 6: Connect Water Supply Lines

Route Supply Lines

Guide hot and cold water supply lines through the faucet base and into a bucket.

Turn On & Flush Water Supply

Open water supply, flush lines for 30 seconds, then close supply.

Turn Off Water Supply

Close water supply valves after flushing the lines.

Step 7: Prepare & Install Drain

Disassemble Drain Pop-Up

Take apart the drain assembly components (K, K2, K3, K4, K5).

Install Drain Body into Sink

Insert drain body through sink, avoiding plumber's putty.

Connect Drain to Plumbing

Connect the assembled drain to the sink's drainage pipe.

Activate Drain Mechanism

Secure drain nut and push drain top to activate sealing mechanism.

Step 8: Final Checks & Operation

Turn On Water Supply & Faucet

Open water supply valves and faucet handles to test flow.

Check for Leaks and Verify Function

Inspect for leaks under the sink and ensure water flows correctly.

Additional Installation Support

Contact Pfister for further assistance if needed.

Related product manuals