EasyManua.ls Logo

Pfister Ladera LF-042-LR - User Manual

Pfister Ladera LF-042-LR
6 pages
Print Icon
To Next Page IconTo Next Page
Loading...
Installation Support • Soporte de instalación • Support d’installation
Installation Videos Available
Videos de instalación a disposición
Vidéos d’installation disponibles
Personal Assistance, Product Specs, &
“How-to” Questions:
Asistencia personal, especificaciones del
producto y preguntas sobre “cómo hacerlo”:
Aide personnelle, spécifications du produit
et questions « pratico-pratiques » :
1800PFAUCET (7328238)
pisterfaucets.com/support
pisterfaucets.com/videos
492780100
Dec 8, 2016
Required Tools
Herramientas necesarias
Outils nécessaires
Additional Helpful Tools
Otras herramientas útiles
Outils supplémentaires utiles
Parts in the Box
Piezas en la caja
Pièces dans la boîte
1
Copyright © 2016, Pister Inc.
4" Single Control Centerset Faucet
Grifo de Centerset del solo control de 4 pulgadas
Robinet de Centerset de commande simple de 4 pouces
Flashlight
Linterna
Lampe De Poche
Cloth
Paño de limpieza
Chion
F
G (x2)
H
Items shown are not to scale.
De resultados no están a escala.
Produits aichés ne sont pas à l'échelle.
Safety Goggles
Anteojos de seguridad
Lunettes de sûreté
Bucket
Balde
Seau
Adjustable Wrenches
Llaves ajustables
Clés â mollette
Quick Installation Guide
Guía de instalación rápida
Guide d’installation rapide
LF-042-LR
Ladera™
WARNING / ADVERTENCIA / AVERTISSEMENT
To reduce the risk of injury or property damage, read all instructions before installing product. Wear safety goggles. Product must be installed in
accordance with all state & local plumbing & building codes. Call a professional if you are uncertain about installing this product.
Para disminuir el riesgo de lesiones o daños a la propiedad, lea todas las instrucciones antes de instalar el producto. Utilice gafas de seguridad. El producto
deberá instalarse de acuerdo con la normativa de plomería y construcción estatal y local. Llame a un profesional si no está seguro sobre cómo instalar este
producto.
Pour réduire le risque de blessures ou de dommages, lire toutes les instructions avant d’installer le produit. Porter des lunettes de sécurité. Le produit doit
être installé en conformité avec tous les codes de construction et de plomberie locaux et de l'état. Appelez un professionnel si vous nêtes pas certain de la
façon d’installer ce produit.
Locate water supply inlets and shut of the water supply valves. These are usually
found under the sink or near the water meter. If you are replacing an existing faucet,
remove the old faucet from the sink and clean the sink surface thoroughly.
Ubique las entradas del suministro de agua y cierre las válvulas de suministro de agua.
Generalmente se encuentran debajo del fregadero o cerca del medidor de agua. Si se trata de
un reemplazo de grifo, quite el grifo viejo y limpie completamente la supericie del fregadero.
Recherchez les entrées d'approvisionnement et fermer leurs robinets. Ces robinets se
trouvent généralement sous l'évier ou près du compteur d’eau. Si vous remplacez un robinet
existant, retirez, le vieux robinet de l'évier et nettoyer soigneusement la surface de ce dernier.
Turn O Water Supply Cierre el suministro de agua Couper l’alimentation en eau
Hot
Caliente
Chaud
Cold
Fría
Froid
A
B E
C
D
1184212
SAMPLE COPY
Question and Answer IconNeed help?

Do you have a question about the Pfister Ladera LF-042-LR and is the answer not in the manual?

Summary

General Safety & Tools

Safety Warnings

Read all instructions before installing and wear safety goggles to reduce risk of injury or damage.

Required Installation Tools

List of essential tools needed for installation, including adjustable wrenches.

Helpful Installation Tools

Optional tools that can assist with the installation process, such as a flashlight.

Parts Inventory

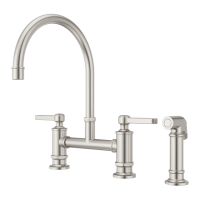
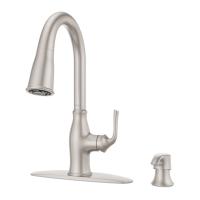
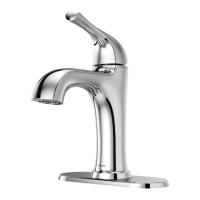
Diagram and list of components included in the faucet package for verification.

Option 1: Install Faucet Without Deckplate

Step 2 A: Mount Faucet Body

Attach faucet spout body (A) and secure with mounting hardware (B) to the sink surface.

Step 2 B: Connect Mounting Hardware

Secure faucet to sink using mounting bracket (E) and nut (F), ensuring correct orientation.

Option 2: Install Faucet With Deckplate

Step 3 A: Position Deckplate and Faucet

Place deckplate (C) and faucet (A) onto sink, aligning holes for mounting.

Step 3 B: Secure Faucet Assembly

Install mounting bracket (E) and nut (F) to secure the faucet assembly to the sink.

Connect Water Supply Lines

Note on Supply Lines Inclusion

Water supply lines are not included; consult manufacturer for correct installation method.

Step 4 A: Route Lines to Bucket

Guide water supply lines into a bucket for initial flushing procedures.

Step 4 B: Turn On Water Supply

Open the main water supply valves to allow water flow to the faucet.

Step 4 C: Flush Water Lines

Run hot and cold water through the faucet for at least 15 seconds to flush debris.

Step 4 D: Turn Off Water Supply

Close the main water supply valves after flushing the lines.

Step 4 E;4 F;4 G: Connect Supply Lines

Connect hot and cold water supply lines to faucet, tightening gently by hand.

Prepare & Install Push & Seal Drain

Step 5 A: Disassemble Drain Components

Take apart the pop-up drain assembly, keeping all components organized.

Step 5 B: Align Drain to Sink

Position the drain assembly, aligning the Pfister logo with the sink for proper orientation.

Step 5 C: Thread Drain Body

Partially screw the drain body into the sink opening, ensuring it is correctly aligned.

Step 5 D: Connect Drain to Plumbing

Connect the drain outlet to the existing sink drain plumbing.

Step 5 E: Secure Drain Assembly

Hand-tighten the drain nut (H3) firmly to secure the drain assembly in place.

Post-Installation Checks & Faucet Function

Step 6 A: Check for Leaks

Inspect for any water leaks above and below the sink after turning on the water.

Step 7 A: Faucet Operation

Open the faucet handle to test hot and cold water flow.

Step 8 A: Remove Aerator

Remove the aerator to flush the faucet and clear any internal debris.

Step 8 C: Reinstall Aerator

Hand-tighten the aerator back onto the faucet spout after flushing.

Pfister Ladera LF-042-LR Specifications

General IconGeneral
BrandPfister
Model NumberLF-042-LR
Product TypeKitchen Faucet
Number of Handles2
Installation TypeDeck Mounted
Number of Holes Required3
ADA CompliantYes
Valve TypeCeramic Disc
Flow Rate1.8 GPM
WarrantyLimited Lifetime

Related product manuals