4
13
16
14
15
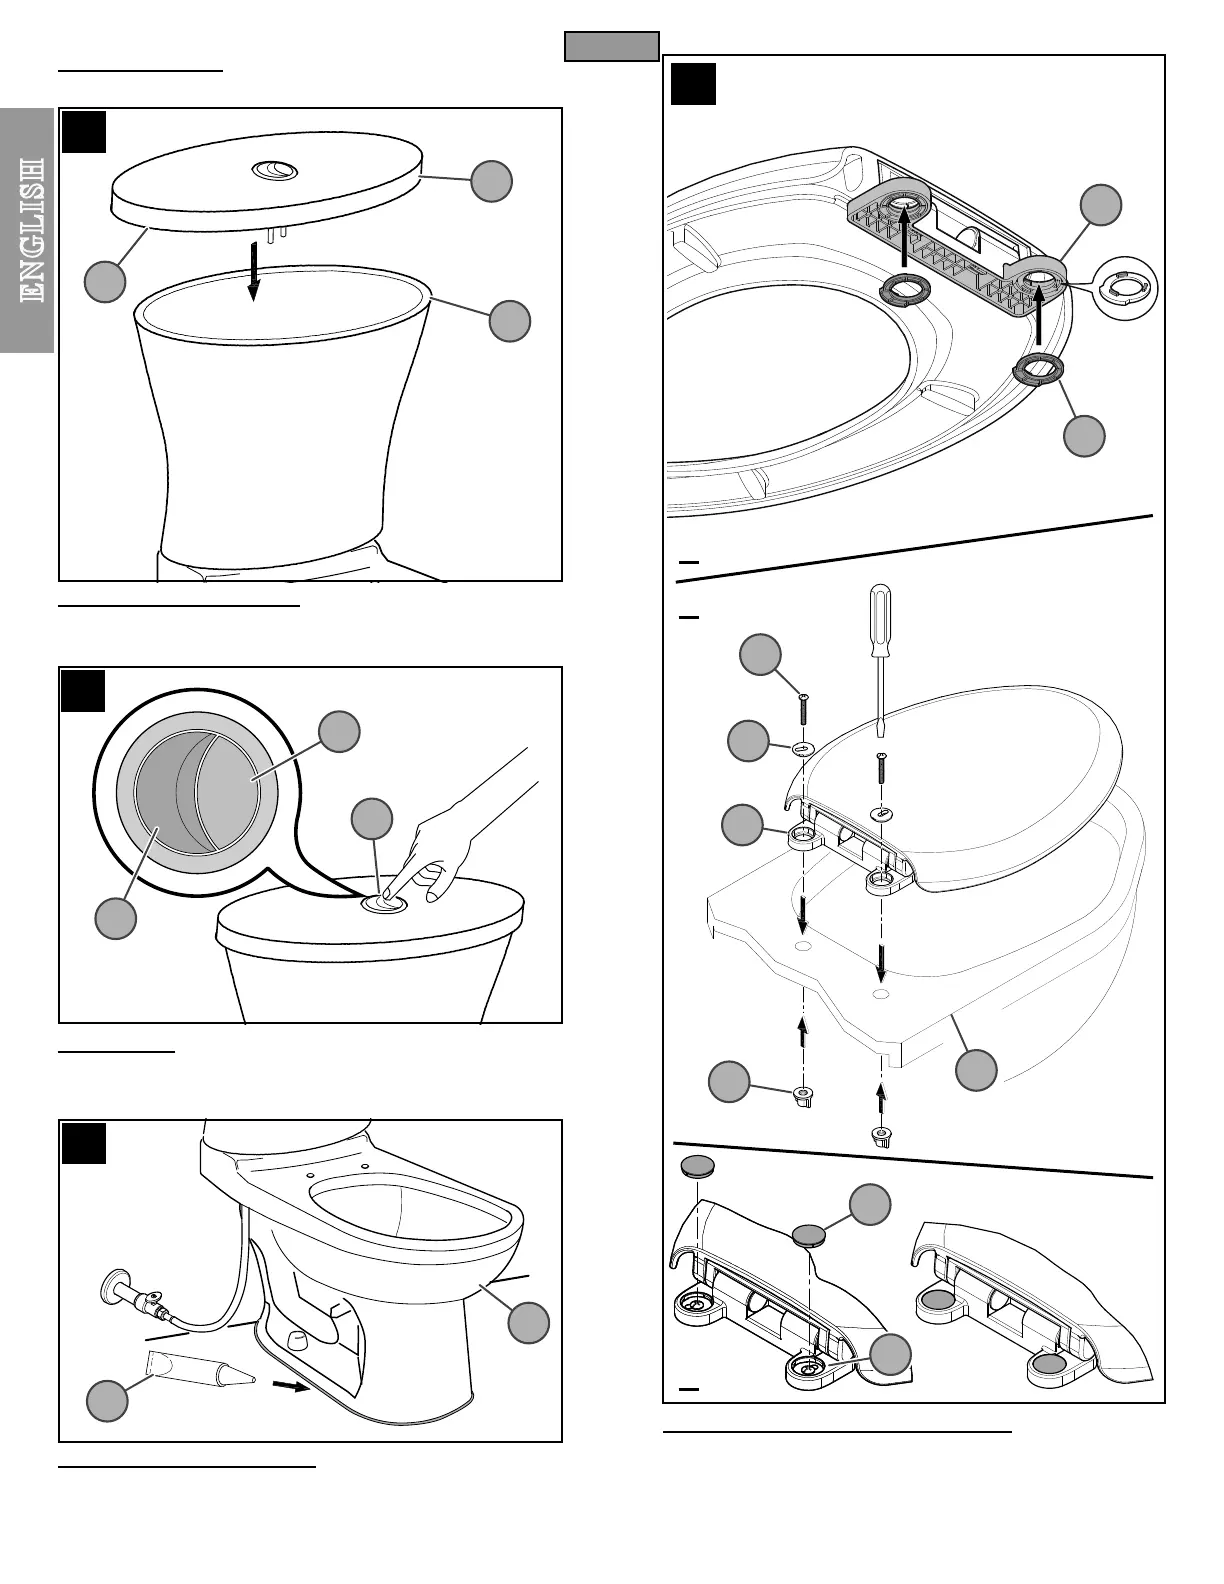
12 UNIT START UP
Turn on Main Water Supply Valve and check for leaks.
13 TANK LID INSTALLATION
Place Tank Lid (13A) on top of Tank (13B). Be sure Lid Lip (13C) covers the top of
Tank (13B).
14 FLUSHING
Press Flush Button (14A) to activate ushing mechanism. Flushing Button (14A)
comes with Full Flush (14B) and Reduced Flush (14C). Check for leaks above and
below the toilet.
15 SECURING TOILET BOWL
Secure Toilet Bowl (15A) to the oor surface by placing a bead of sealant around Toilet
Bowl Base (15B). (Sealant not included). Please follow manufacturer’s instructions
when using sealant.
16 TOILET SEAT COVER INSTALLATION
A. Push Spacer (16C) under Seat Holes (16B) by aligning tabs into slots.
B. Place Screw (16C) into Washer (16D), insert into Seat Holes (16B). From below Toilet
Bowl (16E), twist Nut(16F) onto Screw (16C). Align Seat with Toilet Bowl before nal
tightening. Use screwdriver to hold Screw in place while tightening Nut.
C.Push in Caps (16G) over Seat Holes (16B) as shown.
13A
16B
16A
16C
16D
16B
16B
16F
16E
16G
13B
13C
14A
14B
14C
15A
15B
A
B
C